
Results 1 to 10 of 21
 27Likes
 LinkBack URL
 About LinkBacks
Threaded View
 AaronX


-
06-13-2008, 07:30 PM #1Senior Member

- Join Date
- May 2008
- Location
- Fort Wayne, IN
- Posts
- 141
Thanked: 56 WIP: DD Goldedge Replating/Restoration
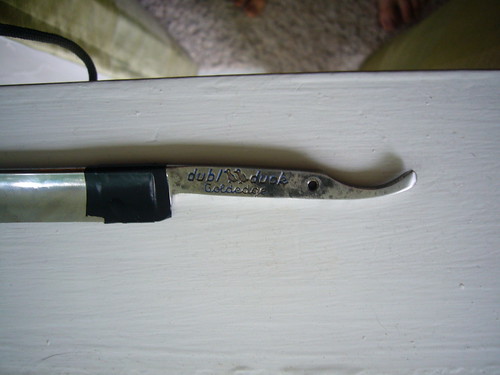
Warnings
If you attempt this on your own you will be working with hazardous chemicals, electricity and acid. Remember to practice good safety habits like gloves, goggles and to always understand what you are doing prior to attempting it.
Materials
4.5 V 300 mA power source - You can pick one up from radioshack or from Caswellplating.com
Stainless steel wand - Caswellplating.com
2 wand bandages - Caswellplating.com
Nickel and Gold plating solutions - Caswellplating.com
Black Electrical Tape
Battery Acid - Auto parts store
Q-Tips
Gloves
Goggles or Safety glasses
Distilled Water
Dish Soap
Scrubby Sponge
Procedure
1. You will want to de-pin the blade from the scales and clean it up to where you remove the rust/dirt/what have you on the blade. We want the steel exposed so feel free to take off what gold plate is there.
2. Tape off the section of the blade where you want the gold plating to stop.
3. Wash the blade using the scrubby sponge and dish soap. We want to remove all the oils from the steel. After you've done this rinse it with the distilled water and DO NOT touch the part you are plating with your hands. If you touch the tang in this instance you will deposit oil on it and it will not plate correctly.
4. Now put on your gloves and safety goggles. We will be dealing with battery acid here after all. You need to pickle the steel using the battery acid. Apply some to a Q-Tip and rub it along all sides of the part we want to plate for 30 seconds per area. The blade may turn a bit black or tarnished looking that's ok.
5. Rinse with distilled water. Rinse your hands for a minute as well.
6. Wrap a wand bandage around the end of the stainless steel plating wand. Pour a little of the nickel solution (green) into a glass cup and microwave it on high for about 15 seconds. We want to heat it up. It will plate faster.
7. Soak bandage wrapped plating wand in the nickel plating solution. Connect the wand to the positive (+) end of the power source and the razor blade to the negative (-) end.
8. Rub the bandaged end over the place where you want to plate. Do not keep the wand stationary too long or it will scotch the plating. Just move it in small circles a few minutes each side. We want to plate the steel with nickel since the gold plating will adhere better to the nickel than the base steel.
9. Once complete remove and wash the wand bandage. Repeat steps 6-8 this time with the gold plating solution.
Finished product
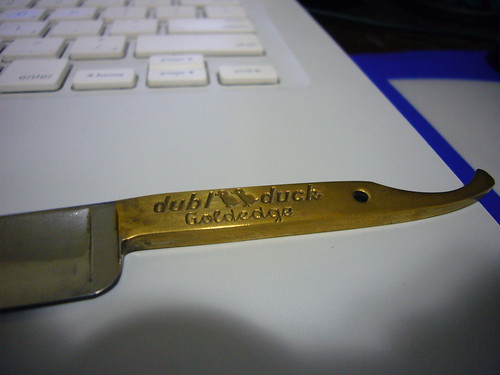
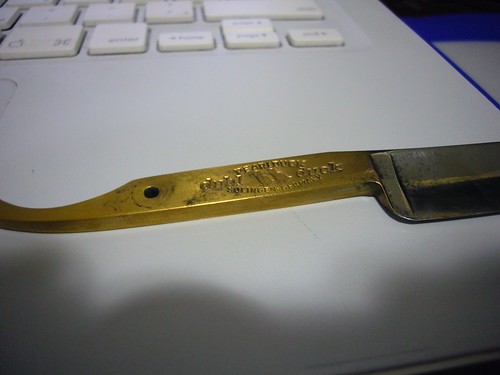
Now just to find some blue paint.Last edited by AaronX; 06-13-2008 at 10:54 PM.
-
The Following 21 Users Say Thank You to AaronX For This Useful Post:
10Pups (10-15-2013), AirColorado (10-17-2013), beenpickin (04-05-2009), Chevhead (10-15-2013), ChopperDave (11-10-2015), DoughBoy68 (11-10-2015), engine46 (11-14-2015), gssixgun (06-13-2008), jmercer (04-21-2017), Joelski78 (06-13-2008), littlesilverbladefromwale (12-28-2008), megabit (06-13-2008), MikeB52 (11-10-2015), netsurfr (06-13-2008), nipper (01-01-2014), RezDog (10-15-2013), rolodave (12-15-2013), SailorJ (11-01-2013), Stropper (08-11-2009), The0ctopus (05-21-2009), tintin (10-25-2015)


 Reply With Quote