Results 1 to 10 of 10
  1. #1
    Senior Member Big Red's Avatar
    Join Date
    Oct 2007
    Location
    Fresno, CA
    Posts
    1,068
    Thanked: 130

    Default Red Head in progress

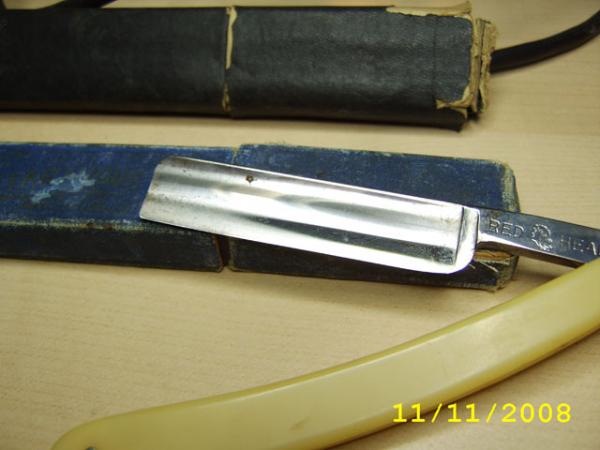
    All right guys, posting this kinda to help get me off my ass. I HATE this sanding thing. I"ve decided that Job actually restored razors and God put him through all that to prepare him for sanding.

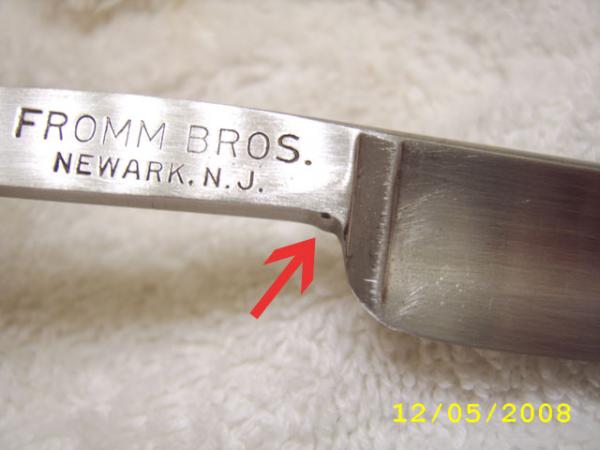
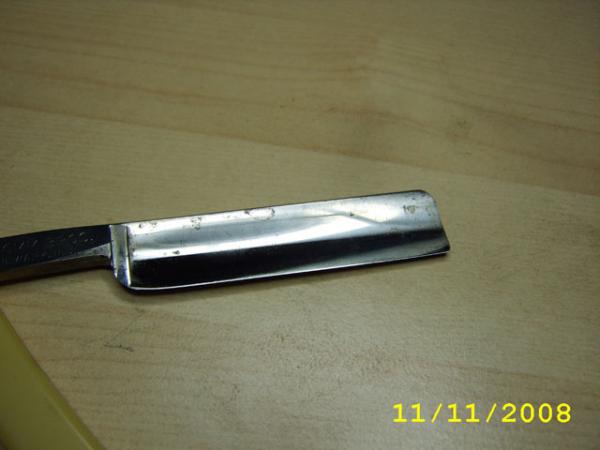
    I think I paid 10 bucks for this razor, steal. had some bad staining. I have about 8-10 hours in it right now (started off by hand, finally got some flap wheels) had to go to 100 and lots of time to get the staining out. Also it had a slight bump at the tang/blade juncture that looked crappy. I use a disc to smooth that out.


  2. #2
    Senior Member Big Red's Avatar
    Join Date
    Oct 2007
    Location
    Fresno, CA
    Posts
    1,068
    Thanked: 130

    Default Current

    Now some tips for newbies like me. when using spinning wheels, ala dremel, everybody always says make sure the wheel is turning in the direction of the edge. got that. another word of advice though, on hollow ground razors that tip edge can be thin and disappear in a real hurry. I ended up with a little rounded spot in the front edge, really quick. (I mean accidental quick, not like I rested it there).

    this is where it is now, after these pics I started on 600 grit. shaping the tip right took some time, and I got good advice on it from Max. I used grinding bits, sanding wheels, and for final rounding 220 grit and time. I personally love how it turned out.

    pics were just to show the tip but trust me, there is NO staining left. I originally was going to give this to my brother, a redhead too, but after I got into it so far I said forget him.


  3. The Following User Says Thank You to Big Red For This Useful Post:

    FloorPizza (02-06-2009)

  4. #3
    Large Member ben.mid's Avatar
    Join Date
    Aug 2008
    Location
    Oxfordshire, England
    Posts
    3,096
    Thanked: 763

    Default

    You've done a fantastic job on that so far! Those scratches are going to be a real pig to get out though, so yo're either going to have to commit to a lot more work for a mirror, or accept a scratch pattern. Either way, it's heading towards a great restore!

  5. #4
    Just one more lap... FloorPizza's Avatar
    Join Date
    Oct 2008
    Posts
    775
    Thanked: 142

    Default

    Beautiful. That rusted out hunk of junk turned out just gorgeous.

    I know very little about razor restoration, but I have had great luck getting mirror finishes by using Glen's ammo polisher method. It will save you so many hours of sanding, and leave you with zero sanding marks. You've probably already seen the thread, but in case you haven't.... http://straightrazorpalace.com/works...mentation.html

    Thanks for sharing those pictures... gets me anxious to get going on a few project razors I have laying around.

  6. #5
    Senior Member Big Red's Avatar
    Join Date
    Oct 2007
    Location
    Fresno, CA
    Posts
    1,068
    Thanked: 130

    Default

    I have seen that, let me ask a question, does that work after you have already sanded it, essentially creating a scratch pattern? I have a couple of blades I think I'll try that on, they have no rust at all, just some patina.

    one more question though, both of these blades are sharp enough to shave, just need a touch up probably. I'm guessing the tumbler kills the edge?

    Thanks guys.

    Red

  7. #6
    Senior Member blabbermouth ChrisL's Avatar
    Join Date
    Oct 2007
    Posts
    4,445
    Thanked: 834

    Default

    I haven't been following Glen's thread much these days. There's the deep saturated black staining; I have never been able to get that out no matter how much tumbler action the blades see. You could call it patina. I call it hell on steel. Has anyone been able to get out the stains in the tumbler?

    Chris L
    "Blues fallin' down like hail." Robert Johnson
    "Aw, Pretty Boy, can't you show me nuthin but surrender?" Patti Smith

  8. #7
    Senior Member
    Join Date
    May 2008
    Location
    Fort Wayne, IN
    Posts
    141
    Thanked: 56

    Default

    The black stains are Fe3O4 and if it's just a stain and not a pitting yes I've gotten them out using the tumbler with some different media and abrasive aids.

    Stains in pits you cannot always get out just with a tumbler. You'd need to sand those down.

  9. #8
    Just one more lap... FloorPizza's Avatar
    Join Date
    Oct 2008
    Posts
    775
    Thanked: 142

    Default

    Quote Originally Posted by Big Red View Post
    I have seen that, let me ask a question, does that work after you have already sanded it, essentially creating a scratch pattern? I have a couple of blades I think I'll try that on, they have no rust at all, just some patina.

    one more question though, both of these blades are sharp enough to shave, just need a touch up probably. I'm guessing the tumbler kills the edge?

    Thanks guys.

    Red
    Some guys are able to get 400 grit sanding marks out with walnut shell media. I've only been able to get out 800 and 1k grit scratches. The aggressive ceramic media will easily get out 400 grit scratches, and is capable of doing a lot of sanding work for you if you don't mind leaving it in the media for a few days. The "sanding marks" that the ceramic media leaves behind is easily removed by the walnut shell media in two to three days.

    Lately, I've been doing the ceramic media for three days, then hand sanding what's left, then back in the ceramic for a day, then three to five days in walnut shells. It's a long process, but yields very good results.

    Every edge I've taken out of the vibrator has required a new bevel. That's the only real disadvantage to this system that I've seen. I dunno if everyone else has this problem, but every blade I put in the vibrator comes out with enough edge chipping to require the new bevel.

  10. #9
    At this point in time... gssixgun's Avatar
    Join Date
    Jun 2007
    Location
    North Idaho Redoubt
    Posts
    26,960
    Thanked: 13226
    Blog Entries
    1

    Default

    The chipping is most likely from the harder ceramic media, I have left blades in for over a week in walnut and never had chipping... Now you do end up with a nicely polished edge though ....... There is no getting around resetting a bevel, I don't really care what blade polishing technique you might use, even hand sanding requires resetting the bevel....

    Now if you guys are really nice I might do a thread on my latest technique on doing a bevel reset that is really, really, fast and even ....
    I have been pulling out a lot of razors from the media lately, so I have been working this one on about 10 razors so far, with really consistent results....


    And sorry Red for taking this slightly That "Red Head" is looking good, fitting razor for you


    PS: Red if that is the razor you are planning on sending me to hone I can toss in in the mixer for you no problem
    Last edited by gssixgun; 02-07-2009 at 06:08 PM.

  11. #10
    Senior Member Big Red's Avatar
    Join Date
    Oct 2007
    Location
    Fresno, CA
    Posts
    1,068
    Thanked: 130

    Default

    I have some walnut media new out there, already coated in polishing compound. I could try throwing this in there. what I'm wondering on though is I have two blades that are in great shape, no rust, no stains, but some patina that makes part of the blade look a bit frosted. I was thinking about throwing them in. it'd be the first time that tumbler's been used in 2-3 years!!!! I know, I should be out hunting more.

    Glen, I think that's probably the one going to you, its the only one I have any time to work on right now. i need to get on microfasteners and get some washers so I can pin these scales.

    Red

Posting Permissions

  • You may not post new threads
  • You may not post replies
  • You may not post attachments
  • You may not edit your posts
  •