
Results 1 to 9 of 9
Thread: Green-Red-Wood-Dye-Experiment
 LinkBack URL
 About LinkBacks
-
05-03-2009, 04:38 AM #1Hones & Honing


- Join Date
- May 2005
- Location
- Saint Paul, Minnesota, United States
- Posts
- 8,023
- Blog Entries
- 1
Thanked: 2209 Green-Red-Wood-Dye-Experiment
Hello all,
I thought I would share an experiment with you. The motivation for this came from a prior post where Delirium(?) gave this link
Dying Quilt
I was so impressed that I promptly went out and bought some Curly Maple, Quartersawn White Oak and some Black Cherry wood, a bottle of Transtint Red & Green dye ( each). I wanted to try this! I tried to get some Quilted Maple wood but the store had none.
Here is the starting point
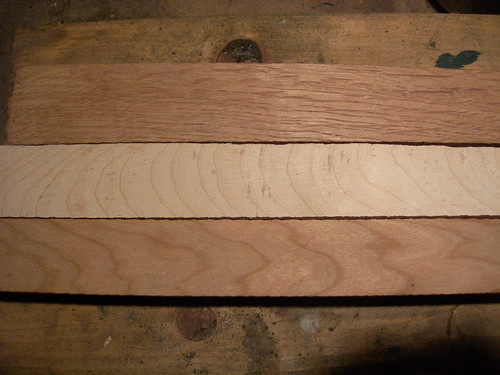
top to bottom, QS white oak, curly maple, black cherry
Next I applied the green dye, mixed at a ratio of 1 part dye/ 4 parts water and here is the result
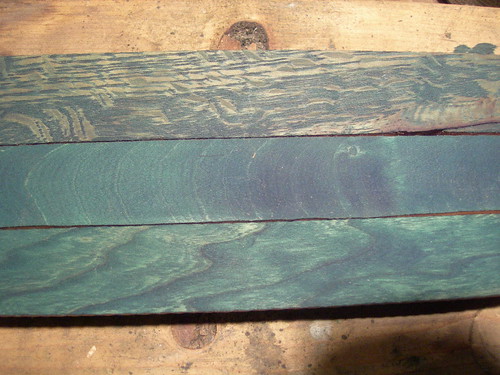
Top is Oak, curly maple, black cherry.
Note the differences of where the dye soaked in!
Tonite the wood was dry so I sanded it back. The original goal was to have the green only in the "grain", the purpose was to provide a greater contrast. The curly maple did not go along with the plan!
Here are some picks after sanding...
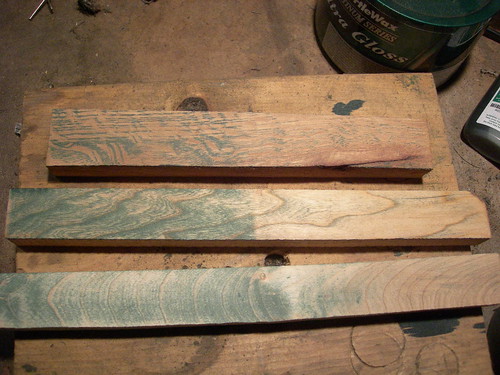
Obviously I sanded the right side more than the left. I want to see what the consequence is when finished.
Next I mixed up some red dye. Using Spazolas suggestion I used a hand sanitizer as a dilute medium and judged the darkness of the mix by using the popsicicle stick. I guess I used the wrong brand because mine did not result in a gel but rather a water consistency.
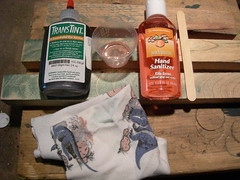
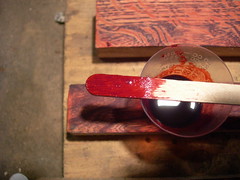
I applied the first coat of red and it looked kinda pink on the wood
 Randolph Tuttle, a SRP Mentor for residents of Minnesota & western Wisconsin
-
05-03-2009, 04:48 AM #2Hones & Honing
- Join Date
- May 2005
- Location
- Saint Paul, Minnesota, United States
- Posts
- 8,023
- Blog Entries
- 1
Thanked: 2209
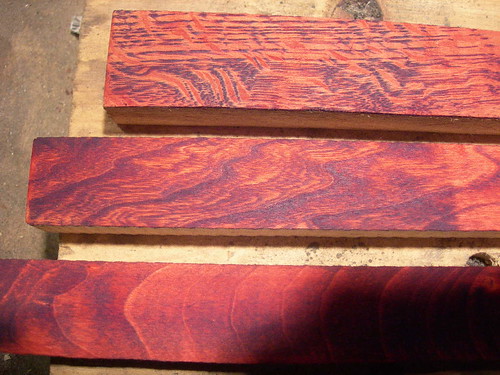
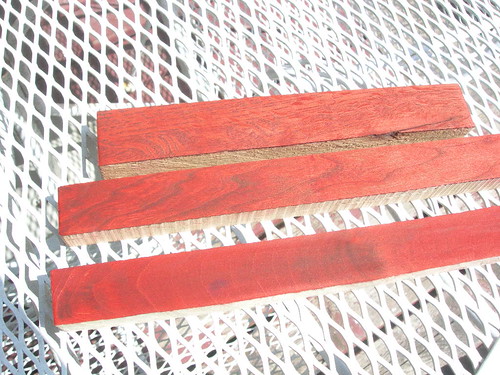
So I mixed up a darker batch of dye and applied a second coat.
Here are the results. I will let them dry until tomorrow.
Here are some close ups....
Here is a link to all of the pics with much larger sizes.
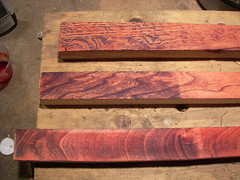
This is the right side of the wood that was sanded the most...
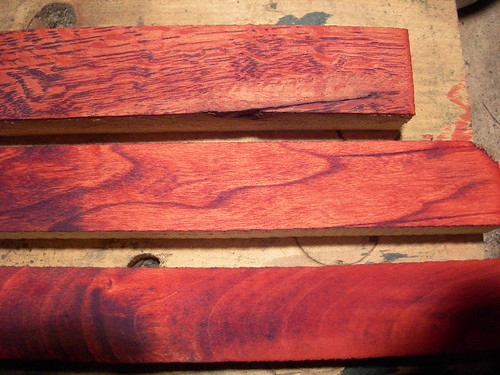
Again, the top piece is QS Oak, next black cherry and curly maple at the bottom. The difference in dye absorption is obvious.
Tomorrow I will sand the wood up to 320 grit and see what it looks like and post pics. I will be adding to this thread until all of the final clear coats are finished.
Here is a link to all of the pics
http://www.flickr.com/photos/randyda...7617532137575/Last edited by randydance062449; 05-03-2009 at 04:51 AM.
Randolph Tuttle, a SRP Mentor for residents of Minnesota & western Wisconsin
-
05-03-2009, 04:53 AM #3Comfortably Numb


- Join Date
- Jan 2009
- Location
- Charlotte, NC
- Posts
- 2,095
Thanked: 668
Cool, good pics showing the difference. It does make difference. I am working on a scale/brush project in quilted maple now that I'm going to mess with dyes on.
-
05-04-2009, 12:04 AM #4Hones & Honing
- Join Date
- May 2005
- Location
- Saint Paul, Minnesota, United States
- Posts
- 8,023
- Blog Entries
- 1
Thanked: 2209 2nd day...
OK, so today the dye was dry.
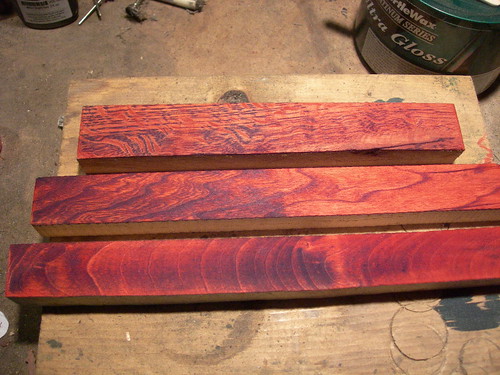
Here is what the starting point looked like..
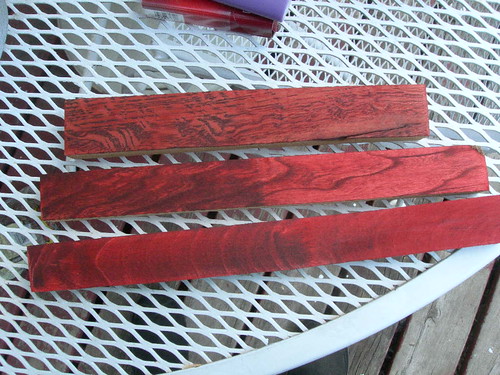
Next I sanded the wood with 180, 240, and 320 grit sandpaper. Here is the result........ kinda surprising......
I think what I did wrong was to start with an 80 grit finish when I dyed the wood. That left a bunch of high ridges that sanded off easily.
Next time I will start with a 320 grit finish.
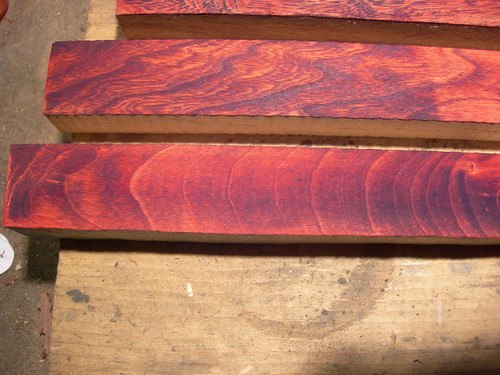
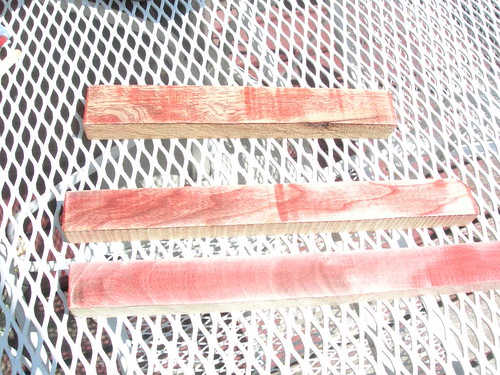
The next step was to reapply the red dye and let them dry.
The above pic was taken outside in bright sun so it looks washed out.
Once the dye dried I started applying the clear gloss, water based, poly finish. So far I have applied 3 coats of the finish and it is starting to get some depth. Tomorrow I will post some more pics. Oh...between each coat I am using a 500 grit sandpaper, very lightly. Then using a tack cloth to remove any dust.
The QS white oak is so open grained that the next time I need to fill the "crevices" first. I have to do some thinking about what to use. If anyone has suggestions please let me know.Randolph Tuttle, a SRP Mentor for residents of Minnesota & western Wisconsin
-
The Following User Says Thank You to randydance062449 For This Useful Post:
TOB9595 (05-04-2009)
-
05-04-2009, 05:14 PM #5Senior Member


- Join Date
- Dec 2006
- Location
- Burkburnett TX
- Posts
- 3,100
Thanked: 2392
Randy,
I think that you have some pretty good contrast going on there. The dyed wood looks
good and it does not have any finish on it yet.
That is type of hand cleaner I use it turns pretty fluid but it is still easier to wipe around than plain water or alcohol.
I think that you are on the right track, it looks very good.
Charlie
-
05-04-2009, 05:31 PM #6Hones & Honing
- Join Date
- May 2005
- Location
- Saint Paul, Minnesota, United States
- Posts
- 8,023
- Blog Entries
- 1
Thanked: 2209
Thanks Charlie. I now have 3 coats on the waterbased poly clear gloss finish on them. There is some depth to the finish now but I want to see what happens with more coats so today I will add 2 more coats.
Pics tomorrow.Randolph Tuttle, a SRP Mentor for residents of Minnesota & western Wisconsin
-
05-04-2009, 07:25 PM #7Managing the UnManageable

- Join Date
- Jan 2008
- Location
- New Jersey
- Posts
- 524
Thanked: 37
Good info and pics.
Thank you for taking the time to share your work
Tom
-
05-04-2009, 08:20 PM #8Shaves like a pirate

- Join Date
- Sep 2007
- Location
- DFW, TX
- Posts
- 2,423
Thanked: 590
very interesting, i like the way the dye job brings out the figuring on the cherry
-
05-04-2009, 10:38 PM #9Hones & Honing
- Join Date
- May 2005
- Location
- Saint Paul, Minnesota, United States
- Posts
- 8,023
- Blog Entries
- 1
Thanked: 2209 Update...
This afternoon I applied another coat of the finish. I used a sponge brush, same as before. One thing I noticed was a lot of small bubbles and after it dried I still had small bubbles in the finish. So I sanded the bubbles out. What I learned today.
1. Do not shake the can of finish, thats what creates the bubbles.
2. The sponge brush also seems to create some bubbles.
One thing I tried was to dump the sponge brush and instead use a plastic baggie wrapped around my finger as an applicator. That removed all the bubbles but it also resulted in a very thin layer of finish being applied, kinda like a squeegee. But...perhaps more thin layers devoid of air pockets is better in the long run?
Comments are welcome, Randolph Tuttle, a SRP Mentor for residents of Minnesota & western Wisconsin


 Reply With Quote