
Results 1 to 10 of 11
Thread: Restoration Mistake
 LinkBack URL
 About LinkBacks
-
06-08-2009, 01:08 PM #1Lookin like a crim


- Join Date
- Apr 2009
- Location
- Coffs Harbour Australia, Home of the Big Banana
- Posts
- 2,706
Thanked: 1072 Restoration Mistake
Hey Guys,
Made a very annoying mistake today and thought i might share it. After all I've learnt something from it maybee someone else can to. i was trying to remove some pitting from this little J. Diriam & Sons blade and making nice progress. When i started there was a small chip in the heel end but after a lot of hard hard work with 120 grit w/d i took a close look and saw my nick had become a crack and as soon as i put some preassure on it, well, you can see the photo.
Maybee i should have breadknifed it before starting and gotten rid of the chip, or maybee i just went to far with the sanding and thined the blade too much.
Any opinions are welcome, i dont want to make this mistake again.
Cheers,
Baldy
-
06-08-2009, 01:19 PM #2Born a Hundred Years Too Late

- Join Date
- Sep 2008
- Location
- Way Upstate,NY
- Posts
- 1,243
Thanked: 319
I've done this before too.Looks to me like you may have done what I did,use too much pressure when sanding.Sometimes we don't realize how brittle heat treated and hardened steel can be.Then when it's ground thin,it is even more breakable.
-
The Following User Says Thank You to aroliver59 For This Useful Post:
baldy (06-09-2009)
-
06-08-2009, 01:33 PM #3The only straight man in Thailand

- Join Date
- Jan 2009
- Location
- Bangkok, Thailand
- Posts
- 1,659
Thanked: 235
I think this razor had a hair line crack all along. The anoying thing is that you got so far along before the crack made itself known.
-
The Following User Says Thank You to ndw76 For This Useful Post:
baldy (06-09-2009)
-
06-08-2009, 02:30 PM #4Senior Member

- Join Date
- Sep 2008
- Location
- PDX
- Posts
- 1,568
Thanked: 203
I'd square the nick off and make it look cool. Continue with the restore and you have yourself a custom.
I think it would look cool with a chip out of the back just round off that sharp end so you do not scythe yourself.
-
The Following User Says Thank You to singlewedge For This Useful Post:
baldy (06-09-2009)
-
06-09-2009, 02:19 AM #5Member

- Join Date
- Mar 2009
- Location
- Manassas, VA
- Posts
- 90
Thanked: 17
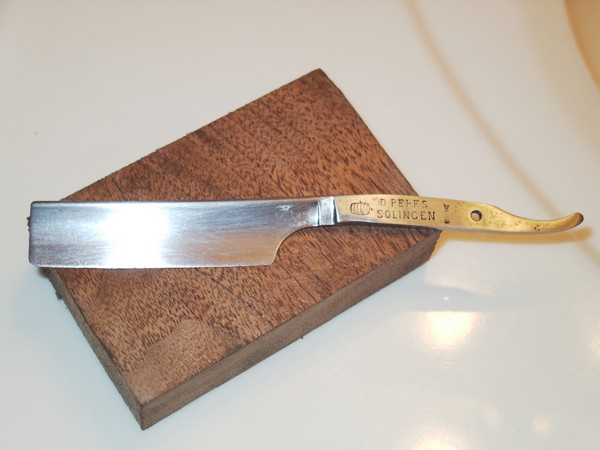
I've got a D. Peres that I got all crusty. It had a crack about the same place that showed itself almost immediately when I started my 180 grit sanding. I cut the shoulder off. Gonna start working on some scales Friday. Here's a couple pics:

-
The Following User Says Thank You to PaulX608 For This Useful Post:
GibII (06-09-2009)
-
06-09-2009, 03:03 AM #6Lookin like a crim
- Join Date
- Apr 2009
- Location
- Coffs Harbour Australia, Home of the Big Banana
- Posts
- 2,706
Thanked: 1072
Thats nice work Paul. thanks i think i will round it off like you did. Is going slow on a bench grinder the best way to shape the blade?
Baldy
-
06-09-2009, 03:17 AM #7Member
- Join Date
- Mar 2008
- Location
- Hartly, DE
- Posts
- 66
Thanked: 10
Very nice fix on that blade. I have one I split at just about the same place as you 2 did. was a practice blade but now I can pull it back out. Thanks for the Picture.
-
The Following User Says Thank You to GibII For This Useful Post:
baldy (06-09-2009)
-
06-09-2009, 03:18 AM #8Unofficial SRP Village Idiot
- Join Date
- Sep 2008
- Location
- Yonkers, NY however, born and raised in Moultrie,GA!
- Posts
- 554
Thanked: 151
I have done that too. I find I have to try to be extra careful with the hollow ground razors too because they can't take as much pressure as the wedges. But, I love the suggestion and the pics by Paul. I think it might be a great time to test your dremel or cutting tools if you have any. Besides, if it can be repaired and will shave well, what else matters? Good Luck and sorry about the blade.
-
The Following User Says Thank You to treydampier For This Useful Post:
baldy (06-10-2009)
-
06-10-2009, 03:15 AM #9The Great & Powerful Oz


- Join Date
- May 2008
- Location
- Bodalla, NSW
- Posts
- 15,636
Thanked: 3751
Depends on how hard the steel is. A bench grinder at 2850 rpm can tear chunks out of the thinner steel but would be ok for the flange area. Better off with a slow wet grinder or even a dremel when working the edge.. Originally Posted by baldy
 The white gleam of swords, not the black ink of books, clears doubts and uncertainties and bleak outlooks.
-
The Following User Says Thank You to onimaru55 For This Useful Post:
baldy (06-10-2009)
-
06-10-2009, 07:18 AM #10Senior Member

- Join Date
- Aug 2007
- Location
- dfw-garland
- Posts
- 534
Thanked: 40
i have done this once as well, however it was because i was sanding the edge/blade on a towel and not on a hard smooth surface. from that mistake on i always use a flat surface beneath the blade.
vgod
-
The Following User Says Thank You to vgod For This Useful Post:
baldy (06-10-2009)


 Reply With Quote