
Results 1 to 1 of 1
Thread: How to Make a Razor De-Humidor
 LinkBack URL
 About LinkBacks
-
07-30-2009, 09:47 PM #1< Banned Scammer >

- Join Date
- Jun 2009
- Location
- Sunny California!
- Posts
- 466
Thanked: 125 How to Make a Razor De-Humidor
HOW TO MAKE A RAZOR DE-HUMIDOR
How to Make a Razor De-Humidor
HOW TO MAKE A RAZOR DE-HUMIDOR
Materials List:
Cigar Humidor or used Cigar Box.
Felt or Silk
Foam or Styrofoam
Silica Gel Packets
Tools:
Glue Gun with lots of glue sticks
Utility Knife
Scissors
Some Notes:
Where to aquire materials:
Nothing here is difficult to come by, and most everything can be picked up from your local craft store. Possibly even the silica gel packets, but IDK. The cigar humidor I purchased off eBay for $30. Can also be found on Amazon similarly priced. If you want a cigar box just stop by your local smoke shop and see what they have available.
This is a very simple job that I does not need any "shop" skill to do. The most you'll have to be able to do is see and think...
I think if I did it again I would use a different material than felt, maybe silk or something similar. You can use just about anything for the frame of the holders, so long as you cut it to fit. I used foam which I picked up at a craft store along with the felt. Easy to cut it with a utility knife. You could also use styrofoam or even wood, if you feel like cutting it all.
The Glue gun worked great for this, and made it a snap. You could use something like krazy glue, but that is really easy to make a mess out of and hot glue simply rolls right up into a ball, and also dries nice and quick. Silica gel packets can be picked up online, or around the house if you have em. You can also substitute rice for the gel packets if you just spread it out along the bottom of the box, underneath your razor holder.
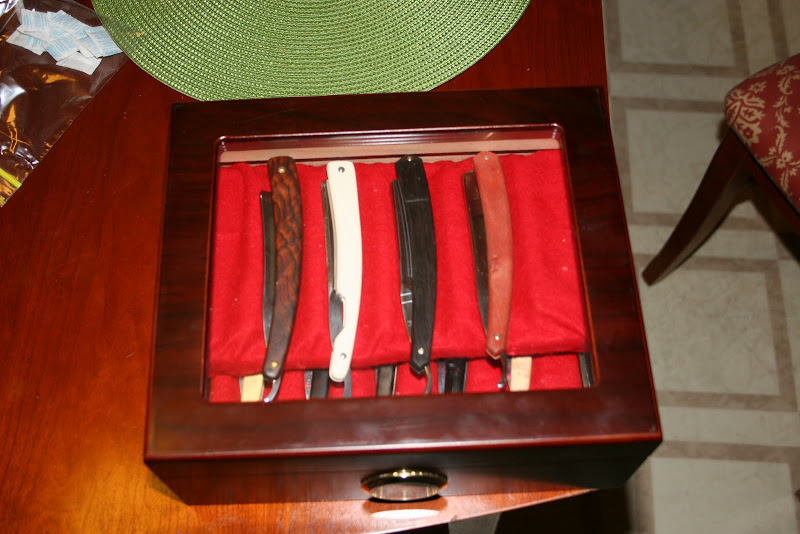
The Purpose: To provide a good looking case to store your razors in, and protect them from humidty. It also functions as a safe haven for your dangerous razors if you have young kids running around the house. Also, it is pretty cheap to make, compared to purchasing a custom razor box.
The Process:
I'll keep this really simple as it is not all that difficult anyway.
*Note, if you are using a cigar humidor, make sure that you remove the humidifier from the box. Some are embedded, some are not. Just make sure to take it out, that is important! You dont want to ruin all of your razors...
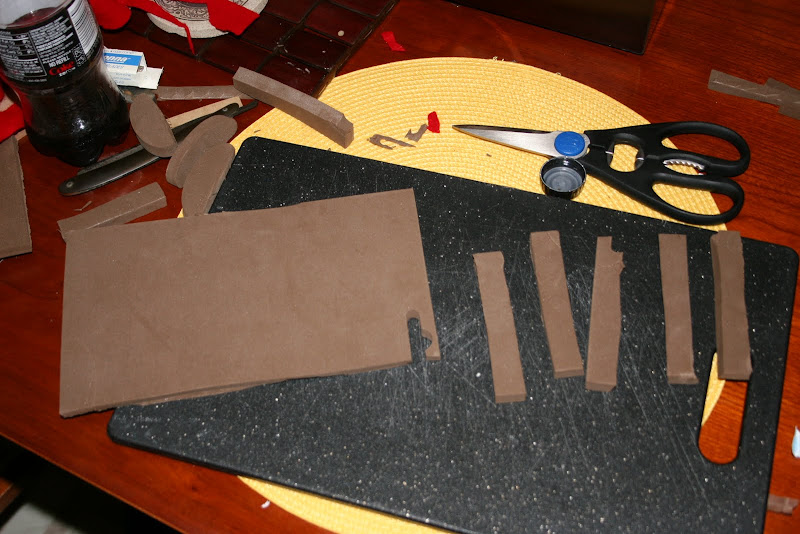
1. Cut the base to fit. Does not have to be pretty, as we will be covering it with material anyway. I am using foam in my example.
2. Cut the razor holders. These are just strips of the foam that are the length in the direction you want your razors to lay. I chose to put mine left to right. Lay out the strips on the base foam, using a straight razor to judge how far apart you want them. With the hot glue gun, glue the foam strips to the base at the desired locations.
3. Cut a strip of felt long enough to wrap all the way around the foam base, and overlap it a little to account for tightening. Also, make sure and include the "dips" caused by the foam strips that act as the razor holders. Additionally, you want a bit of play on the sides as well. See pics if you dont follow.

4. Glue the felt to the foam base one razor holder at a time. Try and make the ends meet at the bottom around the middle of the base. You will now have a wrapped base with undone sides. Cut off the "joined" half of the excess so that you will have an even and unparted strip left over to nicely wrap the sides with. Fold the uncut side over and Glue the sides to the foam. Remove excess to fit. Glue the seams together and make the look decent. This is the bottom piece, so this does not have to be real pretty. Consider it practice for the top layer
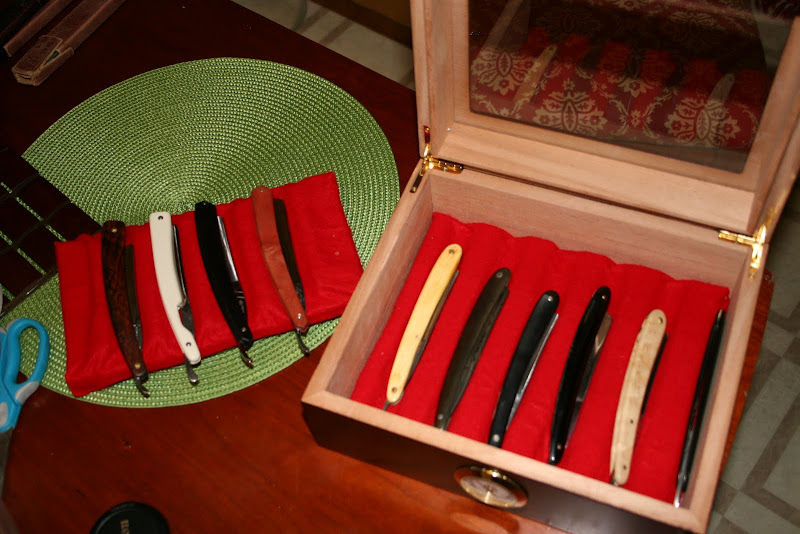
5. Repeat the process for the top layer. The only difference here is that I made my top layer shorter so that the bottom layer was still visible (SWMBO'S idea, which I though looked a lot cooler than just covering the bottom with the top layer. I also alternated the top rows with the bottom rows, as it looked nice.To make the top layer stay on top, I simply added some foam strips underneath the top layer to both give it support and allow it to stay upright. I made the middle pieces a bit shorter than the sides for aesthetic purposes. Glue, wrap and touch up the top layer and your almost done!

Final step is to toss in some silica gel packets underneath the bottom layer. Your razors will now be well protected from moisture

Last edited by sapito318; 07-30-2009 at 10:30 PM.
-
The Following 6 Users Say Thank You to sapito318 For This Useful Post:
AMDG (07-30-2009), dannywonderful (07-30-2009), dnjrboy (07-31-2009), oldfat1 (07-30-2009), smythe (07-31-2009), wheelz74401 (07-31-2009)


 Reply With Quote