
Results 1 to 10 of 17
Thread: Pics of a few rust blued blades
 LinkBack URL
 About LinkBacks
-
08-21-2009, 04:44 PM #1Senior Member

- Join Date
- Mar 2007
- Posts
- 608
Thanked: 124 Pics of a few rust blued blades
I decided a while back to rust blue some blades. Figured that it might be an alternative to hand sanding, which I hate, and that some of the razors might come out looking pretty sharp (pun intended). These are pics of four that I've done (there were a couple of experiments before these not really worth mentioning). Starting from left: A.W. Wadsworth and Son "XLNT" (I added the barbers notch), George Wosterholm and Sons XL frameback, Empire Razor company with eagle engraving, Henckels for comparison, and in latter pics Diamond razor company razor-- its the one with scales that has been rehoned. The blades were sanded to various girts, degreased, rusted, boiled and carded five or six times. All these blades had flaws, but could be honed and used, except for the Empire razor.

First is the Empire razor. It has/had serous pitting and it isn't a usable razor, having cracks in the edge of the blade. It was sanded with either 80 or 120 girt sandpaper (can't remember which) from spine towards the edge of the blade. It was the only one sanded in this direction. The results were good, the razor ended up with a dark, fairly even finish. I stropped one side of the blade aggressively on a CrO pasted strop to test the durability of the finish, if you look you can kind of see areas where bluing was removed on the spine and on the bevel. This test might not have been entirely fair, you're supposed to let the finish develop over about 90 days to toughen up and deepen. I think the huge pits on this razor were made much less of a distraction by the bluing. It was an ugly mess before it was blued, and I think it looks pretty good now.
I should note here I took pics with and with out the flash to show effects of different light on the finish color. The flashless pics are natural light next to a window with a good dose of sunlight. They look a bit darker normally than they came out in the flashless pics. The towel they are resting on is light blue, for reference, and you can see its a bit washed out looking in the pics with no flash, and truer in the pics with the flash.

These two show the side that was stropped


-
08-21-2009, 04:50 PM #2Senior Member
- Join Date
- Mar 2007
- Posts
- 608
Thanked: 124
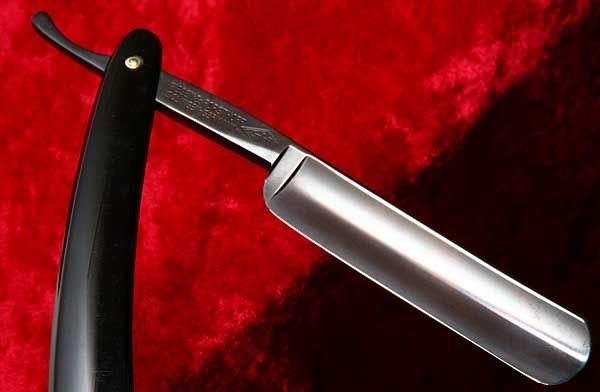
Second is the frameback. This was sanded with 220 from the heel to the toe. The finish is lighter than the Diamond and the Empire razors, the lower grit sanding leaving a deeper matte finish, but I wouldn't call it a dramatic difference. I still kind of wish that I'd used a lower grit on this blade, though. But overall the finish prolly turned out the best of the razors. I can't say if that was sanding or the fact I took extra care with this one, I wanted it to turn out well.
Thats a fingerprint in the middle of the blade, not a flaw.


Now I have the problem that I really cant think of what scales would look good with this...
And one more break. This 7 image limit thing is a real PITA.
-
08-21-2009, 05:05 PM #3Senior Member
- Join Date
- Mar 2007
- Posts
- 608
Thanked: 124
3rd is the XLNT. This was sanded toe to heel with 400 grit paper. The finish actually turned out the worst on this one, with some odd streaking and blotching at the toe of the blade. Not sure if this is due to the grit size being high and not letting the solution bite, or the blade not being properly degreased. I went a little "degreaser crazy" (used 6 different degreasers, I think) and there may have been some left on the blade b/c I didn't give it time to evaporate, or there may have been other longer lasting resides from the degreasers that I didn't get off.
You can see the streaking in the flashless pics, they're more prominent towards the toe. They're most visible in the third pic.


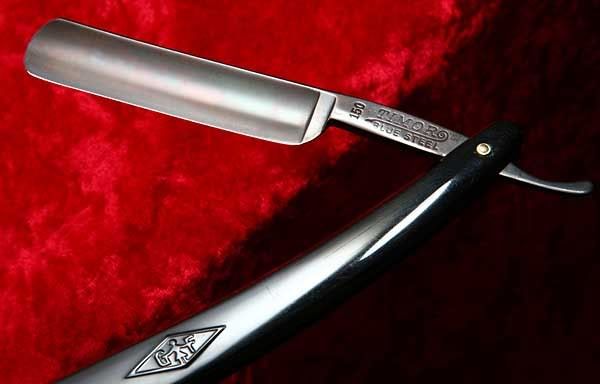
Final is the Diamond razor. This was sanded toe to heel with 120 or 180 grit (can't remember again). This one has pretty bad pitting, but nowhere near as bad as the Empire. It's been honed and used to make sure that there was no damage to metal, works fine. Diamond seems to be pretty good razor. It was honed with tape on the spine.
The streaks in this pic are oil, not the finish.

You can see some of the pitting here, its on the spine of the blade, towards the heel.


Overall, I'm pretty pleased with the results. I wouldn't want all my razors blued, but it makes a nice change, and I think that you could choose to blue a badly pitted but still serviceable razor, instead of the whole sand/grind down thing. The finish is going to wear off of the spine and possibly the area above the bevel due to stropping, but that'll still leave 80% plus of the blade blued and protected from rust, and it will leave the tang protected, also. Speaking of which, I'm going to have a hard time resisting the temptation to blue my tangs, not just b/c of the look, but because it prevents damage in a rust prone area. I really like the whole low maintenance thing. Of course, this should prolly only be done to razors that are worth the time, its a long process, taking some 15-20 hours to complete. I really wouldn't call it a labor intensive process, though, the vast majority of the time is spent waiting for rust to develop. I'd recommend watching TV or a movie during this period, actually watching the blades rust would prolly be a most unsatisfying experience.
I'd like to get a little more XP doing this, so if you have a blade or tang that you'd like to have blued, PM me.
-
The Following User Says Thank You to Pete_S For This Useful Post:
slipangle (08-22-2009)
-
08-21-2009, 05:53 PM #4Senior Member


- Join Date
- Apr 2008
- Location
- Essex, UK
- Posts
- 3,816
Thanked: 3164
Excellent work! I really like the rust bluing, but haven't been patient enough to do it - all the waiting, boiling, carding and repeating the cycle put me off. The low temp salt bluing I do gives a similar result, but in much less time, and is tenfold better than the cold bluing options.
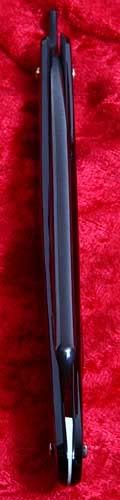
Here are some pics of a Giesen & Forsthoff Timor that had the old bluing removed in order to restore the blade, and which was then blued again:
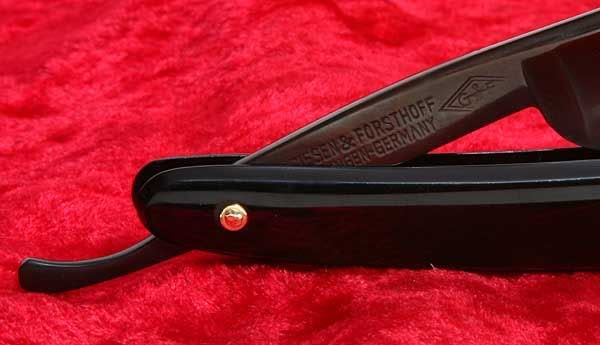
Regards,
Neil
-
The Following User Says Thank You to Neil Miller For This Useful Post:
Pete_S (08-22-2009)
-
08-21-2009, 06:14 PM #5Senior Member

- Join Date
- May 2009
- Location
- Reno, NV
- Posts
- 282
Thanked: 124
That looks great. I wonder how well it would work in the high desert of northen Nevada though. Rust is near impossible here.
-
The Following User Says Thank You to Muirtach For This Useful Post:
Pete_S (08-22-2009)
-
08-21-2009, 10:30 PM #6Member
- Join Date
- Sep 2007
- Posts
- 62
Thanked: 1 great alternative to polishing
I think I get too into shiney ,chrome outcomes. The bluing is really a good alternative.
Al
-
08-22-2009, 03:35 AM #7Senior Member
- Join Date
- Mar 2007
- Posts
- 608
Thanked: 124
Thanks, but I got turned onto a really good rust blue solution by a member here, and I think that it was prolly more responsible for the outcome then what I did.
-
08-22-2009, 03:40 AM #8Senior Member
- Join Date
- Mar 2007
- Posts
- 608
Thanked: 124
Thats nice. I really like that tang and spine blued look, its alot more subtle then having the whole thing blued. I'm trying to figure a way to do that with a rust blue and get clean edges on the spine. Originally Posted by Neil Miller

-
08-22-2009, 03:44 AM #9Senior Member

- Join Date
- Mar 2008
- Posts
- 1,875
Thanked: 285
What did you use to oxidize them?
-
08-22-2009, 03:45 AM #10Senior Member
- Join Date
- Mar 2007
- Posts
- 608
Thanked: 124
Yeah, the durability appeals to me as much as the look does. Like I said before, I really like low maintenance. I don't mind doing some work all at once, but continual maintenance, like oiling blades after each use, is just a drag to me. Originally Posted by OLD_SCHOOL


 Reply With Quote


