
Results 1 to 6 of 6
Thread: Repinning questions
 LinkBack URL
 About LinkBacks
-
04-18-2010, 06:52 PM #1Junior Member

- Join Date
- Feb 2010
- Location
- Regina, Saskatchewan, Canada
- Posts
- 143
Thanked: 43 Repinning questions
Hi Guys,
I'm working on my first repinning today, based around this razor:
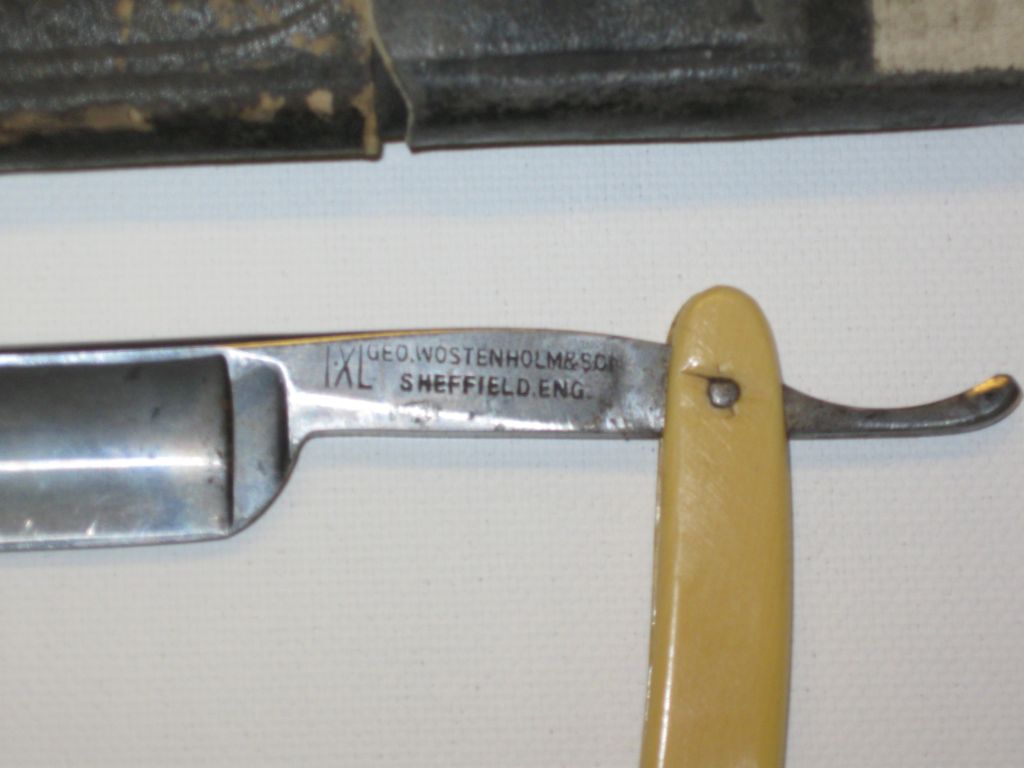
As you can see, the scales were cracked around the pivot a bit, and the other side of the razor was even uglier--I think someone had repinned it at some point, using a nail and no washers.
The blade was loose in the scales, and seemed unwilling to tighten with careful peening, so I decided I would repin, and because of the cracked scales, rescale as well.
Spare time is a bit hard to come by as of late, and this is a daily shaver for me, so I decided to try and do things as fast as possible, using a premade rescaling set from Fendrihan's (blasphemy, I know; when I've got more time, I might like to start rescaling my collection, but it will have to wait for now) It came in yesterday, and I started work this morning to repin.
I've run into a couple of issues. I finally got the old pin out, and it looks like both it, and the pivot hole in the blade are slightly larger (5/64, rather than 1/16). This makes the new pin just a touch sloppy, but I don't have anything on hand to easily sleeve it with. Is it a worry?
Secondly, the set came with two pins and four domed washers...but the new scales already have a pin in at the wedge end. I assume that they included extra parts in case I screw up--and I appreciate that. However, I'm a bit lost, as I'm not sure if I can use domed washers for sitting between the blade and scales, and if so, which side does the dome sit on--blade or scale? I could always flatten them out, and redrill, but is that reasonably?
Thirdly, and perhaps most worryingly, the washers don't seem to want to go on the pin...they're too small. I could drill them out, but surely that isn't the intention when things come as a kit. Am I missing something?
Here's a pic of everything:
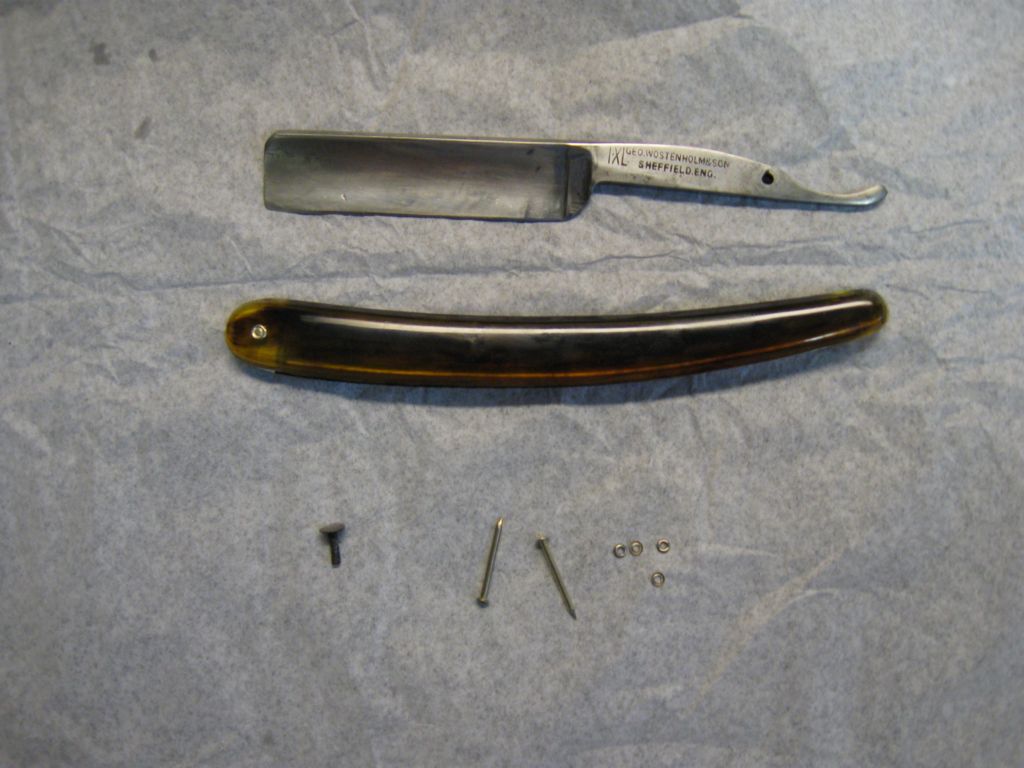
For reference, the black stub on the left is the old "pin."
Thanks in advance for any and all help!
-
04-18-2010, 11:03 PM #2Gold Dollar Heretic

- Join Date
- Mar 2010
- Posts
- 222
Thanked: 41
Hmm, you got me on the last one. i'll leave this one for someone else. Originally Posted by Vulcan500rider

Goog
-
The Following User Says Thank You to greatgoogamooga For This Useful Post:
Vulcan500rider (04-19-2010)
-
04-19-2010, 12:07 AM #3At this point in time...


- Join Date
- Jun 2007
- Location
- North Idaho Redoubt
- Posts
- 27,101
- Blog Entries
- 1
Thanked: 13249 Tricks !!!
Here are some tricks to help ya out
1. The pretty side, or the nail head goes in from the show side of the razor (Toe left Tang right) just like the pic above..
2. Those are locking washers, the "cup" goes down toward the scales on the back side...
3. Drill a 1/16 inch hole through a small piece of wood or plastic to press the washer on tight the pin slides through the hole and the washer gets pressed on......
4. Clip it TIGHT, then smooth with a file the washer will crush as you tighten the pin and give a near perfect peen if you do it right...
5. Tap Tapity Tap never bang bangLast edited by gssixgun; 04-19-2010 at 01:31 AM.
-
The Following User Says Thank You to gssixgun For This Useful Post:
Vulcan500rider (04-19-2010)
-
04-19-2010, 12:47 AM #4Junior Member
- Join Date
- Feb 2010
- Location
- Regina, Saskatchewan, Canada
- Posts
- 143
Thanked: 43
Thank you both for your replies.
Impatient as always, I followed more or less what you outlined for the washers, gssixgun, but using the smallest hole on my wire strippers to hold the outside of the washer while I gently tapped the pin through.
I also decided just to leave the pivot hole as is; it's only 1/64", so I suspect you're spot on about it being fine, so long as I get the pin tight.
Thanks for the tips, both of you; I'll post pics of the finished product when I'm done putting it all together!
-
04-19-2010, 01:07 AM #5Wee Whisker Whacker

- Join Date
- Nov 2009
- Location
- New York
- Posts
- 760
Thanked: 177
There's not much I can add to Glen's post, except that the little space you described will easily be unnoticable after a few extra taps with a hammer. Like Glen said, taps not bangs.
Good luck, and post after photos.
-
The Following User Says Thank You to BingoBango For This Useful Post:
Vulcan500rider (04-19-2010)
-
04-19-2010, 02:33 AM #6Junior Member
- Join Date
- Feb 2010
- Location
- Regina, Saskatchewan, Canada
- Posts
- 143
Thanked: 43
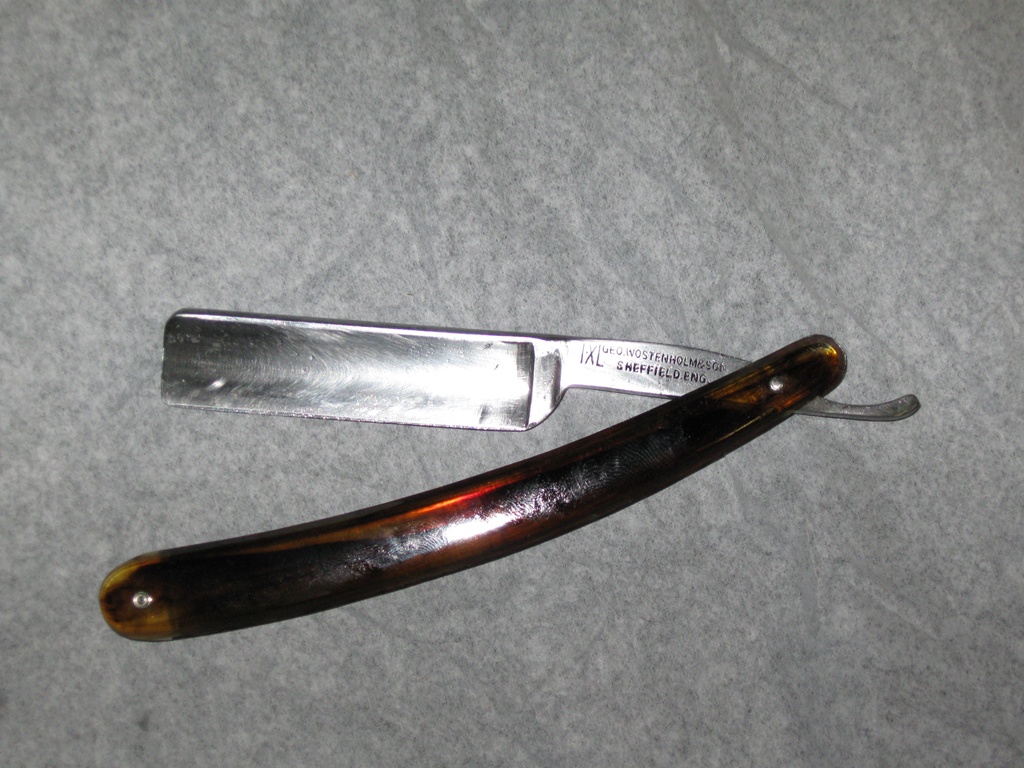
Alrighty. I went ahead and got it pinned. It's not perfect; I left just a touch too much pin above the washer, so the peened end is just a bit larger than I wanted, but it's tight, WAY easier to strop, and still shaves like a dream.
Here's the finished product:
And here's one of the peen. Sorry for the poor picture quality. I'm not much of a photographer, and I've got a really simple point and shoot that I can't seem to get very good close-up shots out of...

Again, fellas, thank you for the advice and guidance! I love this site!


 Reply With Quote