
Results 1 to 7 of 7
 LinkBack URL
 About LinkBacks
-
02-05-2011, 03:12 PM #1Trailing along the leading edge


- Join Date
- Jul 2010
- Location
- Earth
- Posts
- 327
Thanked: 107 Re-pinning a Wade & Butcher (Original restore)
Hi Guys,
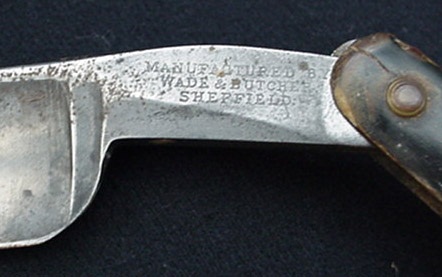
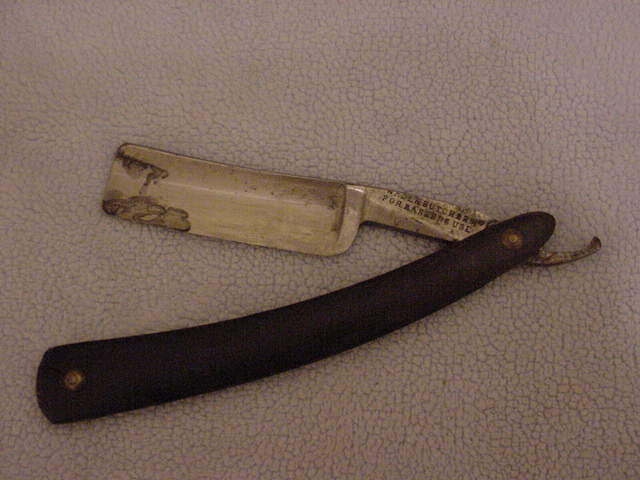
I am restoring a couple Wade & Butcher choppers with horn scales, and 2 of them have the original old "Bull's eye" finishing on the pins.
I want to remove the pins, hand-sand the blades and fix the small cracks in the scales with marine epoxy resin, but when I eventually re-pin them, I want them to have a 100% original look.
Can anyone give me some info on what you've done to replace the pins on one of these and bring it back to its original look?
I've removed pins before on other razors by carefully filing off the top of the pin and a small amount of the original washer, and then removing it all to re-use the original washer with a new pin. That has worked very well, but I'm not sure if I can do it with these ones.
Here are some photos of what I am talking about:
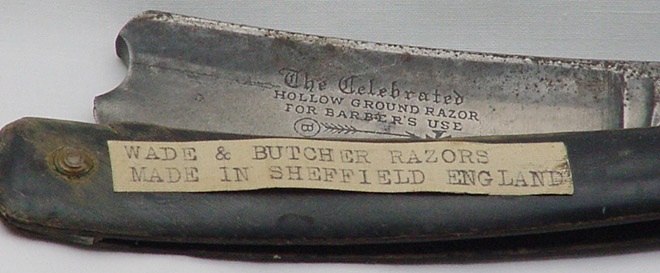
And the other one:
Thanks!
-
02-05-2011, 03:48 PM #2razor saver

- Join Date
- Mar 2010
- Location
- Southern Utah
- Posts
- 130
Thanked: 112
I just finished up a similar restore. I saved the original washers as well. I (very carefully) drilled out the pin with a drill press and 1/16" bit until the washers came loose. Be aware that these bullseye washer that protrude out from the scales have a second "stabilizing" washer beneath the brass bullseye that you will want to save as well. Took a lot of patience and steady drilling before I was able to get them all popped. Don't rush it or you can very easily damage the originals beyond repair.
Once they were off I was able to clean the dirt off of them and fix any bends in the washers with a small pair of needle nose pliers (again, very carefully) and give them a little cleaning.
When I put the razor back together, I ended up using about a 3/16" brass rod for the new pins as I found the holes in the washers to be quite wide. Here is a link to the before and after shots.
http://straightrazorpalace.com/custo...ore-after.html
-
The Following 2 Users Say Thank You to yosh For This Useful Post:
leadingedge (02-07-2011), Maxi (02-06-2011)
-
02-06-2011, 10:11 AM #3The Electrochemist

- Join Date
- Apr 2009
- Location
- Hastings, UK
- Posts
- 1,714
Thanked: 527
leadingedge,
Send off a PM to Mr Neil Miller, who is a member here at SRP; he will be able to give you sage advice about this matter
Have fun !
Best regards
Russ
-
The Following User Says Thank You to PhatMan For This Useful Post:
leadingedge (02-07-2011)
-
02-06-2011, 10:42 AM #4This is not my actual head.


- Join Date
- Nov 2009
- Location
- Middle of nowhere, Minnesota
- Posts
- 4,624
- Blog Entries
- 2
Thanked: 1371
I saw a post from Max once that had brilliant advice for these situations...
Take a really small jewelers saw and cut the pins on the inside of the scales. You can preserve all of the original hardware that way without much risk.
Strange women lying in ponds distributing swords is no basis for a system of government.
-
The Following User Says Thank You to HNSB For This Useful Post:
leadingedge (02-07-2011)
-
02-07-2011, 03:31 PM #5Trailing along the leading edge
- Join Date
- Jul 2010
- Location
- Earth
- Posts
- 327
Thanked: 107
Great advice guys, I really appreciate it!
-
02-07-2011, 03:33 PM #6Trailing along the leading edge
- Join Date
- Jul 2010
- Location
- Earth
- Posts
- 327
Thanked: 107
Any way you can give us some info on how you made those goreous horn scales for this restore Yosh? It looks awesome!
 Originally Posted by yosh

-
02-16-2011, 05:07 PM #7razor saver
- Join Date
- Mar 2010
- Location
- Southern Utah
- Posts
- 130
Thanked: 112
Check out Brad's (undream) video series on restoration. He gives a top notch tutorial. Very useful.
Straight Razor Restoration Start to Finish Video Series - Straight Razor Place Wiki
-
The Following User Says Thank You to yosh For This Useful Post:
leadingedge (05-05-2011)


 Reply With Quote