
Results 1 to 6 of 6
 LinkBack URL
 About LinkBacks
-
02-08-2011, 05:57 AM #1Senior Member


- Join Date
- May 2009
- Location
- Reno, NV
- Posts
- 282
Thanked: 124 Creating a smooth patina in hours
I really like the way a nice patina on a vintage blade looks. Especially when paired up with the high polish of the bevel and hone wear. I hated to lose that look on some of the blades I have cleaned. Well the other night I got a crazy idea.
I generally have two tumblers running at any point. One with walnut shells and the other with those plastic pyramids that you can get from Harbor Freight.
The main downside I have noticed about the pyramids is that they create this fine dust as they beat each other up. I was going to take them and clean them up with a colander and running water. But then inspiration struck. Instead I poured about two cups of water into the tumbler. At that point I took a Fredrick Reynolds blade I had lying around with a large crack in it and tossed it into the mix. The blade is worthless, but for experimentation it would do the job great.
The next morning I went down to the basement and discovered that the media and water combined to give a great natural patina. Of course I forgot to take photos before so this morning I took a different blade that was all polished up pretty and took the before shots.


After twelve hours in the tumbler I pulled it out and took theses photos.
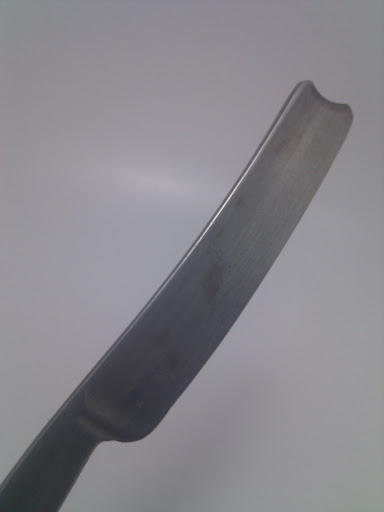


As you can see the simultaneous oxidation and polishing gave a great uniform look to the blade. There are a few spots of slightly different color. I think they might have been from finger oils, but I'm not sure.
I just threw it back in to take some more photos in the morning as well to see if I can get it any darker.
-
02-08-2011, 06:23 AM #2Modern Day Peasant

- Join Date
- May 2010
- Location
- Denver Rocky Mtn. High Rent,Colorado
- Posts
- 8,705
Thanked: 1160
That's kinda cool lookin.Shame about the crack in the blade though.Looks like it could'a been a contender !

-
02-08-2011, 06:32 AM #3Senior Member
- Join Date
- May 2009
- Location
- Reno, NV
- Posts
- 282
Thanked: 124
The blade in the photos is solid. I've actually got a set of purpleheart scales I hope to be putting it into tomorrow.
-
02-08-2011, 06:36 AM #4Modern Day Peasant
- Join Date
- May 2010
- Location
- Denver Rocky Mtn. High Rent,Colorado
- Posts
- 8,705
Thanked: 1160
Ewwps...my bad.Nice blade

-
The Following User Says Thank You to Nightblade For This Useful Post:
Henryjoe (02-08-2011)
-
02-09-2011, 03:17 AM #5Senior Member
- Join Date
- May 2009
- Location
- Reno, NV
- Posts
- 282
Thanked: 124
And here the blade is after 30 hours. The color is not as even as it was before with some much darker spots on the blade. That said it darkened up just about to where I wanted it.


-
The Following 3 Users Say Thank You to Muirtach For This Useful Post:
Nightblade (02-09-2011), shutterbug (02-09-2011), simpleman (02-09-2011)
-
02-09-2011, 04:15 AM #6Senior Member

- Join Date
- Sep 2009
- Location
- Guthrie, Oklahoma
- Posts
- 419
Thanked: 217
that's looking really cool. Should be a dandy when it's finished.


 Reply With Quote