Results 1 to 7 of 7
  1. #1
    Senior Member
    Join Date
    May 2011
    Location
    PG
    Posts
    140
    Thanked: 17

    Default Dunc's Intrepid foray into the realm of restorations

    With a few fleaBay blades in my possession and the beginnings of a restoration kit I figure I might as well "contribute" to the workshop community (although the reality is I am just here to sponge information, suggestions and inspiration )

    I'm going to just plug away in one thread instead of cluttering the board with a bunch of pleas for advice and guidance as I slowly work my way through the process of bringing old blades back to life.

    My goal's in restoring are to build up a collection of shavers so I will be able to provide less repetitive SOD posts and to satisfy my rampant gear whoring and tinkering tenancies...

    So let me begin with introductions of the first 3 sacrifices... er I mean projects.

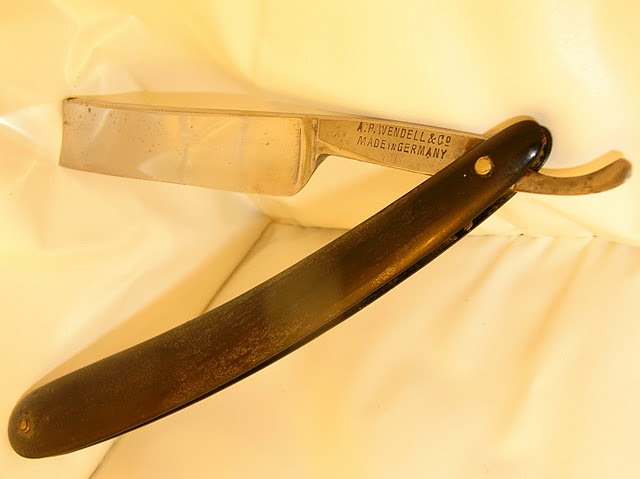
    This little guy is probably going to be the first attempt. It is stamped as a A.P. Wendell & Co, made in Germany. The scales are tight and would probably clean up nicely, minimal staining and minor pitting as far as my negligible experience can tell. The blade has a slight frown and I'm thinking instead of tearing this little guy apart I might just let it be my honing guinea pig (after next payday when the hone budget is ratified).

    Name:  DSCN5840.JPG
Views: 259
Size:  35.8 KB
    Name:  DSCN5841.JPG
Views: 238
Size:  31.7 KB

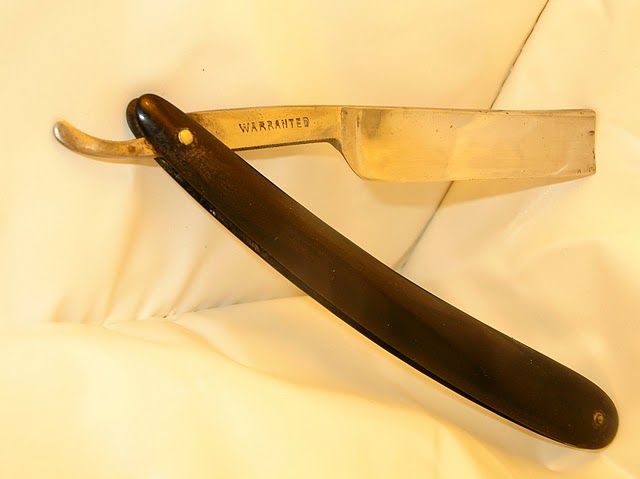
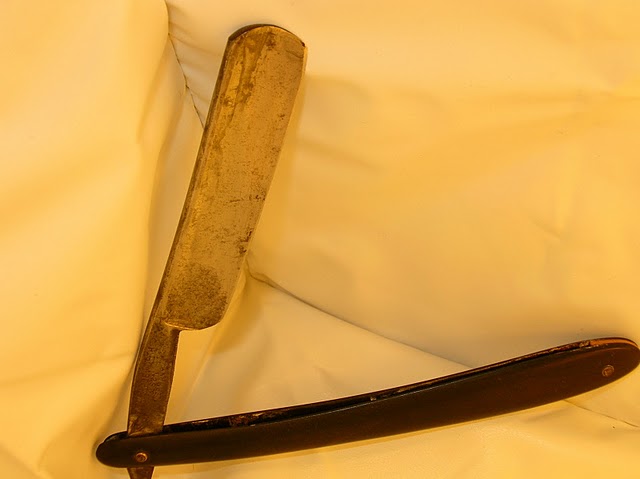
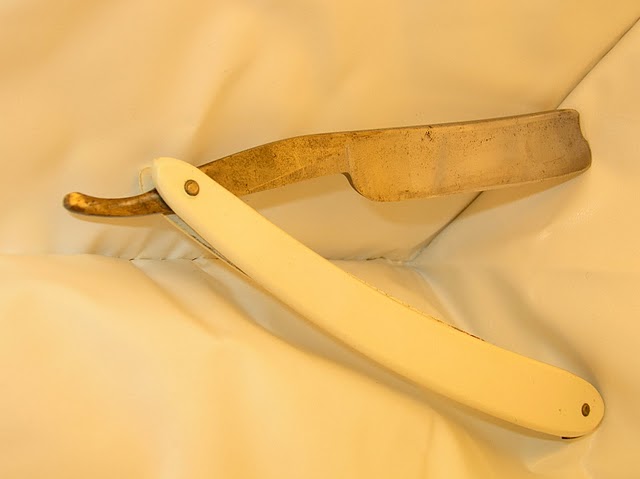
    The other razors both have warped scales and will be providing me with a opportunity to make new scales and learn the fine art of peening... both blades show some pitting and tarnish.
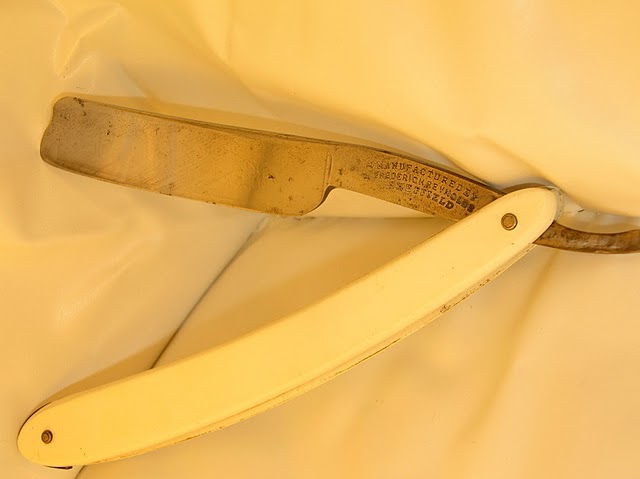
    A.W. Wadsworth "Pathfinder" and Fredrick Renyolds "the princes own" will need to be torn down. I think the FR has a bit of a smile and the Pathfinder has some heal wear but nothing severe. I would like to keep the etching on the Pathfinder (If i go after it with hand sanding is the etching a lost cause?), the etching on the FR is so faded I doubt it is worth considering.

    Name:  DSCN5836.JPG
Views: 228
Size:  32.6 KB

    Name:  DSCN5837.JPG
Views: 228
Size:  34.6 KB

    Name:  DSCN5838.JPG
Views: 235
Size:  25.8 KB

    Name:  DSCN5839.JPG
Views: 231
Size:  29.4 KB

    I am picking up a tumbler and I was thinking that once I have these torn down a cycle through the walnut shells and buffing compound might be educational, to give me a foundation as to what can be buffed out in that manner. Then move on to sanding if a more aggressive removal is needed.

    I always am interested in the wisdom of those more experienced than myself

  2. #2
    Scale Maniac BKratchmer's Avatar
    Join Date
    Mar 2009
    Location
    Decorah, IA
    Posts
    2,671
    Thanked: 641

    Default

    Honed one of those Pathfinder "Big CHiefs" for a guy a few months back... let me tell you, those are nice razors! Took an edge very readily, and man oh man was it smooth!

  3. #3
    Senior Member mjhammer's Avatar
    Join Date
    Apr 2011
    Location
    Wheat Ridge, Colorado
    Posts
    1,330
    Thanked: 262

    Default

    The tumbler has worked for a few folks here already. Well enough to save a guy about 5 hours of hand sanding to get a valid starting point.

    I have restored a set of super old scales. I start with dissassembly. I sand them starting with 220 grit and ending with 600 grit. Then I buff then for hours with some #00 steel wool. I then hand polish them with some Maquire's PlastX and cotton balls.

    Talk about bringing some old scales back to life.!!

    The blades I sand for fun and relaxation. I found I spend about 10 hours on average per razor I sand. No tumbler here...

    Good luck on these projects mate. NOthing like bringing a 10$ X-Bay razor back to life. Nothing...
    ​-- Any day I get out of bed, and the first thing out of my mouth is not a groan, that's going to be a good day --

  4. #4
    Senior Member
    Join Date
    May 2011
    Location
    PG
    Posts
    140
    Thanked: 17

    Default

    The Big Chief is now without scales and slowly getting sanded down. I have got it fairly clean the pitting is another story. I want to keep the etching so quite a bit of the pitting is going to stay.

    220 grit done, 300 grit starting to look good.

  5. #5
    Senior Member
    Join Date
    May 2011
    Location
    PG
    Posts
    140
    Thanked: 17

    Default

    1500 is done... need to find some 1800 and 2000 grit.


  6. #6
    Senior Member jfleming9232's Avatar
    Join Date
    Jun 2010
    Location
    Andalusia, Alabama
    Posts
    577
    Thanked: 125

    Default

    Looking good. When it's all said and done, are you going for a mirror polish or more of a satin look?

  7. The Following User Says Thank You to jfleming9232 For This Useful Post:

    Dunc (06-14-2011)

  8. #7
    Senior Member
    Join Date
    May 2011
    Location
    PG
    Posts
    140
    Thanked: 17

    Default

    Quote Originally Posted by jfleming9232 View Post
    Looking good. When it's all said and done, are you going for a mirror polish or more of a satin look?
    Thanks, I haven't quite decided I think I am going to go for a mirror polish on this one just to see how it works out.

Posting Permissions

  • You may not post new threads
  • You may not post replies
  • You may not post attachments
  • You may not edit your posts
  •