
Results 1 to 9 of 9
 4Likes
Thread: Horn scale damage
 LinkBack URL
 About LinkBacks
-
06-28-2011, 02:07 AM #1Member

- Join Date
- Sep 2010
- Location
- Santiago de Chile
- Posts
- 46
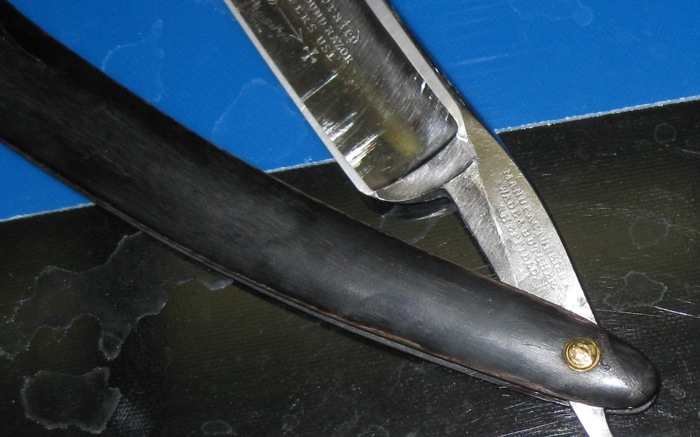
Thanked: 18 Horn scale damage
Hi there,
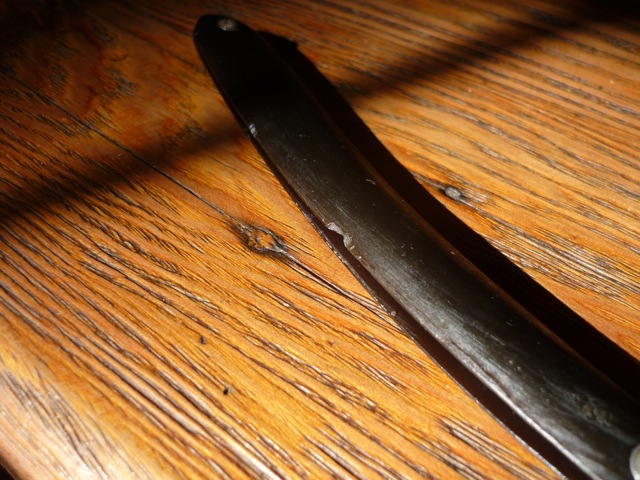
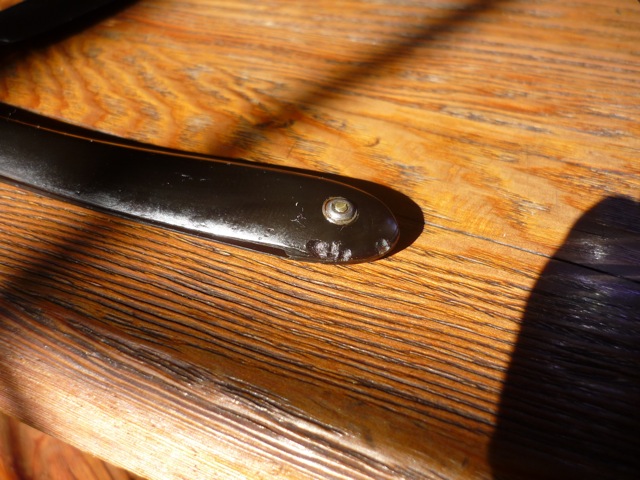
I have a very nice W&B with horn scales.
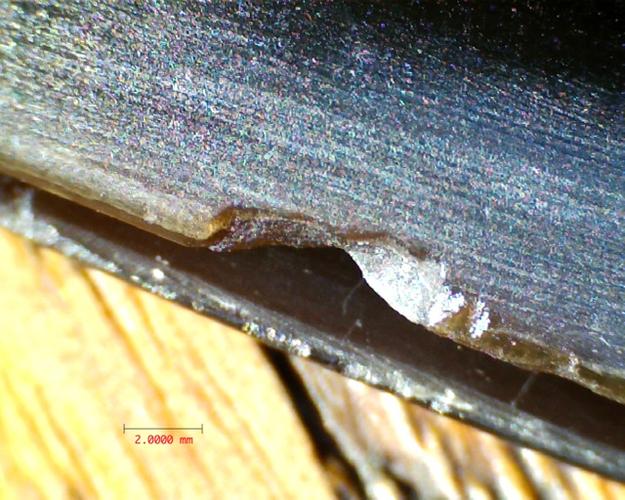
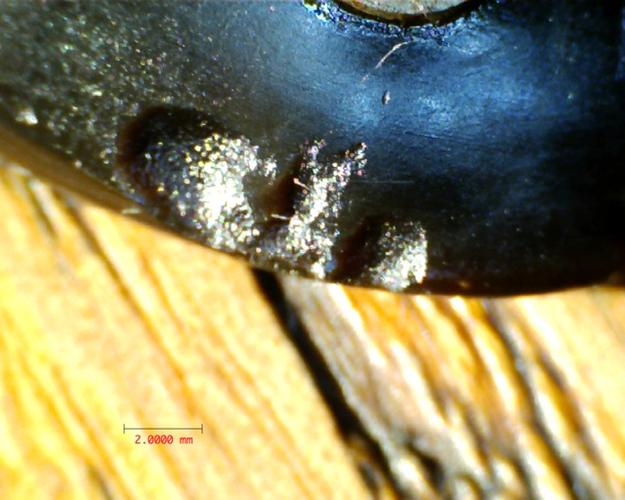
My concern is for some damage on scales. It is like some bite ¿bug of what type?
I have this razor for some months and I dont think the problem is active or worse but I would know what I can do for avoid increase of the damage.
Thanks in advance for any help.
Greetings to all.
-
06-28-2011, 02:26 AM #2Senior Member

- Join Date
- Jun 2009
- Location
- Colorado Springs
- Posts
- 1,769
Thanked: 1045
Soak it in neats foot oil. it will be difficult to patch though..
-
The Following User Says Thank You to Wintchase For This Useful Post:
100fuegos (06-28-2011)
-
06-28-2011, 02:32 AM #3Senior Member


- Join Date
- Dec 2006
- Location
- Burkburnett TX
- Posts
- 3,100
Thanked: 2392
first regrind/horn repair
post #13 in this thread
Charlie
-
The Following User Says Thank You to spazola For This Useful Post:
100fuegos (06-28-2011)
-
06-28-2011, 02:38 AM #4Razor Vulture

- Join Date
- Oct 2010
- Location
- Lone Star State
- Posts
- 26,181
Thanked: 8619
I would recommend to not apply oil as most epoxys won't adhere to it after you do. All I have read is to epoxy and then treat! I have some to experiment with. If Walt(Dirtychrome) comes aboard on this, you can get some great Horn advise. Charlie has also given some great advise/links! Don't get in a hurry! JMHO! There is a bug which seeks out horn.If anyone knows about this bug, it would be interesting! I have an old Browning shotgun which had a horn butt plate that the bugs got to! It looks like your scales! U can do it!
Last edited by sharptonn; 06-28-2011 at 02:45 AM.
"Don't be stubborn. You are missing out."
I rest my case.
-
The Following 2 Users Say Thank You to sharptonn For This Useful Post:
100fuegos (06-28-2011), dirtychrome (06-28-2011)
-
06-28-2011, 03:05 AM #5Senior Member


- Join Date
- Apr 2010
- Location
- Yakima, Wa
- Posts
- 1,955
Thanked: 494
I don't know enough about it, but a friend of mine is an entomologist. When I helped him move he got upset that "carpet beetle larvae" got to his father's mounts.
They may not be the same deal, but its at least a possibility.
-
The Following User Says Thank You to deighaingeal For This Useful Post:
100fuegos (06-28-2011)
-
06-28-2011, 03:24 AM #6Senior Member

- Join Date
- Mar 2010
- Location
- Arizona
- Posts
- 652
Thanked: 408
Charlie has some great info in that link. I'll add the following also. Originally Posted by sharptonn

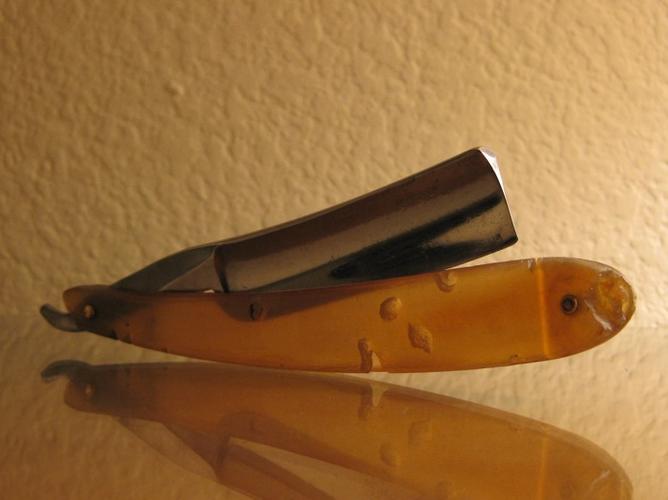
Bug bites, I don't do much worry myself, I think they add a certain amount of character. That is probably just me though. It is not like cell rot. It doesn't keep growing, assuming no more critters present. A blade that has been untouched for a long time, not only is it dusty and dirty, but you may find dead bugs left behind. I'm confident you cleaned it up well, so not to worry about that.
If a crack is present, or a notch missing, I will use a one hour set epoxy mixed with horn dust or pigment or maybe a combo. For pigment and dye, I like Castin Craft since easy to get and lots of colors available. It comes opaque and clear (pigment or dye) I got turned on to System3 epoxy, since instructions include mixing measurements that can be done by weight, instead of eyeball volume. You'll want to play around with some mixes prior to application to find the texture and sheen you like.
The first below image is a chopper that was cracked at pivot, and missing a notch behind it. For the crack, ground away inboard scales, behind the crack, and cut a new horn piece. This one was epoxy mixed with horn dust and Procion MX Dye. Since then I like the Castin Craft better. As you can see, the repair is fairly smooth, but the epoxy seam is viewable.
I fear if same approach on the holes, it would look odd. IMO Being peppered with not quite right color match dots is less attractive than the bites. Larger damage, I will make the compromise.
Second progress image is tortoise shell that required liners due to broken pivot and broken section at wedge of scales. Had to replace missing piece with horn. This being a precious material, some compromises happen in this sort of repair.
Epoxy was done without any powder, just a mix of different colors of the Castin Craft both dye and pigment. To attempt color match on epoxy, different color mixed epoxy were used at different parts of seam
Third below image is a bug bitten one, that I think is handsome as is. I need to take some pics of other ones. Seems I keep showing this, haha
Of course...anothet option is replace the scales. sorry had to through that out, lol.

Last edited by dirtychrome; 06-28-2011 at 04:29 AM.
-
-
06-28-2011, 04:59 PM #7Texas Guy from Missouri

- Join Date
- Jul 2009
- Posts
- 1,135
Thanked: 252
Agree with comments above about experimenting with epoxy. I build up layers of epoxy, eventually filling in the bug bite. Apply a layer, dry, apply again. A little like layers of paint.
You might want to fill it in a little first with several layers of plain epoxy. Then apply the layer with texturing, coloring or whatever you experiment and find matches the look of the scales.
-
The Following 2 Users Say Thank You to LarryAndro For This Useful Post:
100fuegos (06-28-2011), dirtychrome (06-30-2011)
-
06-28-2011, 05:35 PM #8At this point in time...


- Join Date
- Jun 2007
- Location
- North Idaho Redoubt
- Posts
- 27,101
- Blog Entries
- 1
Thanked: 13249
Although it is rather expensive, Acra-bed is about indestructible, and normally doesn't require multiple build-up layers....
Many of the Rifle bedding kits are adjustable for thickness and color and are much much stronger then just epoxy...
-
The Following 2 Users Say Thank You to gssixgun For This Useful Post:
100fuegos (06-28-2011), str8fencer (06-29-2011)
-
06-28-2011, 10:46 PM #9Member
- Join Date
- Sep 2010
- Location
- Santiago de Chile
- Posts
- 46
Thanked: 18
Hello Gentlemen,
thanks for all your advices.
I think I have some epoxy compound in near future for my "artistic expression”.
Have nice days.


 Reply With Quote