
Results 1 to 10 of 13
 8Likes
 LinkBack URL
 About LinkBacks
-
07-30-2011, 02:12 AM #1Captain ARAD.


- Join Date
- May 2011
- Location
- Pacifica, CA
- Posts
- 2,474
Thanked: 2226 My adventures with ivory. With a side order of GAH! CORROSION!
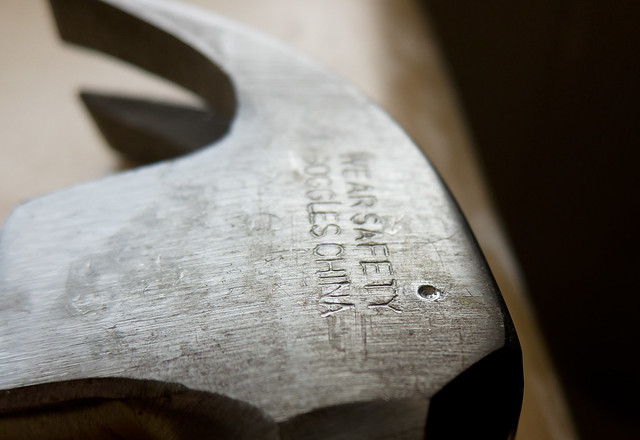
I finally got the nickel-silver pins I needed to start working on the various razors that just would look wrong with brass. My first order of business was this poor creature.
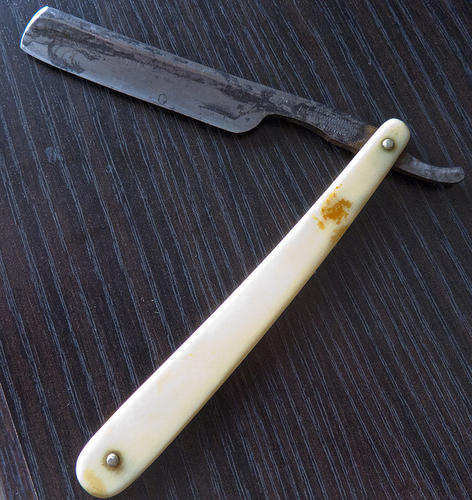
I got it for $7 on eBay. Ivory scales. The scales turned out pretty easy to fix (though they still show a scar from that crack), it was the blade that thwarted me. It's better now, but there's a long way to go yet and I was anxious to get this on a hone and shave with it.
No, I still haven't honed it.
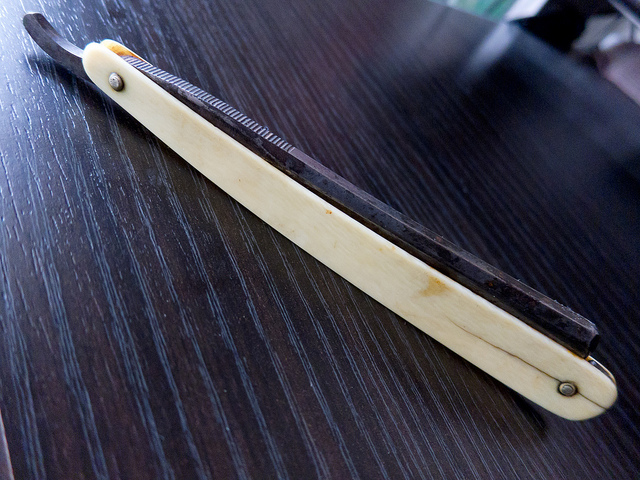
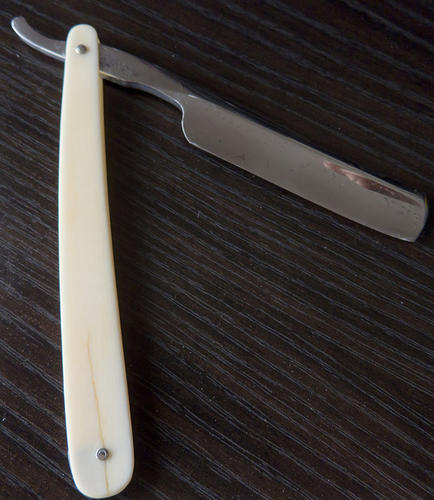
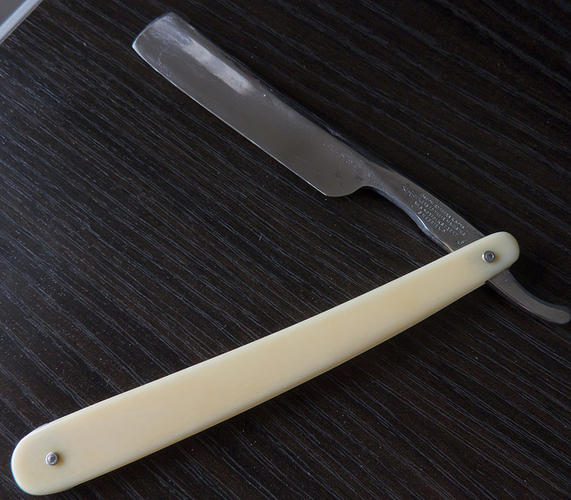
In its improved state:
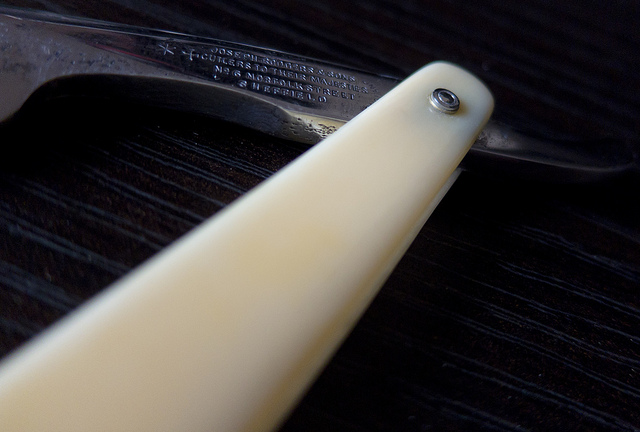
I'd like to clean up the pins a little better. They're currently just a touch grungy, but that will have to wait until I've got a buffer. Hand sanding those pits out was making me very unhappy.
Overall though, I'm quite pleased!Geezer likes this.-Zak Jarvis. Writer. Artist. Bon vivant.
-
07-30-2011, 03:23 AM #2Senior Member

- Join Date
- Jul 2011
- Posts
- 768
Thanked: 99
I like the pins. Tell me more about how you did those.
-
07-30-2011, 03:47 AM #3Captain ARAD.
- Join Date
- May 2011
- Location
- Pacifica, CA
- Posts
- 2,474
Thanked: 2226
What I did with the pins was to use cello-tape to hold two sets of washers in place. I've got brass on the bottom, SS on the top. Then I cut the pins effectively flush with the washers, put cello-tape on both sides, and peened them with a jewelers hammer against a drilled out divot on the head of a carpentry hammer. Originally Posted by medicevans

As it turns out, the lead wedge in the original had a tiny inconsistency that had caused the original crack in the scales. I noticed after I took those pictures -- the scales were slightly bowed at the toe -- so I've cut the pins out.
When I redo them tomorrow, I'll try and do a video to show how I did it.
I'm hoping that the .5 mil copper shims I cut will support the ivory better against the wedge.Geezer likes this.-Zak Jarvis. Writer. Artist. Bon vivant.
-
07-30-2011, 10:24 AM #4Member

- Join Date
- Apr 2009
- Location
- Sheffield England
- Posts
- 54
Thanked: 25
How did you repair the cracked scales. I have one that is waiting to be done and it has about the same length crack.
BTW very nice restore
-
The Following User Says Thank You to Exile For This Useful Post:
Voidmonster (07-30-2011)
-
07-30-2011, 04:33 PM #5Captain ARAD.
- Join Date
- May 2011
- Location
- Pacifica, CA
- Posts
- 2,474
Thanked: 2226
Superglue. Superglue, it turns out, loves ivory. I could not have anticipated how much it loves the stuff. It sticks to ivory a little bit better than it sticks to my fingers. Originally Posted by Exile
I nearly got into trouble there, in fact, because it very nearly glued the crack together before I'd properly aligned the pieces. I was just barely able to get things aligned.
Then I coated the whole piece and hand sanded it back down to get everything nice and level.
I did all the sanding at 600 grit. From there a liberal dose of Mother's polish got it looking like milk.Geezer likes this.-Zak Jarvis. Writer. Artist. Bon vivant.
-
The Following User Says Thank You to Voidmonster For This Useful Post:
Exile (07-30-2011)
-
07-30-2011, 05:19 PM #6Senior Member

- Join Date
- Jan 2011
- Location
- Roseville,Kali
- Posts
- 10,432
Thanked: 2027
I do Quite a bit of Ivory repair and restoration (other than razor scales) one trick we use is to run the cracked item thru an ultrasonic with mild soap,that removes any discoloration.
If a large crack or void is to be filled,I mix some powdered Ivory with epoxy or CA clue as a filler.
Repairs become almost invisable.Geezer likes this.
-
The Following 5 Users Say Thank You to pixelfixed For This Useful Post:
august11231 (08-29-2011), bjsulla (07-31-2011), Exile (07-30-2011), Geezer (08-01-2011), Voidmonster (07-30-2011)
-
07-30-2011, 05:59 PM #7Captain ARAD.
- Join Date
- May 2011
- Location
- Pacifica, CA
- Posts
- 2,474
Thanked: 2226
Crap. I wish I'd known that trick! I had just used a toothbrush and toothpaste. It got the worst of it, but some discoloration remained (hence the still-visible crack). Originally Posted by pixelfixed
I'm guessing that, having glued, I'm stuck with it now (heh). Unless I get really frisky and cut out the crack with a jeweler's saw and mix up a slurry out of the powder and some glue.-Zak Jarvis. Writer. Artist. Bon vivant.
-
07-30-2011, 09:21 PM #8Captain ARAD.
- Join Date
- May 2011
- Location
- Pacifica, CA
- Posts
- 2,474
Thanked: 2226
Shooting video of the pinning method I used here wasn't going to happen. I've got auto-focus video, good video and tripod-mountable cameras, but no single device with all of the above.
So I took a bunch of pictures instead. Here's the basic rundown.
(Sorry these are in Flickr format, I've figured out how to get them to appear natively on the forum, but it adds a layer of work to the process and there are a lot of pictures here).
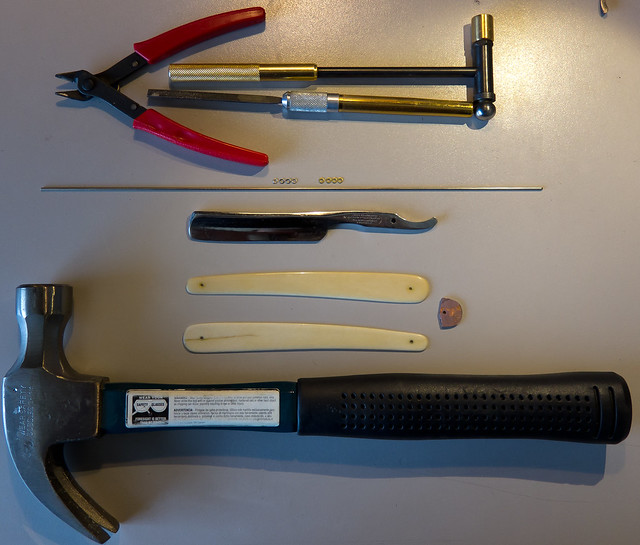
Pinning Tools by Zak Jarvis, on Flickr
Step one. Tools. Top-to-bottom:
- Cheap flush cutters and jeweler's hammer from Harbor Freight.
- The file in the picture is old (I don't remember where I got it) and I ended up never using it. Used the Dremel instead.
- 4 stainless washers and 4 brass washers
- Nickel-silver rod
- Razor guts.
- Carpentry hammer with divot drilled into the head to convert it into an anvil for pins.
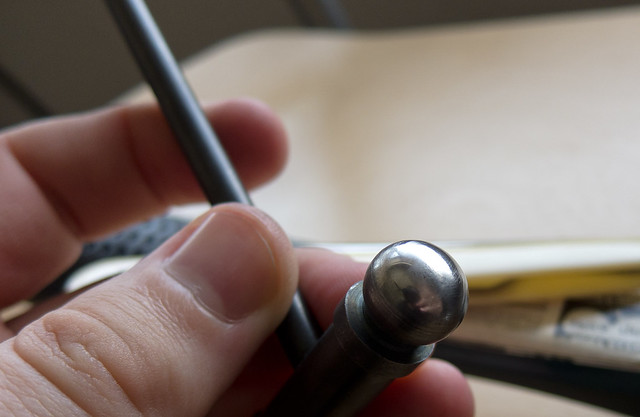
Step one:
Bevel the pins. There are a lot of ways to do this. I've done it with the file in the picture, and that works, but it leaves a slightly rough end. Today I did it using the Dremel and the highest grit stone wheel. It cuts slow and is likely to burn your fingers a bit, but it leaves the metal pretty smooth and gets the job done.
This step happens a lot, but it should all look like this:
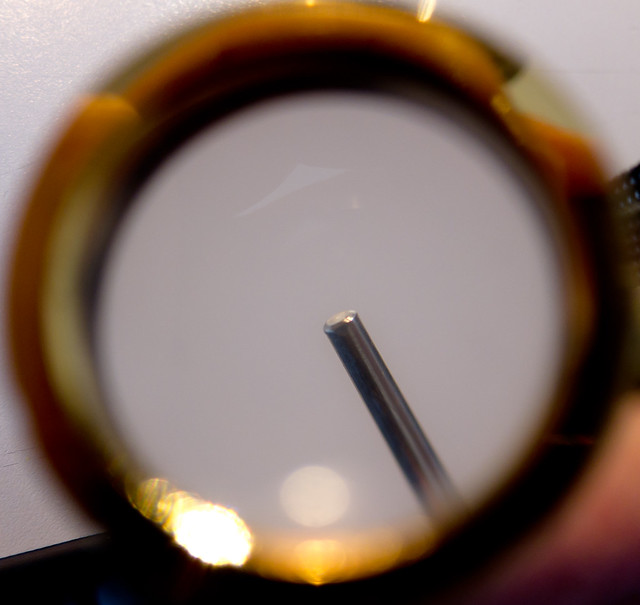
Beveled Pin by Zak Jarvis, on Flickr
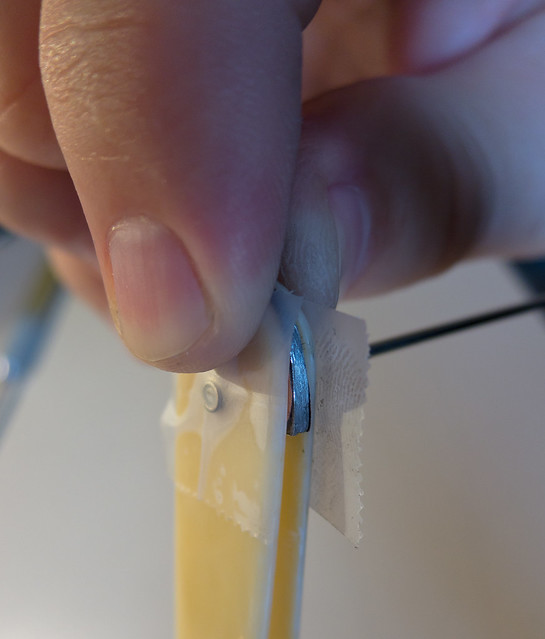
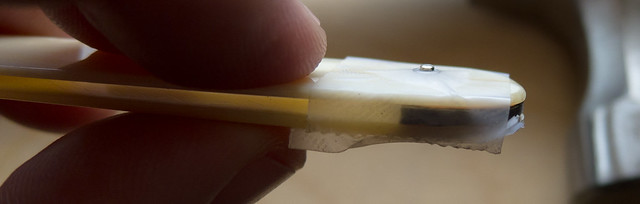
Step two:
Run the pin through the scales, load up the washers then tape them down with cello tape. It's not actually very hard to do with a little practice, and I find it more convenient than peening one end first, then cutting the pin. It also means that I can play the pin length back and forth as I peen to get more even results.
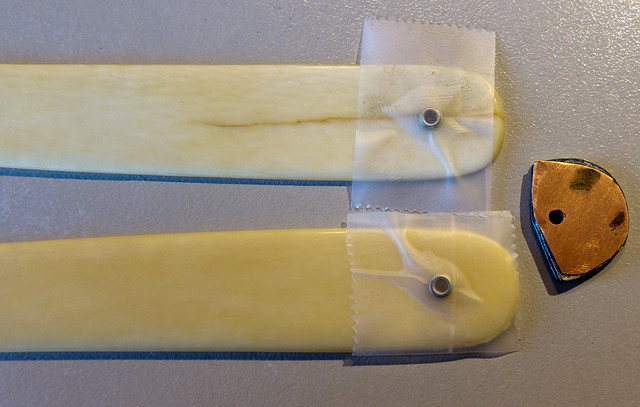
Taped Washers by Zak Jarvis, on Flickr
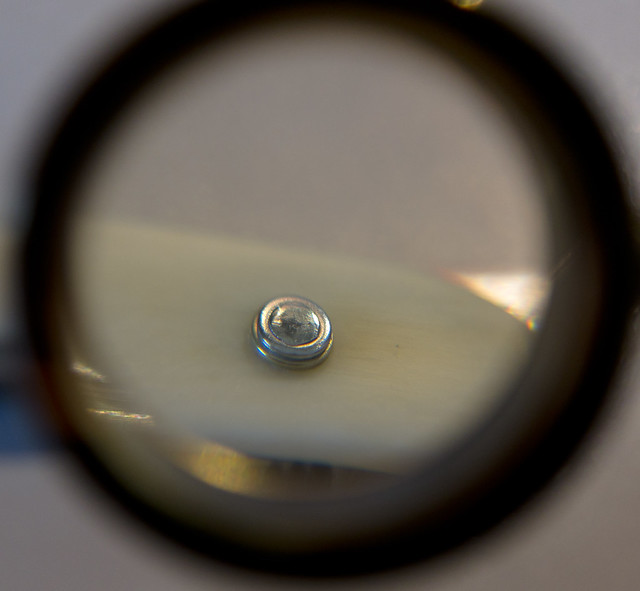
Step three, cutting:
Puncture one side of the tape with the pin (cello tape makes this really easy to do, and also holds everything in place). Get the pin flush with one side:
One Side Flush by Zak Jarvis, on Flickr
Collar down almost flush with the pins and cut.
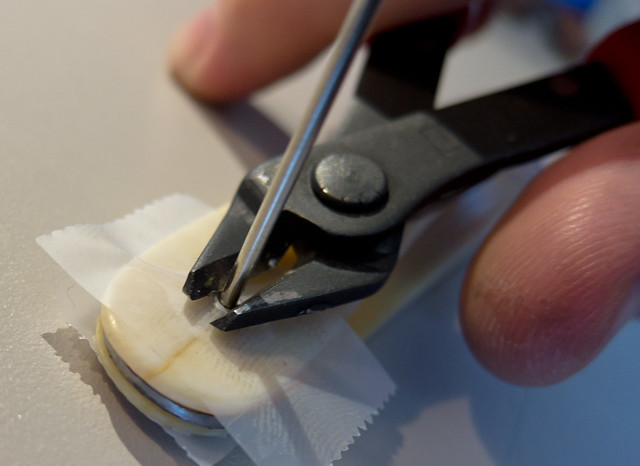
Cutting the Pin by Zak Jarvis, on Flickr
Note, the flush cutters did a particularly crappy job here. You can see where I started the cut (the lower indent on the pin) and where it ended up cutting at. Sigh. Lots of Dremel-time to get the pin down to length after this.
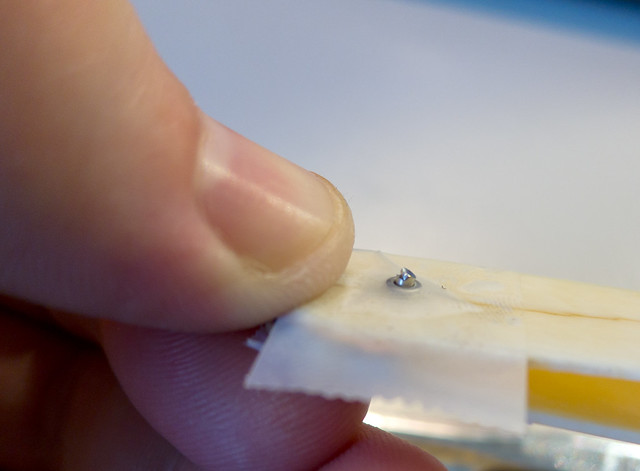
After the Cut by Zak Jarvis, on Flickr
This is the pin, ground to length and beveled.
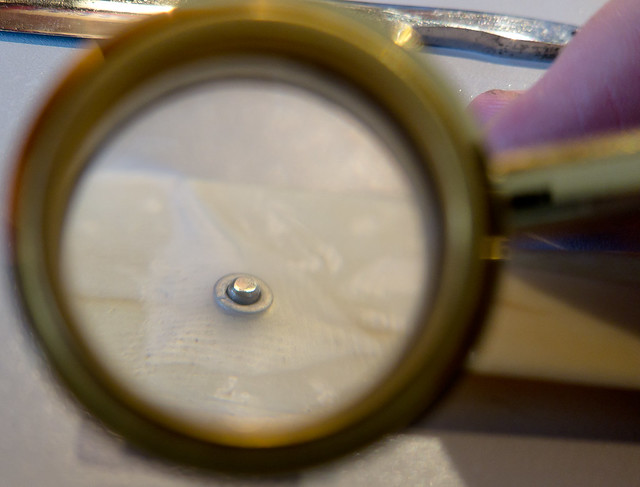
Post Cut Bevel by Zak Jarvis, on Flickr
(to be continued)-Zak Jarvis. Writer. Artist. Bon vivant.
-
07-30-2011, 09:22 PM #9Captain ARAD.
- Join Date
- May 2011
- Location
- Pacifica, CA
- Posts
- 2,474
Thanked: 2226
(...Continued)
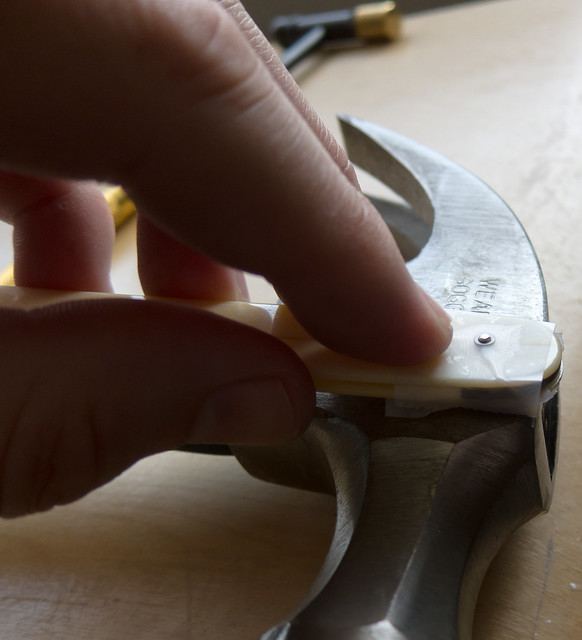
Step Four, peening:
I've made an anvil out of a hammer. To do that I just found a drill bit slightly larger than the pins I'd use and ran it on the head of the hammer 'till it made a little dent. It could probably use a clean and polish at this point. It still works as a hammer, but it's also now an anvil. It's officially a multi-tool! I wonder if they'd take this away getting on a plane...
Pin Anvil by Zak Jarvis, on Flickr
This is how much the pin sticks out. Because of the tape, on the other side it's completely flush. It's just about as much as the thickness of a single washer.
Pin Length by Zak Jarvis, on Flickr
Onto the anvil...
On the Anvil by Zak Jarvis, on Flickr
As you can see the pin came out a bit rough due to the munged pin-receiver on the hammer.
Peened by Zak Jarvis, on Flickr
I've polished the peening head on my jeweler's hammer to mitigate that problem, but it only works if the anvil is clean too.
Jeweler's Hammer Polish by Zak Jarvis, on Flickr
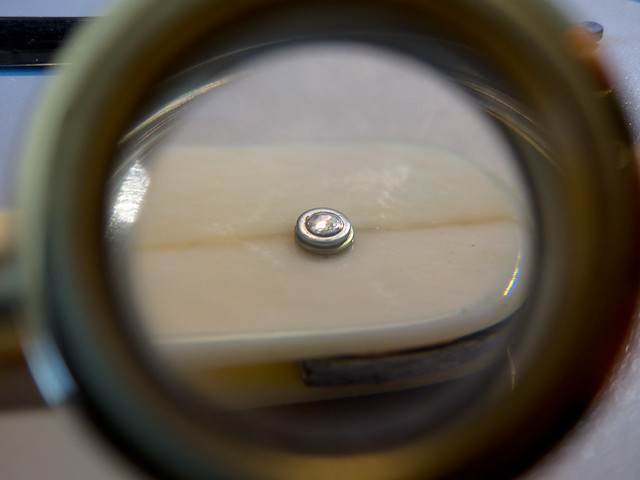
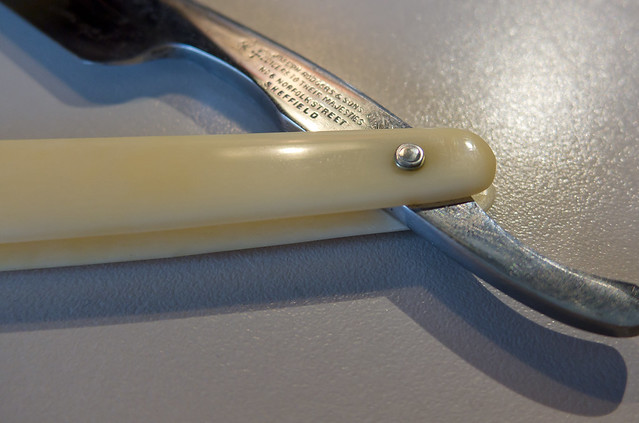
Step Four point Five:
I need to clean up the ugly pins due to that anvil-grime, so I took the dremel to it. Normally I'd never do this. Most scale material gets very unhappy with the temperature of the pins, but ivory isn't as picky.
The cleaned up pins...
Finished Pin by Zak Jarvis, on Flickr
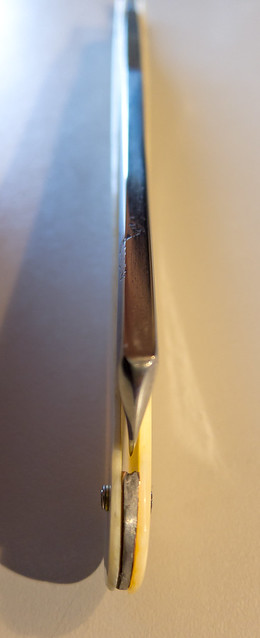
And a longer shot of the hinge pin in place...
Hinge Hero by Zak Jarvis, on Flickr
(continued some more)-Zak Jarvis. Writer. Artist. Bon vivant.
-
07-30-2011, 09:23 PM #10Captain ARAD.
- Join Date
- May 2011
- Location
- Pacifica, CA
- Posts
- 2,474
Thanked: 2226
(... the thrilling conclusion!)
Step Five:
Admire your work.
Happily, the blade centers nicely.
Centering by Zak Jarvis, on Flickr
And it balances just where I'd hold it to shave.
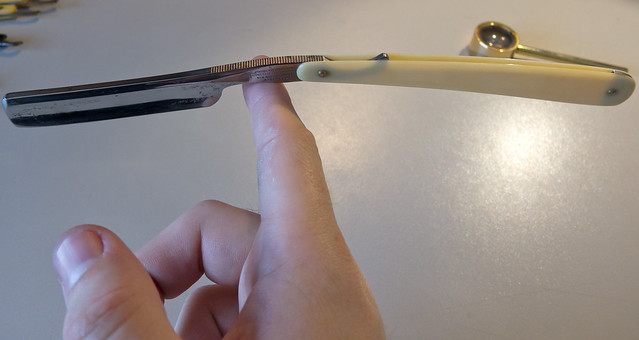
Balance by Zak Jarvis, on Flickr
----
If I were doing this over again, I'd be more careful to fit the copper shims onto the lead spacer better. I get some tiny gaps that I don't really like. Also, one scale has more patina than the other. This is because the scale with the crack got more sanding. I didn't want to sand the other down to match because I was afraid of losing any more structural stability. In the future, there will be a whole lot more ultrasonic cleaning and a whole lot less sanding.
And there you have it. Yet another way to do pins.-Zak Jarvis. Writer. Artist. Bon vivant.
-
The Following 4 Users Say Thank You to Voidmonster For This Useful Post:
august11231 (08-29-2011), bjsulla (07-31-2011), Geezer (08-01-2011), roughkype (08-01-2011)


 Reply With Quote