
Results 1 to 10 of 19
 3Likes
Thread: Regeldso - nothin' to lose.
 LinkBack URL
 About LinkBacks
-
05-06-2011, 09:37 AM #1Geriatric Gamer/Surf Fisher


- Join Date
- Mar 2011
- Location
- Manassas, VA
- Posts
- 298
Thanked: 42 Regeldso - nothin' to lose.
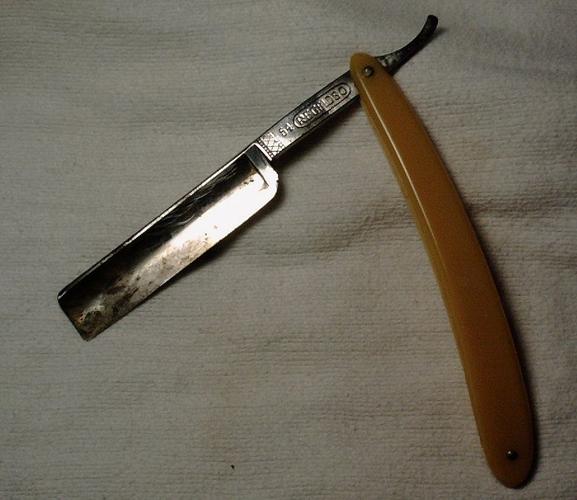
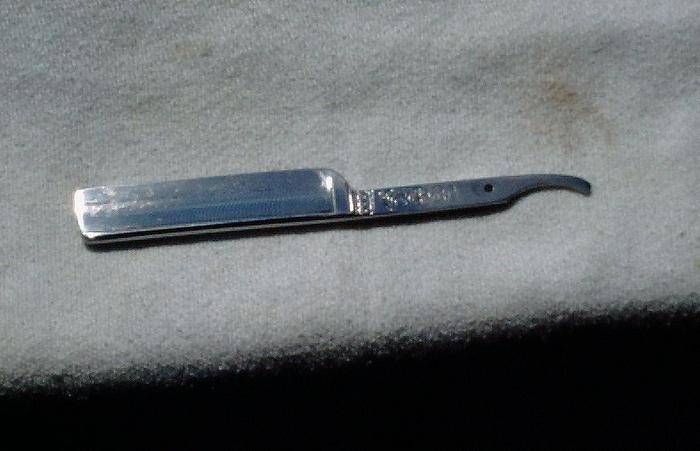
Picked this up yesterday at a local antique shop for 5 bucks. The scales are toast (warped badly), but the blade isn't in bad shape with just some surface scratches and petina. The edge is in good shape.
I'll be setting in with a first restoration attempt - probably with a goal of cleaning and polishing the blade enough to please me, rescaling, and making it shave ready.
Anybody seen one of these?
Wish me luck.
-
05-06-2011, 02:52 PM #2
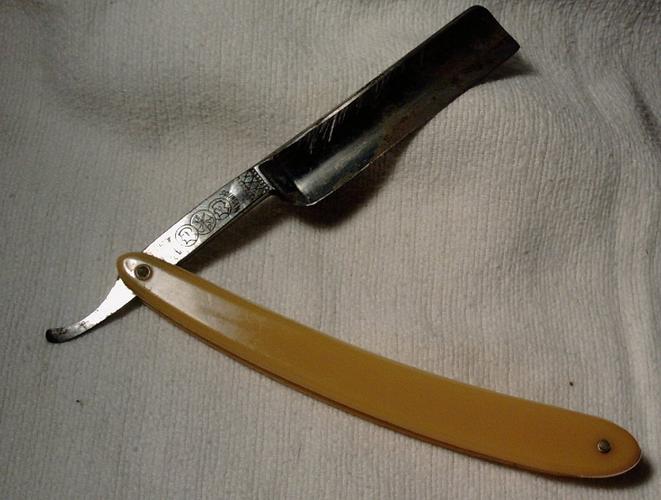
Try honing it before spending any time on cleanup. That edge, in the second photo, looks like it is toast. It may have pin holes through the first 1/8th inch back from the edge. I bought a couple razors at a garage sale yesterday in the rain..and, like yours, not good for anything but my old scale box for repair work.
Respectfully
~RichardBe yourself; everyone else is already taken.
- Oscar Wilde
-
05-06-2011, 03:16 PM #3Geriatric Gamer/Surf Fisher
- Join Date
- Mar 2011
- Location
- Manassas, VA
- Posts
- 298
Thanked: 42
My camera and photos are most likely the real problem, Richard.
There's nothing about that edge I can't fix.
A little steel wool and my Norton would bring it right back, but the scales are toast.
I could shave with it today if I honed it, but cutting my fingers off during the sanding would be a real drag.
I'm going to be doing this restore totaly by hand. I assure you, there will be no power tools used in the process. I don't have any.
-
05-06-2011, 08:23 PM #4Senior Member

- Join Date
- Apr 2011
- Location
- Montvale, NJ
- Posts
- 260
Thanked: 51
i'm hoping to do my first restore my hand also. keep taking pictures of your process and start a thread posting some pictures. it would be a great tutorial. good luck with the razor! Originally Posted by tonycraigo

-
05-08-2011, 05:50 AM #5Senior Member

- Join Date
- Apr 2011
- Location
- Wheat Ridge, Colorado
- Posts
- 1,330
Thanked: 262
Wow, good luck man, keep us posted on your progress. I'm looking forward to it!
-- Any day I get out of bed, and the first thing out of my mouth is not a groan, that's going to be a good day --
-
05-09-2011, 07:15 PM #6Senior Member
- Join Date
- Mar 2011
- Location
- Richmond, Virginia
- Posts
- 104
Thanked: 11
Good luck. I'm down 95 in Richmond and doing the same thing. I've been keeping a log and lots of pics. I'll post something once I feel I have something worth posting. One thing I did pick up was a clampable bench vise from harbor freight.
Amazon.com: NEW Table Clamp - On Bench Vise Jewelers Jewelry Tool: Home Improvement

I can clamp this to my desk and then clamp blades to it with some rubber pieces to protect the blade from marring... then go to town.
-
05-09-2011, 11:52 PM #7
I use this wonderful little clamp on device to give a small shelf out from the front of my bench:
Do a Google for: Bench pin/anvil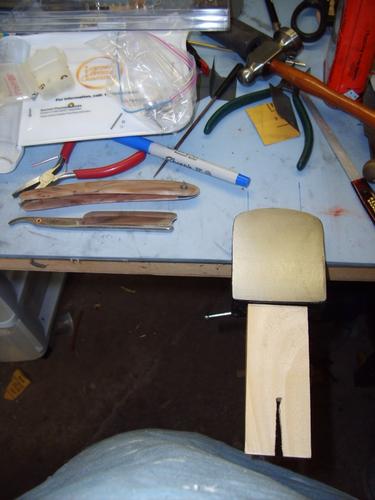
It is great for sanding and sawing, use a piercing saw framePiercing saw,works good for filing too.
Respectfully
~Richard
PS, a couple of holes and a divot with a ball end Dremel Tool will make it a good pinning station too.Last edited by Geezer; 05-09-2011 at 11:56 PM.
Be yourself; everyone else is already taken.
- Oscar Wilde
-
The Following 2 Users Say Thank You to Geezer For This Useful Post:
Havachat45 (09-28-2011), Nphocus (05-10-2011)
-
05-10-2011, 04:03 AM #8Senior Member


- Join Date
- Oct 2010
- Location
- 50 miles west of randydance
- Posts
- 9,573
Thanked: 1352
I have a similar bench pin and think it is wonderful. I like a larger V that almost comes to a point at the edges. Originally Posted by Geezer
Tim
-
05-10-2011, 07:46 PM #9Geriatric Gamer/Surf Fisher
- Join Date
- Mar 2011
- Location
- Manassas, VA
- Posts
- 298
Thanked: 42
So far:
Unpinned scales and started in with 320 grit. An hour or so had the worst of the mess off leaving only clean steel.
There seems to be some light pitting marks and it also appears this razor has seen a previous restoration. The "Made In Germany" is very weak, so I'm not going to rub very hard in this area.
I moved up through 400, 600 and lightly used the 1500 to see how the blade was looking - not bad - so I gave it a little "Mothers" for these horrid photos. I'll stick with the 400 for a few hours more, then move up through the sequence.
My Sis-in-Law has a better camera, so when nearing completion I'll borrow it and hopefully get some better images. I also know they have some Epay left-over from "The Deck From Hades" install a couple of years ago, so I'm toying with the idea of forging a set of scales from same... we'll see. The stuff is hard as rock and should last a million years. lol
-
05-12-2011, 08:48 AM #10Geriatric Gamer/Surf Fisher
- Join Date
- Mar 2011
- Location
- Manassas, VA
- Posts
- 298
Thanked: 42
Well...
The hand sanding went along fine. I removed all the light pitting and all but the deepest of the old scratches I dared to - a previous restoration (perhaps) has left this 1/4 hollow very thin and my eyesight isn't what it used to be, so I decided to err on the side of caution and to leave a few battle scars.
It didn't take very long to realize I was going to need to employ a power tool for the final buffing. I don't have a bench, or a bench wheel, but the good folks at the university I work for did see fit to supply me with two Dewalt cordless drills. Pretty nice ones. Two speed jobs with the reverse switch, which came in very handy.
I stopped by the local Tru-Value and picked up a stick of the brownish stainless and white compounds along with two drill mounted buffing wheels. I had to work with a vice, so I covered the part of the blade I wasn't working on with many layers of paper towel then clamped it firmly in the vice. Here's where it gets tricky.
I'm no rocket scientist, but being very, VERY careful to keep the drill's rotation aimed at the edge (with the edge, never against it - if you know what I mean) I was able to polish out all my sanding marks with the stainless compound very quickly. I used the higher speed setting and only used about half 'throttle'. I also positioned myself where I had a firm grip and absolute control over the tool and the wheel. The vise is one of those that rotates, so positioning was made easier.
I could not buff perpendicular to the blade and reach into the hollow, so an angled attack was necessary - AGAIN - making sure rotations always fell away from the edge!
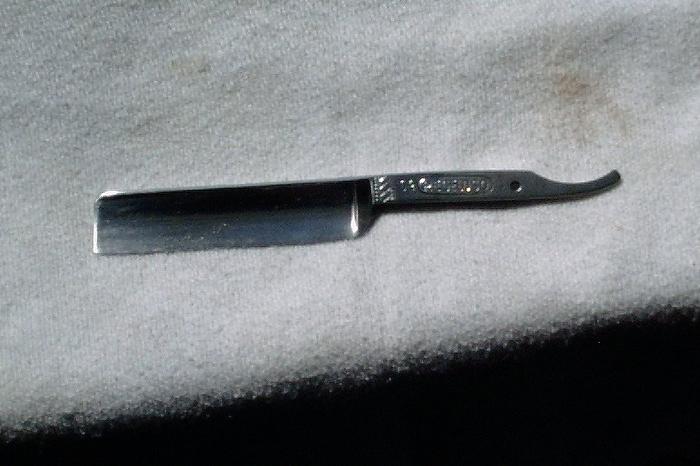
The same technique was used with the white finishing compound and in about an hour I had a near mirror finish along the entire lenth of the razor - first working on one end, then the other.
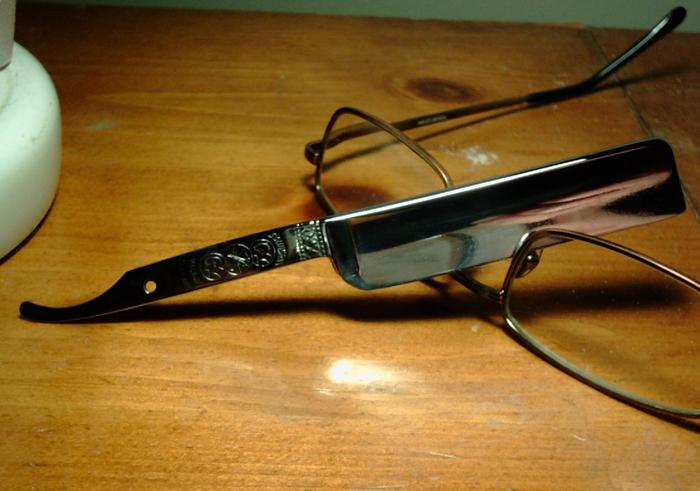
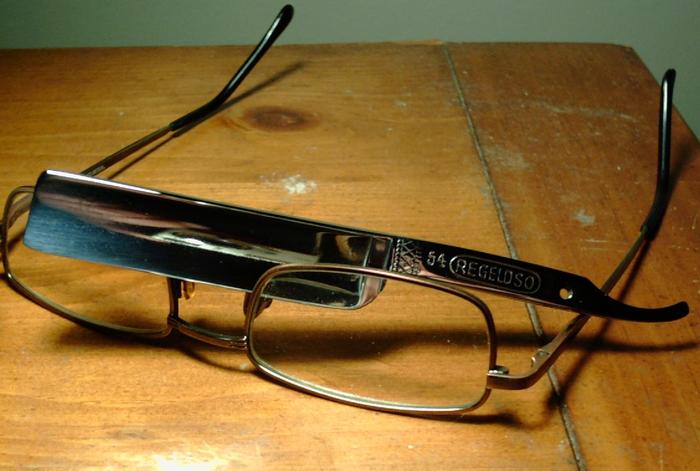
There are a few scars that will remain with this razor, but we're miles ahead of where we started.
Here are two poor images, but will hopefully post some good ones as we progress through the scales installation. I will probably opt for some inexpensive premade replacement scales. I have my eye on some fairly nice ones.
My polishing cloth left a little to be desired on the end there... More Bleach in the laundry next time!

Last edited by tonycraigo; 05-12-2011 at 09:25 AM.
Nphocus likes this.


 Reply With Quote

