
Results 1 to 9 of 9
Thread: Finishing Burr Walnut
 LinkBack URL
 About LinkBacks
-
09-05-2011, 11:46 AM #1Senior Member


- Join Date
- May 2011
- Location
- Gillingham, Medway, United Kingdom
- Posts
- 171
Thanked: 13 Finishing Burr Walnut
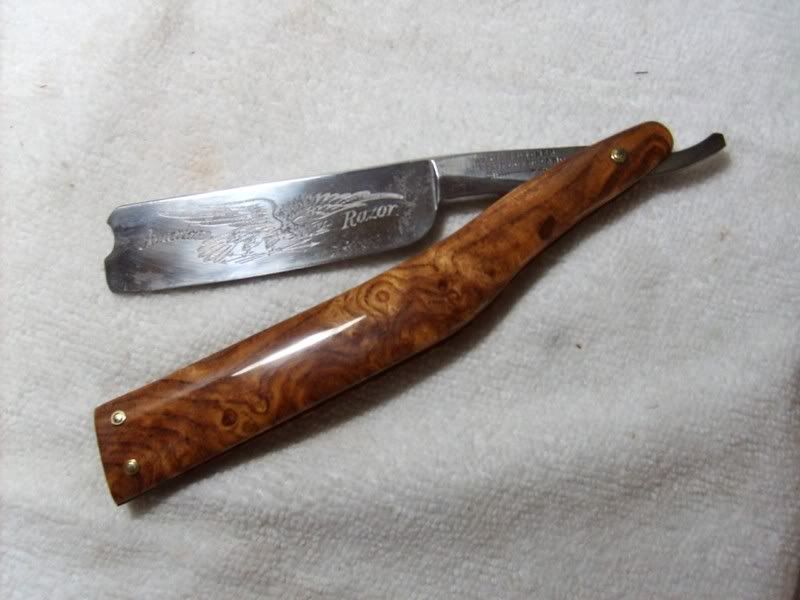
I have some nice burr walnut coming that I intend to use for making scales, however I'm pretty unfamiliar when it comes to working with woods.
Has anyone worked with this before, and have you any good tips?
I would like to do this beautiful wood justice, and really make it 'pop', but it will also need substantial sealing for use with water everyday - how can I best achieve this as a beginner?
I'm not going to know until I have the wood in my hand if it will require much staining (if any), but any advice with this also would be appreciated, especially in relation to how it affects any sealing coats.
I am familiar with resins to some extent, as I work with fibreglass fairly regularly.
Can many coats of a spray lacquer be used?
Are there any methods I should avoid when using this wood?
All advice appreciated guys
Thanks
Paddy
-
09-05-2011, 09:21 PM #2Senior Member

- Join Date
- Aug 2009
- Location
- Butte, Montana
- Posts
- 184
Thanked: 60
I like using Tru Oil finish on walnut. It was developed for use on walnut gun-stocks and maximizes beauty and durability of the wood. I've never been a fan of stains and surface coatings, as I feel they obscure the color and texture of the wood.
-
09-05-2011, 11:35 PM #3
An oil such as Mahoney's Walnut oil, if fresh, and other oils which will polymerize (harden)are nice for solid woods.
##1 buy stabilized wood or you will have the following hassle.
A lot of work to get a good even burl scales using un-stabilised wood. the burl, by nature, has voids and cracks caused by bugs and fungus.. Some folks glue it to a backing material and others go through the following hassle!
Those dark spots are filled voids from bugs and natural drying.
For burl walnut or other "un-stabilised wood:
After cutting it to about 1/16th" oversize thickness, long and wide enough for more than two scales, then soak one side with "thin" CA super glue and let set for a day. Then do the same to the other side.
After that you can start sanding with about 100 grit to get to near thickness.
Soak each side again because you will probably find voids. At this point, decide whether filling the voids would make the piece look crummy. If so start another piece, If not, then continue sanding till almost at the proper thickness. Then CA soak again and wet sand the surfaces.
Then and only make the board into two pieces and double back tape them to cut the scale shape over size and then dry sand to the final shape. Then drill them while still stuck together. Remove them from each other and re-CA the edges. Then you may wish to contour the edges and surfaces. Yup..another Ca or two after that. Then Ca the whole scale;wet sand and polish before assembly.
I cut the wedge oversize and finish it to size at pre-assembly. Then again at final assembly and CA the ends of the scales and the wedge and wet sand and polish!
About a three day process.
Have fun! Remember, it is a learning experience! Be yourself; everyone else is already taken.
- Oscar Wilde
-
09-06-2011, 01:23 AM #4At this point in time...


- Join Date
- Jun 2007
- Location
- North Idaho Redoubt
- Posts
- 27,053
- Blog Entries
- 1
Thanked: 13249
Sorta hard to answer correctly as both of the guys above are right

Walnuts for me are usually a Tung oil or the Tru-oil as it works great, -BUT- like Geezer said if it is a Burl I tend to go the CA route for strength..
You are really the only one that will know for sure as the wood is in your hands... You can also stabilize the wood yourself if you really want to have an adventure....
-
09-06-2011, 06:48 AM #5Senior Member
- Join Date
- May 2011
- Location
- Gillingham, Medway, United Kingdom
- Posts
- 171
Thanked: 13
Well I'm always up for a challenge ....
What is the process involved in stabilizing the wood? I heard it could have to do with some form of vacuum treatment, which is something I can do if required.
And thanks for the replies guys, I have taken that info on board (no pun intended) and appreciate you taking the time to respond.
Cheers
PLast edited by PaddyX21; 09-06-2011 at 07:08 AM.
-
09-06-2011, 12:04 PM #6Senior Member
- Join Date
- May 2011
- Location
- Gillingham, Medway, United Kingdom
- Posts
- 171
Thanked: 13
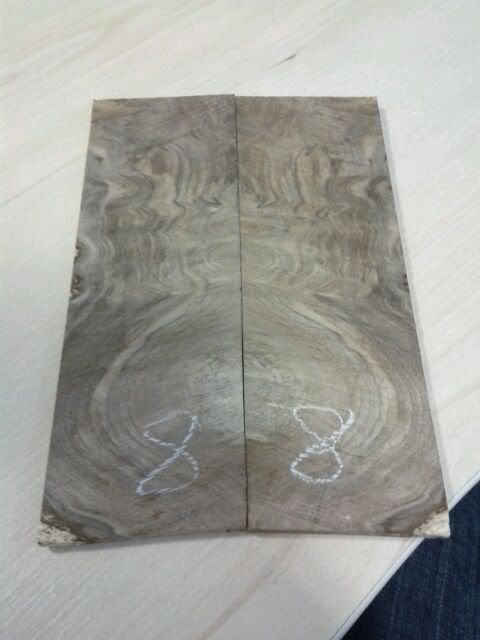
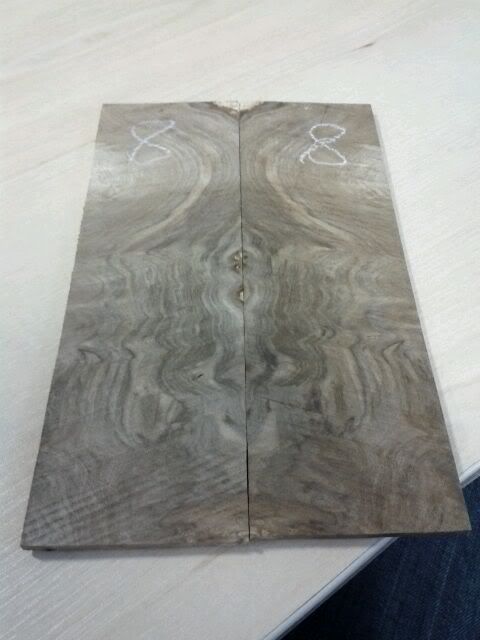
It has arrived now, I should be able to get two sets of scales from it, and pictures don't do it justice unfortunately - especially when taken with a mobile phone!
-
09-06-2011, 03:36 PM #7
Very nice wood. It looks to be quite dense and free of large voids. It will make a nice "bookmatch" set or two of scales. If you have two of the same style razor, the pair in a box or in you shave den would be winners.
Thanks!Be yourself; everyone else is already taken.
- Oscar Wilde
-
09-07-2011, 06:58 AM #8Senior Member
- Join Date
- May 2011
- Location
- Gillingham, Medway, United Kingdom
- Posts
- 171
Thanked: 13
That's just feeding my RAD! Originally Posted by Geezer

Now I'll have to get a second of one of the razors I already have, I'll just HAVE to
-
12-21-2011, 03:27 PM #9Senior Member
- Join Date
- May 2011
- Location
- Gillingham, Medway, United Kingdom
- Posts
- 171
Thanked: 13
Well a first set are starting to come together
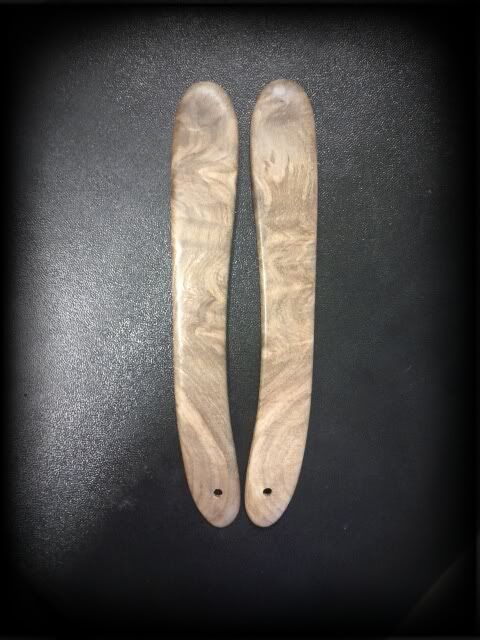
Decided to stick to classic lines for this wood, and I have a fairly large Bengall that may find it's way into them before long!
Still not made up my mind on the finish, but highly tempted to go the CA route.
Made completely by hand, no power tools.
The grain matches considerably better on the next piece of wood, so might make up a second set before long


 Reply With Quote


