
Results 1 to 8 of 8
 2Likes
Thread: A new jacket for my Dorko 8/8
 LinkBack URL
 About LinkBacks
-
11-20-2011, 01:50 PM #1Senior Member


- Join Date
- Sep 2009
- Location
- Sunny Miami
- Posts
- 860
Thanked: 1538 A new jacket for my Dorko 8/8
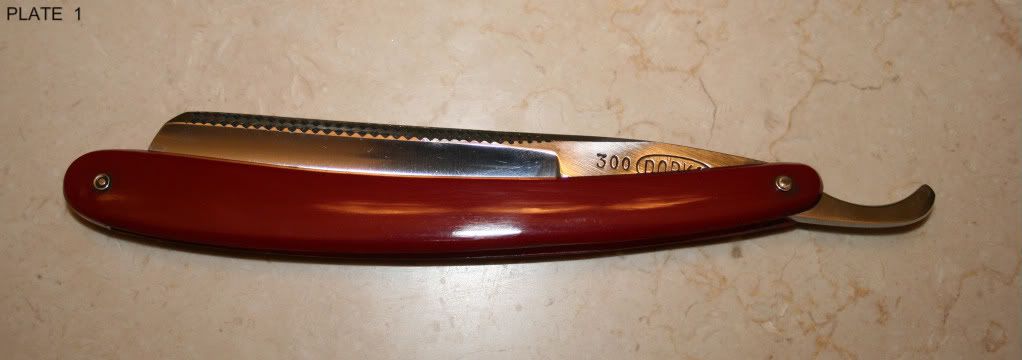
Some time ago I decided to put a new jacket on my Dorko 8/8 silver steel. This is a sweet shaver that should be in my rotation until is passed on to my beneficiaries; anywho, as you can see the scales are way too small for the blade.
A new jacket for my Dorko 8/8
Some time ago I decided to put a new jacket on my Dorko 8/8 silver steel. This is a sweet shaver that should be in my rotation until is passed on to my beneficiaries; anywho, as you can see the scales are way too small for the blade.
See Plate 1
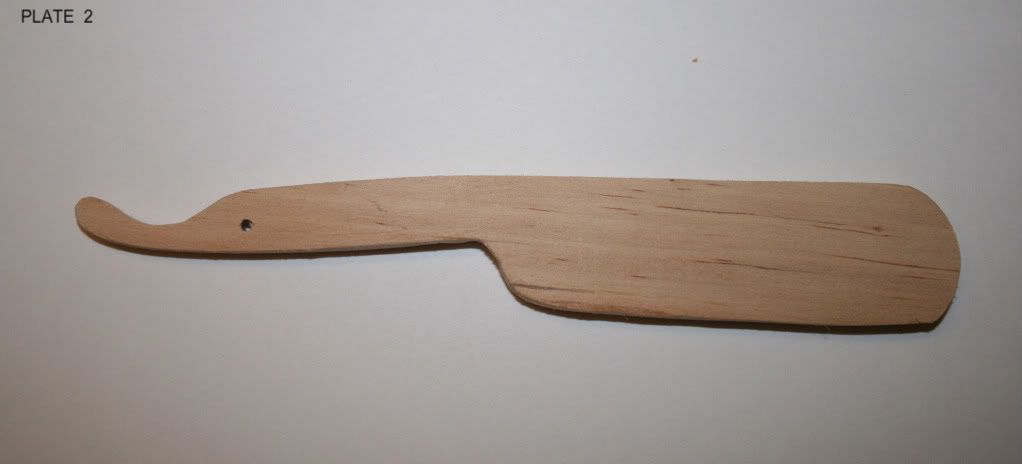
I learned a whole lot when I made the first set of scales for the W&B, one of the things I learned was not to use the metal blade to take measurements and fittings, so I made one out of wood true to scale for this job.
See Plate 2
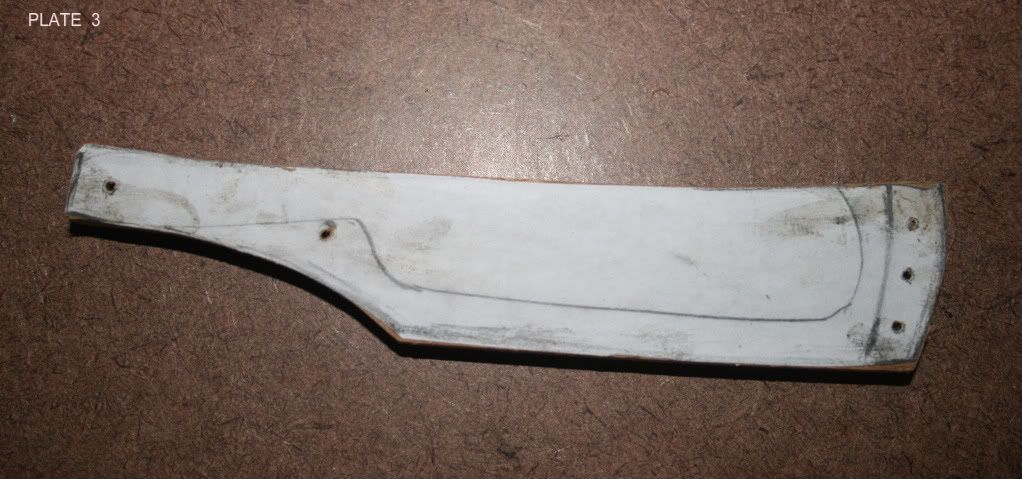
There is something about Teak wood that I like a lot, it is a hardwood used in patio furniture and on boat decks, it is very resistant to rot and easy to care for. I did a draw free hand of the scales and cut a template, I departed from the cookie cutter banana blade design and created something that I had been thinking about for a long time. I pasted the template onto the Teak wood blanks and took it to the belt sander…I know is not pretty; it is work in process guys.
See Plate 3
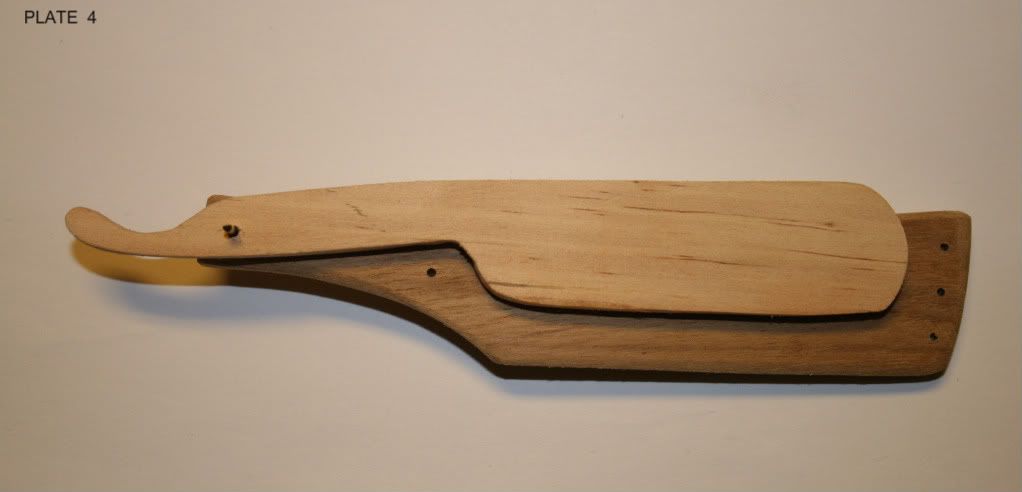
Well, here it is after a few trips to the belt sander, it needs more work but little by little is getting there…see how handy is that dummy blade, no danger of getting cut or damaging the blade.
See Plate 4
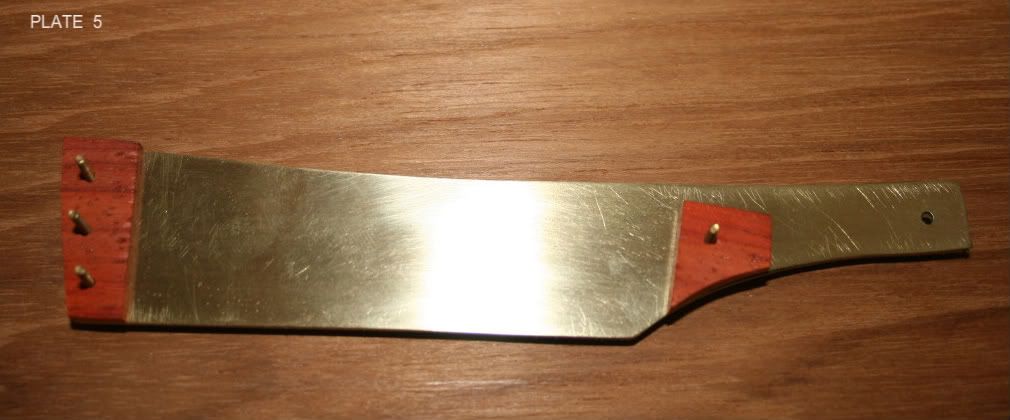
I decided to make liners for the wood scales in order to avoid any warping down the road; so I lined them with .010” brass sheet; I know I could have lined them with .015” brass, but I thought it would make the scales way too heavy. The spacer and Tang-rest are made of African Padouk wood. I know, I have to buff the scratches out with 0000 steel wool ….no problem.
See Plate 5
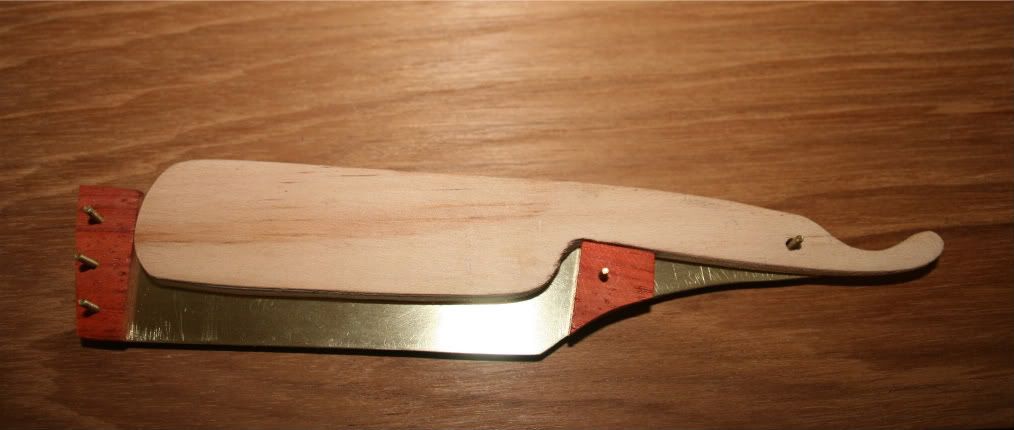
Here is a mock up of the entire project with the “real” blade. Next week, I will be putting everything together, buffing, cleaning and putting more Tung oil on the Teak…I will post final photos then. HOG
See Plate 6
-
11-20-2011, 02:08 PM #2Eagle-eyed


- Join Date
- Jan 2011
- Location
- Slemmestad, Norway
- Posts
- 1,535
Thanked: 418
Nice work, looks very good!
Need help or tutoring? Check out the .
Rune
-
The Following User Says Thank You to Zephyr For This Useful Post:
Hogrider (11-21-2011)
-
11-20-2011, 10:41 PM #3the deepest roots


- Join Date
- Feb 2011
- Location
- Seattle
- Posts
- 1,221
Thanked: 169
Did the brass liner not cause a balance issue, especially with the large design of the scales? Cool design, I'm a huge fan of anything but the "banana" style.
-
The Following User Says Thank You to TwistedOak For This Useful Post:
Hogrider (11-21-2011)
-
11-20-2011, 11:30 PM #4I'm on The Straight Road


- Join Date
- Sep 2011
- Location
- Toronto
- Posts
- 1,371
Thanked: 183
Really nice work. Please post more pics

-
The Following User Says Thank You to jdto For This Useful Post:
Hogrider (11-21-2011)
-
11-21-2011, 12:43 AM #5Senior Member
- Join Date
- Sep 2009
- Location
- Sunny Miami
- Posts
- 860
Thanked: 1538
I have stropped the blade on a horsehide strop which has plenty of draw and I found no problem handling the blade through the stropping process; had I used .015 brass plate which is heavier I might have had an issue with balance and weight. HOG Originally Posted by TwistedOak

Last edited by Hogrider; 11-21-2011 at 03:03 PM. Reason: darn typo
-
11-21-2011, 12:47 AM #6Senior Member
- Join Date
- Sep 2009
- Location
- Sunny Miami
- Posts
- 860
Thanked: 1538
Here you go jdto. Originally Posted by jdto
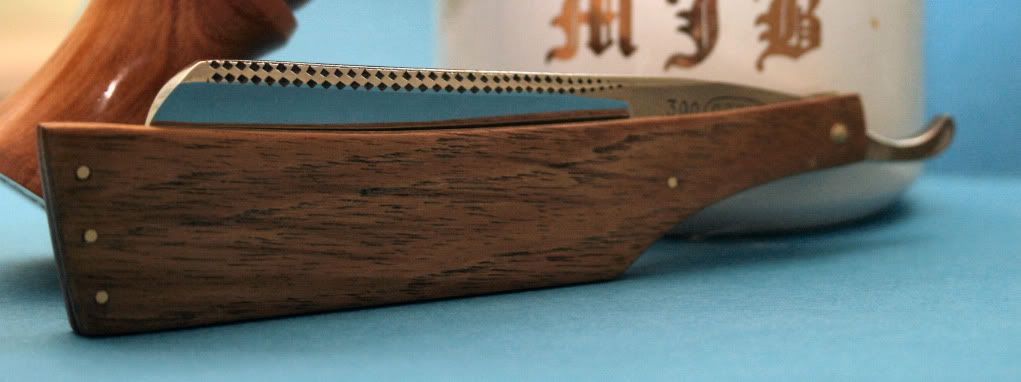
I have glued the spacer and the tang rest as well as the brass rods with CA glue. The only part that will be pinned the usual way is the pivot end of the razor. The tang rest as well as the three pins holding the spacer looks like the rivets in a knife handle. I have sanded and polished everything with 4-0 steel wool; I want to apply several coats of Tung Oil varnish which means that after a coat of Tung Oil is applied it needs to cure for 24 hours; then sand the scales with 4-0 wool and apply another coat. After the photo was taken, I noticed that the rivets in the spacer end of the scales need to be sanded down some more, I will do that with a diamond file that I have; then sand with the steel wool and apply the varnish. HOG

-
The Following User Says Thank You to Hogrider For This Useful Post:
jdto (11-21-2011)
-
11-21-2011, 02:20 PM #7Senior Member

- Join Date
- Jul 2011
- Location
- Tyler, TX
- Posts
- 145
Thanked: 9
Nice job HOG. I like that you went with a unique design. Looks great!
JonJon
Just because it's sharp, does not mean it's smooth.
-
The Following User Says Thank You to Raithskar For This Useful Post:
Hogrider (11-21-2011)
-
11-21-2011, 03:00 PM #8I'm on The Straight Road
- Join Date
- Sep 2011
- Location
- Toronto
- Posts
- 1,371
Thanked: 183
Beautiful work, Hogrider. That teakwood is great.
-
The Following User Says Thank You to jdto For This Useful Post:
Hogrider (11-21-2011)


 Reply With Quote