
Results 1 to 7 of 7
Thread: Golden Beauty Restoration
 LinkBack URL
 About LinkBacks
-
12-18-2011, 10:34 PM #1Junior Member


- Join Date
- Dec 2011
- Location
- Nova Scotia
- Posts
- 23
Thanked: 1 Golden Beauty Restoration
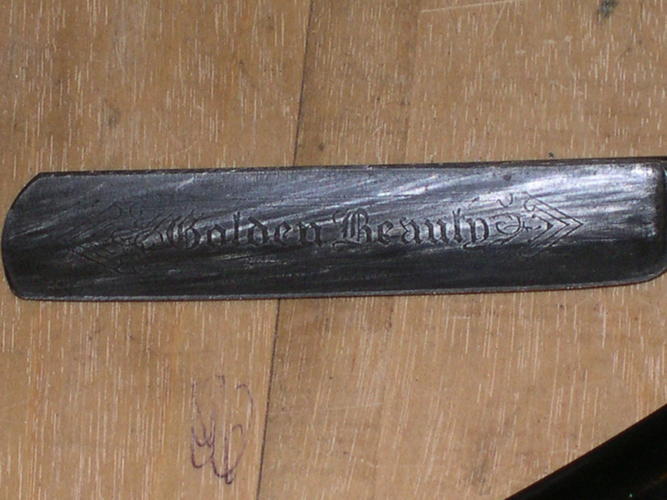
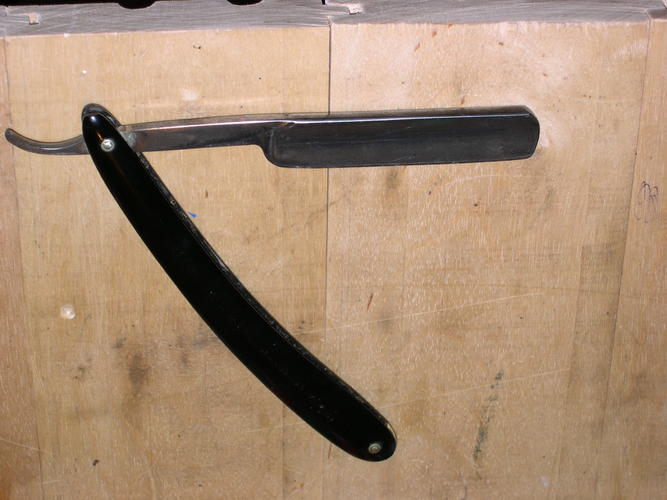
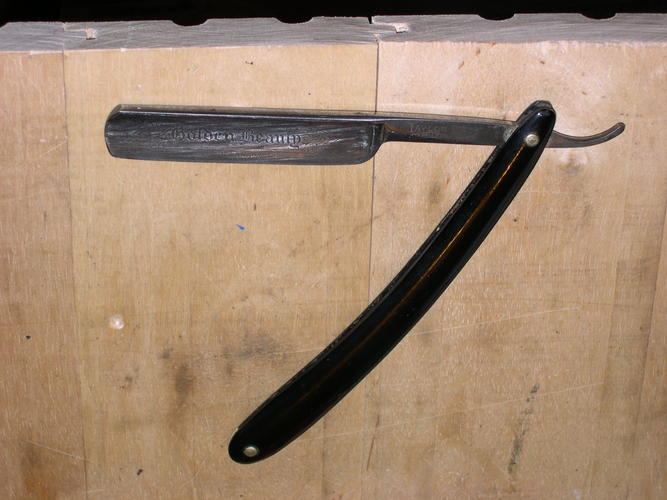
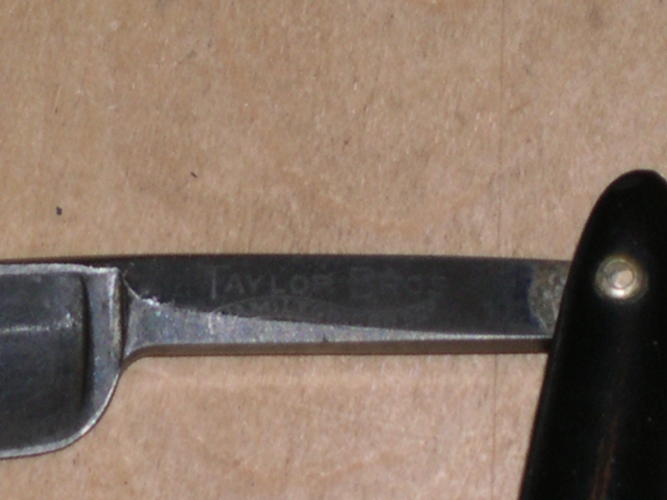
 Golden Beauty/ no pict yetI only bought it cause it was Canadian eh. Just hoping I can restore the blade to make it look prettier. It has GOLDEN BEAUTY on the blade, and am wondering how I polish/clean the blade without damaging the name.
 Attached Images
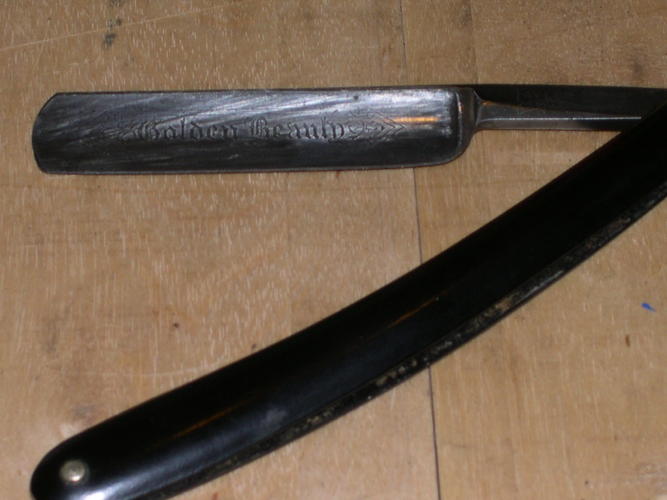
-
12-18-2011, 10:42 PM #2Senior Member


- Join Date
- Mar 2011
- Location
- Ohio
- Posts
- 2,786
Thanked: 421
Is the etching deep? If it is, start with just some metal polish and a rag. If that doesn't work to your satisfaction, use some #0000 steel wool with the metal polish. I find it always best to work backwards when trying to clean a blade with etching.
-
The Following User Says Thank You to Theseus For This Useful Post:
scaredstraight (12-19-2011)
-
12-19-2011, 04:38 AM #3Junior Member
- Join Date
- Dec 2011
- Location
- Nova Scotia
- Posts
- 23
Thanked: 1
I would have to look at it closely, but for the most part, the scratches seem to be very minimal. If I was not able to get the scratches out, that would not deter me from trying to use it. I have been looking for maas polish, but have no luck around here in Nova Scotia. May have to find another kind. Thanks for the info
-
12-19-2011, 05:07 AM #4Senior Member

- Join Date
- Sep 2009
- Location
- Ottawa Canada
- Posts
- 656
Thanked: 111
If there is a Homehardware store near you they might stock it, That is where I get mine here in Ottawa.
-
12-19-2011, 08:35 AM #5Senior Member

- Join Date
- Jun 2007
- Location
- Belgium
- Posts
- 298
Thanked: 312
Scaredstraight;
The pictures aren't great, but from what I can see it looks like somebody used a bit of sandpaper to scuff off whatever light coating of rust or corrosion was on the side of the blade in order to (in his mind) increase the sales worth of the razor. That's pretty sad, but all is not lost. I think you can try to make the best of a bad situation as follows:
If those scuff marks are scratched in (and I cannot tell by the photos) you will need to sand them away. Start with some very really fine grades of wet-r-dry sandpaper using some sort of a shaped backing that matches the curvature of the hollowing so that the sandpaper does not bend or dip into the etching and then start working away very carefully to bring up the polish of the blade. Remember to always try to sand perpendicular to any scratches which already exist. Use some common sense here and keep your eye on your work. Starting with an extremely fine grade of sandpaper will prevent you from introducing any scratches that are worse than what is already there. If you think the results of your very finest sandpaper are too fine, then back off to a coarser grade and try it again. Once you find that the original scratches are being replaced by your own you can proceed to sand back through to the finest grades and then polish.
The point is - and I cannot stress this enough - that you want to avoid any sanding or polishing operations which will either round off the corners of- or dip down into that etching. That will destroy it. Even so, if the etching is not deep enough (and I cannot judge from the photos) you may not be able to totally remove those bright 'scuff marks' without doing damage.
If the sanding operations are successful and you can bring the razor to a reasonable sanded finish (at least 2000 grit) then you could go for the polish. Of course, if the razor is somewhat better than the photos seem to show you could try to jump right in on the polishing worK.
I'm going to be a bit radical here and suggest you do not reach for the nearest stitched cloth buffing wheel. These will also reach down into the etching and it will tend to ruin what remains, most especially if you have reduced the depth of that etching much by your sanding.
At very least try to use a series of hard felt buffs for the polishing. But beware! In this case you would want the diameter of the felt buff to exactly - and I mean exactly - match the radius of the hollowing on the blade. If you can arrange for this then in theory the polishing wheel would be brushing along the surface of the hollowing without having the same tendency to dip into the hollows as would either a smaller diameter wheel or a soft stitched cloth wheel.
If you cannot find hard felt buffs of the correct diameter (and I admit this might be difficult) you could also contemplate making your own buffs of stacked disks of some other material mounted on a screw-and-post mandrel. I might suggest trying balsa wood or hard leather. A bit of fiddly work, I know, but if there is no other answer it would have to serve. Natrually, you will have to make enough of these little wheels so that you can replace them when they become clogged or when you change polishing grits.
A last suggestion is that if you don't feel up to the fussiness of making the tiny wheels you can always elect to polish your razor by hand (ouch!). Reach for some stiff leather with an appropriate shaped backing, spread your polishing compound onto the leather and then start rub-rub-rubbing like a mediaeval craftsman. Resist any urge to reach for cloth as a polishing compound holder until the very end since, once again, it will have more of a tendency to reach down into the etching.
To make your polishing compound hold to the leather, do as follows: Grab a knife and then carve small bits of polishing compound off into something like a small jam jar. Pour in either Naptha (sometimes known as Benzine or Lighter Fluid) or Lacquer Thinner and stir and stamp it around with a wooden coffee stirrer (sometimes known as a popsicle stick) until the waxes holding the compound together have dissolved and you have something which is a bit like a paste slurry. It should be spreadable now and you can make it hold reasonably well to your polishing surface.
Anyway, these are the best suggestions I can come up with just now and - sadly - it is long work, measured in hours, very fussy and there are no guarantees. Good Luck! Let us know what happens.
- Ignatz
-
The Following User Says Thank You to ignatz For This Useful Post:
scaredstraight (12-19-2011)
-
12-19-2011, 04:18 PM #6Poor Fit
- Join Date
- May 2010
- Posts
- 4,562
Thanked: 1263
You could try some Mothers Mag and aluminum polish and see if that works. Its pretty mild
-
12-19-2011, 10:25 PM #7Junior Member
- Join Date
- Dec 2011
- Location
- Nova Scotia
- Posts
- 23
Thanked: 1
Yeah, the pictures are not the best, but what looks like scratches are not. For some reason, they are bare spots in the tarnish. Not sure why they are all in that direction, and looking like scratches. I will start with the polish, and get a good look at the metal once clean. Sometimes it is hard to get good pictures. I appreciate the long resto info Ignatz. Hoping to get polish on it tomorrow. Once I get it cleaned up a bit, I will try to get pictures posted.


 Reply With Quote