Results 1 to 9 of 9
Like Tree4Likes
  • 3 Post By Voidmonster
  • 1 Post By 32t

Thread: An experiment in resurrecting the ancient Horn scale animal.

  1. #1
    Captain ARAD. Voidmonster's Avatar
    Join Date
    May 2011
    Location
    Pacifica, CA
    Posts
    2,474
    Thanked: 2226

    Default An experiment in resurrecting the ancient Horn scale animal.

    I end up with a lot of very old horn scales that I'd really rather fix than throw out. But some of them have huge chunks missing. I've been thinking about that and how to fix it, and here's my first experiment.

    Begin with scales.
    Name:  IMG_0272.jpg
Views: 603
Size:  33.9 KB

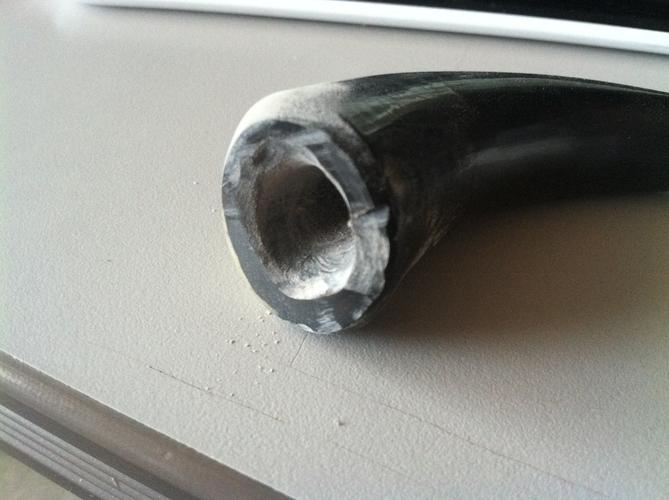
    This was an old set that I chose because A) I didn't have a razor to go in them, B) they present a worst-case scenario in that they've got a significant amount of translucency and C) they're in bad shape.

    I made them worse off by using a burr head on the Dremel and gouging a huge chunk out.

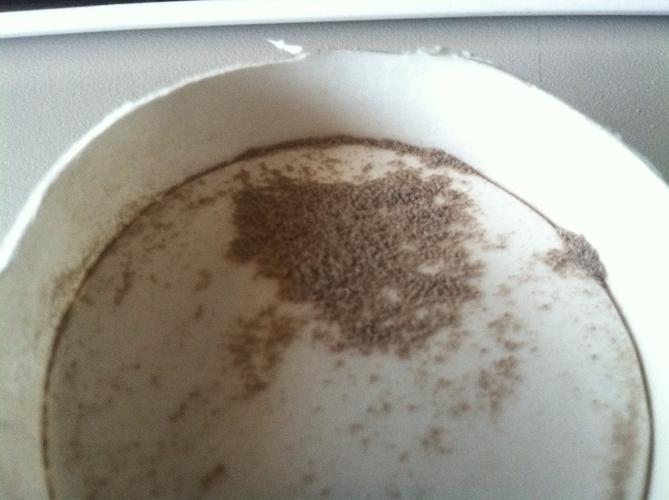
    Next, I made some horn powder.
    Name:  IMG_0274.jpg
Views: 512
Size:  31.9 KB
    Name:  IMG_0276.jpg
Views: 453
Size:  35.5 KB

    (Thanks for the donor horn, Ogershok!)

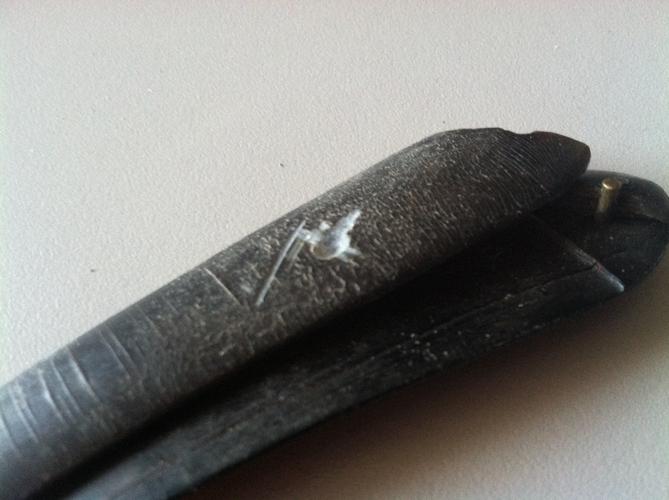
    Next I poured the powder into the gouge, dripped CA glue on that, then sprinkled more horn powder on top until everything got soaked up.
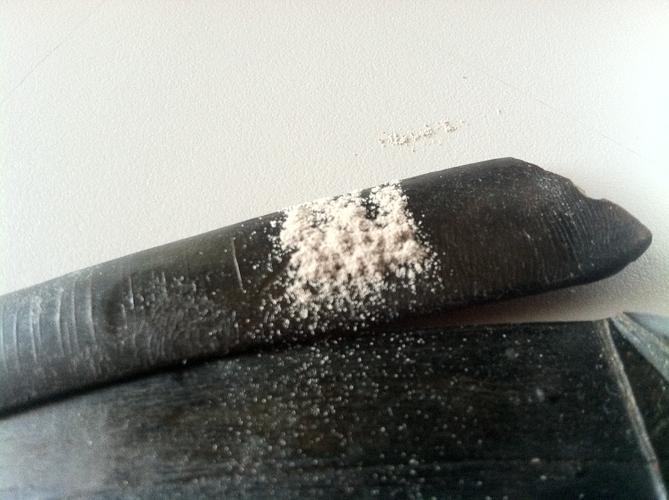
    Name:  IMG_0279.jpg
Views: 521
Size:  44.0 KB

    From there it was just a matter of doing normal CA coats, like you'd do on wood. (coat,sand,coat,sand,coat,sand,coat,and a one and a two, come on, everybody dance!)

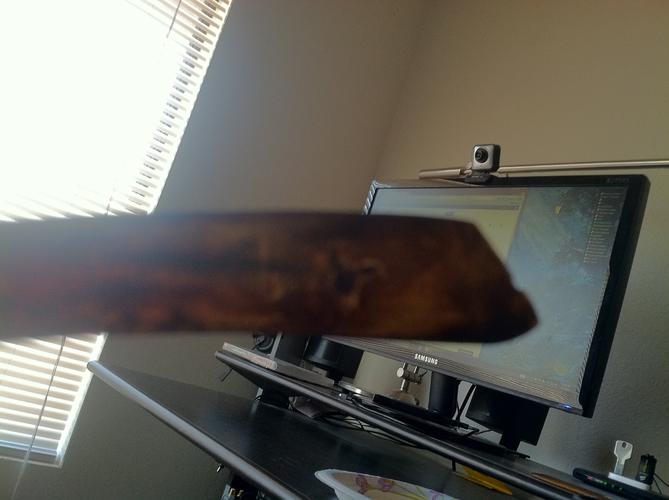
    The final result.
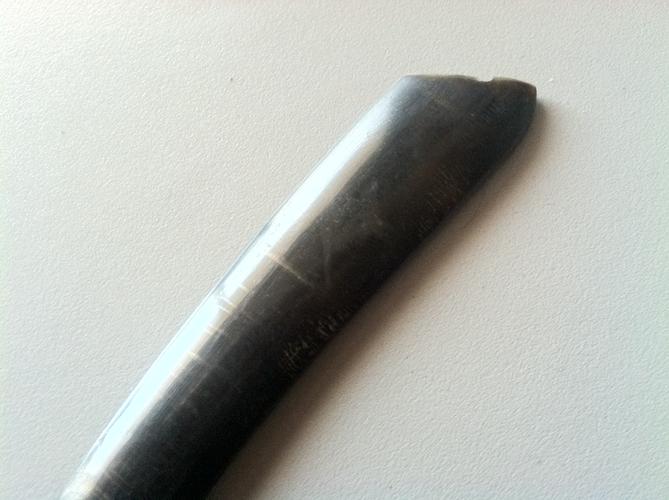
    Name:  IMG_0283.jpg
Views: 448
Size:  34.5 KB
    Name:  IMG_0285.jpg
Views: 427
Size:  28.9 KB

    I did a sloppy job on the finish because I'd already gotten my answer. This does work, but not quite as well as I'd like. Later I'll experiment with blending between regions better. Another technique I want to try is using bits of hair, which if I'm cunning, should let me mimic the warp and weft of the growth pattern.

    In the meantime, this is better than nothing.
    str8fencer, sharptonn and JP5 like this.
    -Zak Jarvis. Writer. Artist. Bon vivant.

  2. The Following 3 Users Say Thank You to Voidmonster For This Useful Post:

    Martin103 (03-03-2012), str8fencer (03-03-2012), Zephyr (03-02-2012)

  3. #2
    Senior Member blabbermouth
    Join Date
    Jan 2011
    Location
    Roseville,Kali
    Posts
    10,432
    Thanked: 2027

    Default

    I do something similar with Ivory,mix up a glob of clear epoxy,mix with Ivory dust,use as a filler.

  4. #3
    Captain ARAD. Voidmonster's Avatar
    Join Date
    May 2011
    Location
    Pacifica, CA
    Posts
    2,474
    Thanked: 2226

    Default

    Quote Originally Posted by pixelfixed View Post
    I do something similar with Ivory,mix up a glob of clear epoxy,mix with Ivory dust,use as a filler.
    Yeah, it was reading about the ivory repair technique that made me think of this.

    I suppose if I'd matched the donor horn to the scales better I would've gotten a better result.
    -Zak Jarvis. Writer. Artist. Bon vivant.

  5. #4
    32t
    32t is online now
    Senior Member blabbermouth 32t's Avatar
    Join Date
    Oct 2010
    Location
    50 miles west of randydance
    Posts
    9,663
    Thanked: 1354

    Default

    Not exactly the same but here is what I did for a bad ding.

    http://straightrazorpalace.com/custo...h-attempt.html

    Tim
    Voidmonster likes this.

  6. #5
    Senior Member dirtychrome's Avatar
    Join Date
    Mar 2010
    Location
    Arizona
    Posts
    652
    Thanked: 408

    Default

    I'll do similar. I use epoxy since like slower set time, with a little more filling ability. I also add a little black due or pigment to the epoxy, then add my horn dust. It is not as white of gray that way. Leaves a darker black, with a good match of texture to the rest of the horn.

    When a section of horn broken of, I'll cut my donnor horn section to fit like a puzzle piece. I'll mix the horn slurry with pigment and glue the section on. It is not an invisible seam, but comes as a clean patch.

  7. #6
    At this point in time... gssixgun's Avatar
    Join Date
    Jun 2007
    Location
    North Idaho Redoubt
    Posts
    27,029
    Thanked: 13245
    Blog Entries
    1

    Default

    Brownells.com

    Acra-glass Gel, in Brown or Black

    Fill, sand, polish voila'

  8. The Following User Says Thank You to gssixgun For This Useful Post:

    Voidmonster (03-03-2012)

  9. #7
    Captain ARAD. Voidmonster's Avatar
    Join Date
    May 2011
    Location
    Pacifica, CA
    Posts
    2,474
    Thanked: 2226

    Default

    Quote Originally Posted by dirtychrome View Post
    I'll do similar. I use epoxy since like slower set time, with a little more filling ability. I also add a little black due or pigment to the epoxy, then add my horn dust. It is not as white of gray that way. Leaves a darker black, with a good match of texture to the rest of the horn.

    When a section of horn broken of, I'll cut my donnor horn section to fit like a puzzle piece. I'll mix the horn slurry with pigment and glue the section on. It is not an invisible seam, but comes as a clean patch.
    It was getting this razor that got me off my butt to finally try this fix. There are a couple dings out of the pressed ornament that'll need filling in. For that one, I'll probably be going the epoxy route, or the Acra-gel Glen linked to. Can't easily shape the horn-dust/CA mix.
    -Zak Jarvis. Writer. Artist. Bon vivant.

  10. #8
    Captain ARAD. Voidmonster's Avatar
    Join Date
    May 2011
    Location
    Pacifica, CA
    Posts
    2,474
    Thanked: 2226

    Default

    Quote Originally Posted by gssixgun View Post
    Brownells.com

    Acra-glass Gel, in Brown or Black

    Fill, sand, polish voila'

    Awesome! Do you have any pics of it in use?

    I am a fan of removing steps to achieve the same results. Especially steps that raise up a burning hair stink.
    -Zak Jarvis. Writer. Artist. Bon vivant.

  11. #9
    Captain ARAD. Voidmonster's Avatar
    Join Date
    May 2011
    Location
    Pacifica, CA
    Posts
    2,474
    Thanked: 2226

    Default

    I've continued to experiment with this, and as of tonight I think I've perfected the technique.

    The first change is that I now drip tiny amounts of CA into the cavity, put a dollop of horn shavings on, compress it, put another drop of glue, add more horn, more glue, wait and sand. This gets me really good, dark fill with just a few light speckles.

    But to make it really perfect (at least on black horn) I then brush on a few coats of India ink and then coat in CA. The end result is really sturdy and quite lovely. I'll get pictures up when I'm finished with the batch I'm working on.

    (getting escutcheon plates off and back on is a bit fidgety)
    -Zak Jarvis. Writer. Artist. Bon vivant.

Posting Permissions

  • You may not post new threads
  • You may not post replies
  • You may not post attachments
  • You may not edit your posts
  •