
Results 1 to 10 of 18
 6Likes
Thread: Stub Tail Restoration Project
 LinkBack URL
 About LinkBacks
-
03-05-2012, 03:18 PM #1Senior Member

- Join Date
- Jun 2011
- Posts
- 222
Thanked: 30 Stub Tail Restoration Project
So I am going to attempt to clean this one up. The blade has some bad chipping on the edge, but no cracks. I think I am going to sacrifice a bit of blade in doing this, but its worth a try before I end up throwing it away.
If the blade can be saved, the scales will be Peach tree burl - thank you to my cousin in Atlanta for the wood. I saved and cleaned the original domed washers and I will use a piece of original scale for a wedge.
More pictures to follow as work progresses.
-
03-05-2012, 05:43 PM #2Senior Member


- Join Date
- Sep 2011
- Posts
- 1,650
Thanked: 1341
IMHO those scales look like they're salvageable and would clean up very nice with some sanding and polishing. Or are they warped or broken?
-
03-05-2012, 05:52 PM #3Senior Member
- Join Date
- Jun 2011
- Posts
- 222
Thanked: 30
I wish they were salvageable - but they werent. They are brittle - very brittle. The scratches are actually deep into the material and there is some rot that has severly damaged the insides of the scales. I even considered sanding them down, filling all voids and spaces with CA and then coating over the entire scales to encapsulate them in CA for protection.
All of that changed when I drilled out the pins. The blade was kinda fused with the scale and it crumbled as soon as I went to seperate them. I kept the pieces and I could likely glue the scales back together - but its hardly worth it right now.
-
03-05-2012, 06:25 PM #4Senior Member
- Join Date
- Mar 2011
- Location
- Washington DC Metro Area
- Posts
- 468
Thanked: 114
Looks like a fun project to me. Good luck. Oh, and post lots of progress picures. We love progress pictures. :-)
Brian
-
03-05-2012, 09:08 PM #5the deepest roots


- Join Date
- Feb 2011
- Location
- Seattle
- Posts
- 1,221
Thanked: 169
 Originally Posted by jumbojohnny
 In this instance I wouldn't reuse the scales for wedge material if they're rotting and brittle. JMHO Originally Posted by jumbojohnny
-
03-06-2012, 04:56 AM #6Senior Member
- Join Date
- Jun 2011
- Posts
- 222
Thanked: 30
I would be inclined to agree, but there are two decent sections of material. I plan on soaking it in some oil and them sanding it to size. If it still seems to brittle to work with then I will go with something else. Originally Posted by TwistedOak
-
03-06-2012, 05:40 PM #7Member

- Join Date
- Jan 2012
- Posts
- 99
Thanked: 11
looks like there will need to be a little bit of elbow grease put into that guy, but hope you post some pics once you are done
-
03-07-2012, 01:42 PM #8Senior Member
- Join Date
- Jun 2011
- Posts
- 222
Thanked: 30
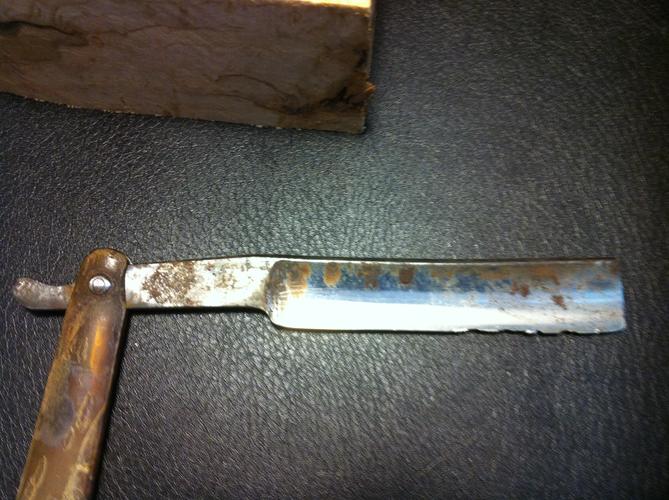
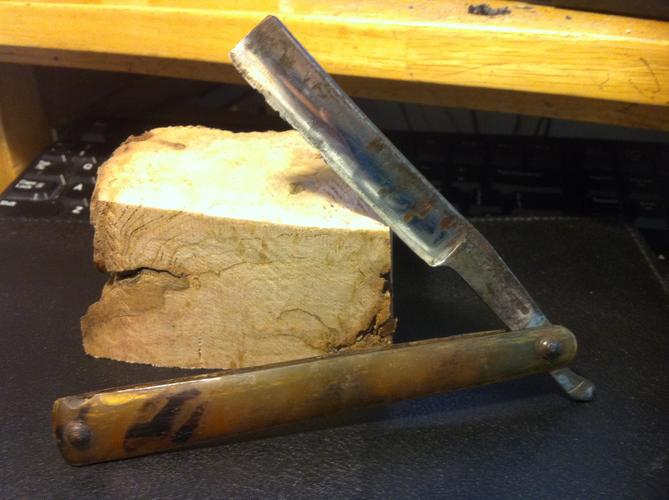
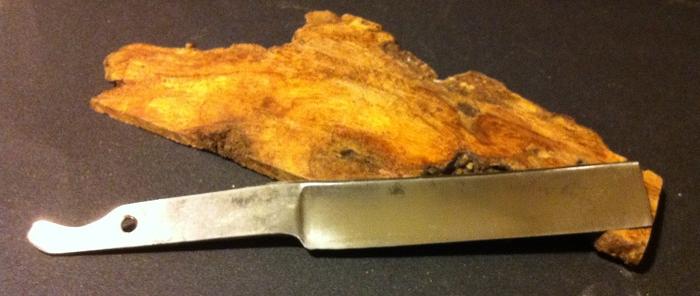
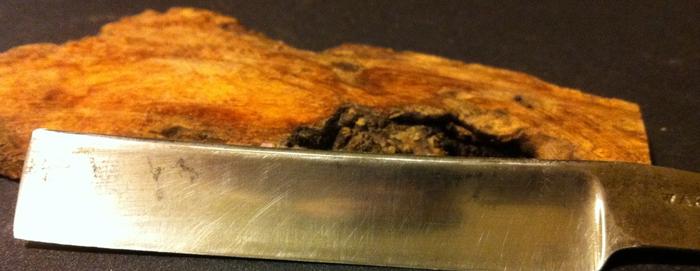
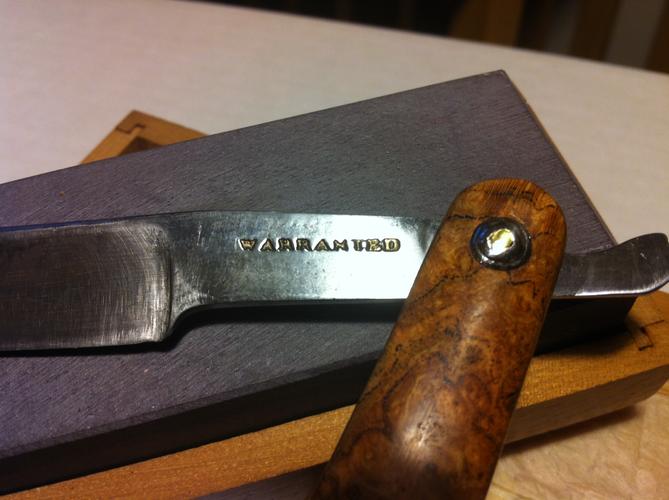
Here are some pictures of working progress:
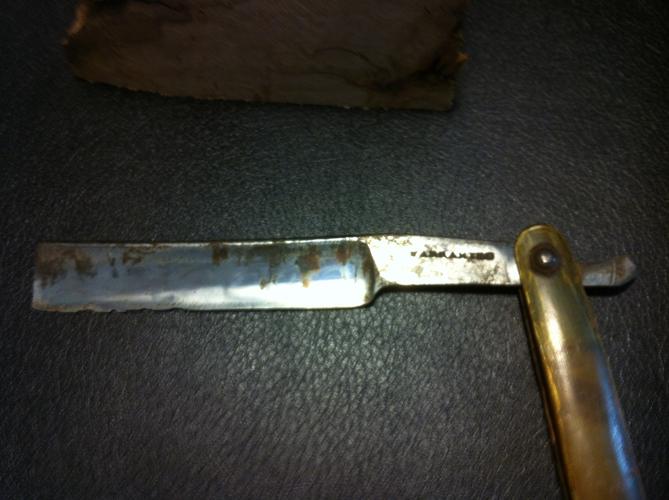
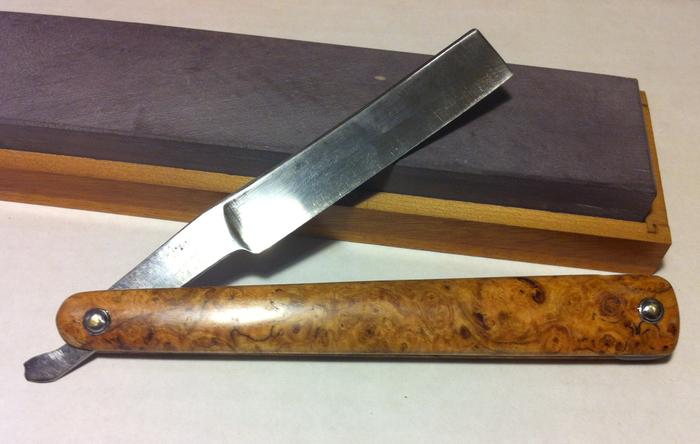
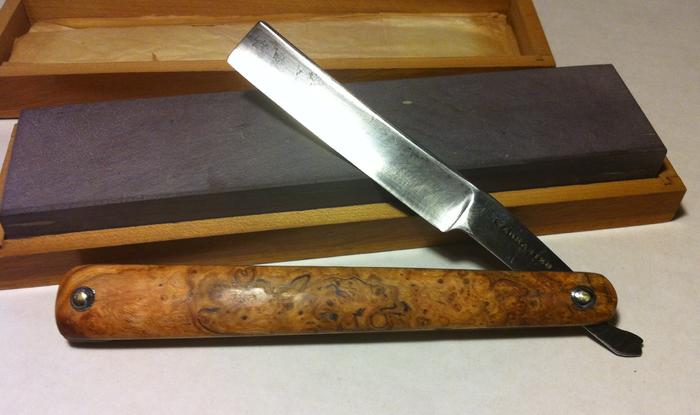
There is a soft spot by the heal, but it should be an easy fix. I have decided to stay with a satin finish rather than a mirror finish. I like the blade to show some of its age. There is some light black stains, but again I like them on this blade for the aged look. The WARRENTED stamp has some gold in the lettering, I just noticed this when taking pictures.

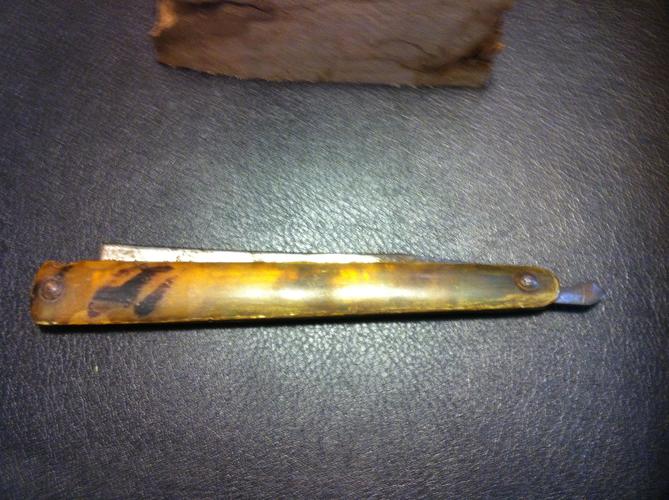
Here are the scales almost ready for some CA. Still need to sand down to 600 and 1000. I still need to think of wedge material, the piece I was going to use didnt meet my personal standards.
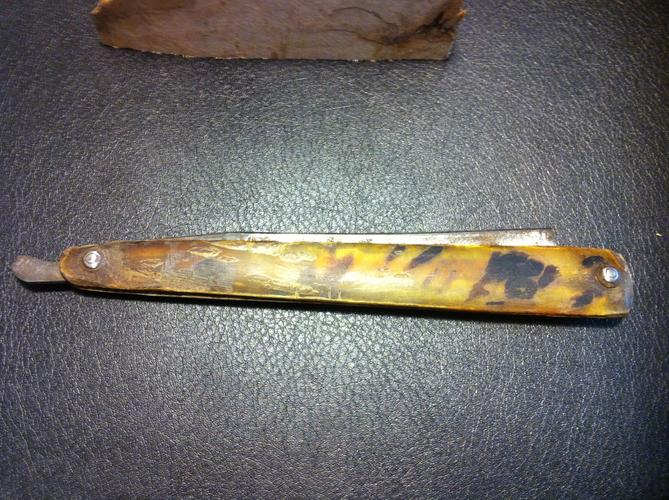
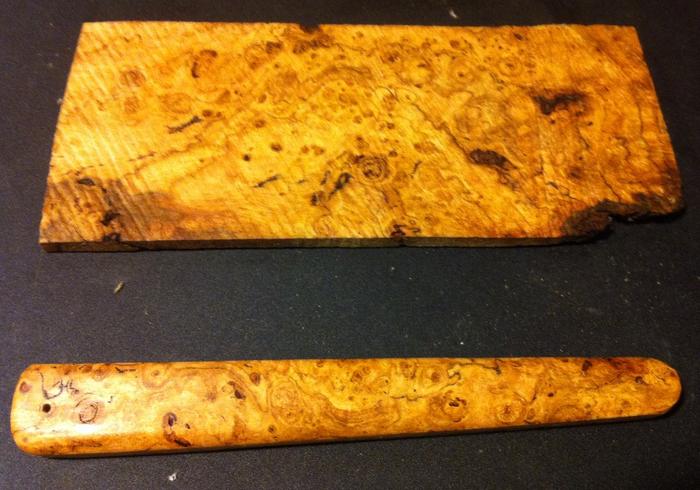
The slab and scales. The wood is peach tree burl - oddly enough the fruit tree burls that I have all look very much alike. Apple - Cherry - Orange & Peach
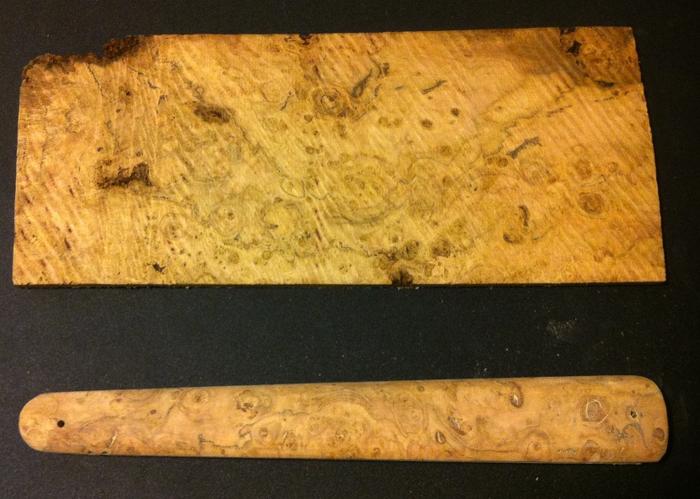
with a little bit of cleaner to show the grain better.
-
05-03-2012, 12:36 PM #9Senior Member
- Join Date
- Jun 2011
- Posts
- 222
Thanked: 30
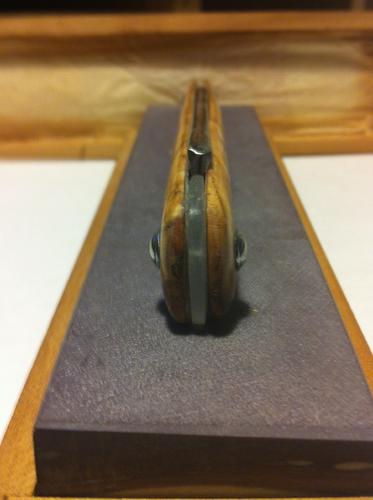
I finished this one a while back, I just loaded some photos as an update. The finished job (sort of finished, I am waiting on better spacer material). I tried to do a wedge for this one, but I liked the spacer better it is made of quartz crystal. As usual I apologize for the poor photos...Cameras still hate me.
-
05-03-2012, 02:41 PM #10the deepest roots
- Join Date
- Feb 2011
- Location
- Seattle
- Posts
- 1,221
Thanked: 169
very nice finished product. Where do you get those fruit tree burls?


 Reply With Quote