Results 1 to 10 of 18
Hybrid View
-
03-07-2012, 08:35 AM #1

Thanks! I wish I'd gotten better 'before' pictures, because it's hard to see some of the work I did (as in I know I did more fill-ins than I can currently find while looking at it up close with good light). I played around with knocking the finish down to satin using micromesh, but the blade isn't really having any of it. I might need to send it to someone that's got a buffer for proper cleaning. At some point before I got this razor, someone did a really lousy job cleaning it with a Dremel (or like tool). It's got telltale wandering patterns of ground-out metal as well as deep pitting. I tried getting it out with hand-sanding. My patience ran out.
However, I'm also thinking of fixing up this razor to the same level:
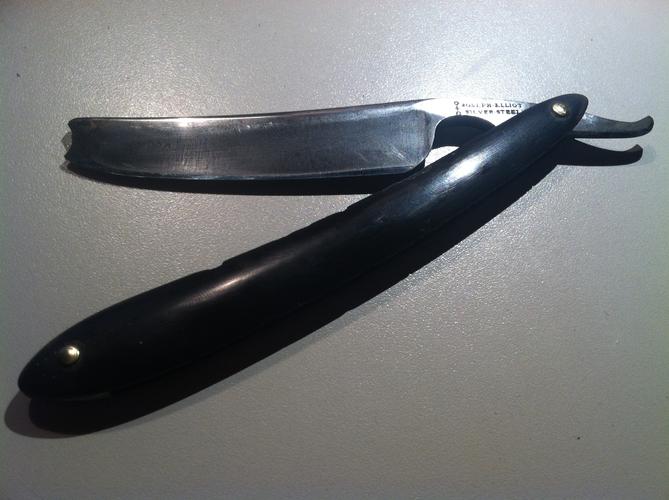
(While that blade does have a lot of toe wear, the taper is actually an intentional design feature)
I'd make a nice presentation box to put them in when I was done fixing the razors. They're both Joseph Elliot blades and I'd guess they were made within a few years of each other. I think they'd make a really neat pair.-Zak Jarvis. Writer. Artist. Bon vivant.
-
03-08-2012, 12:16 AM #2
 The last mile is always the hardest.
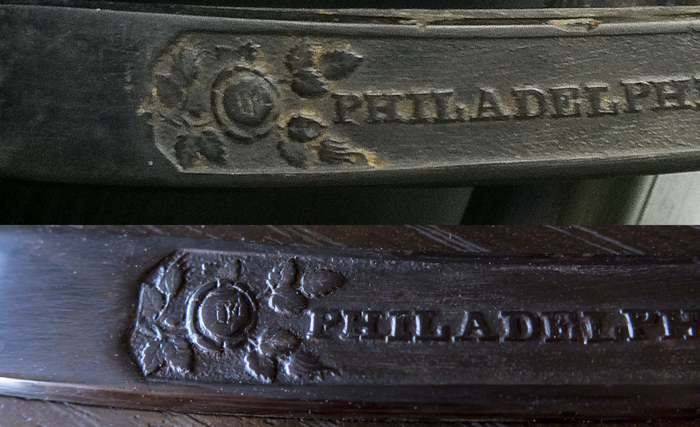
A close up of the detail work I've done restoring these scales.
(the difference in color is due to different cameras and different times of day -- my main light source is the window of my office)
I'm filling gaps using horn shavings (from a piece of donor horn) and CA glue. From the initial attempts I've modified slightly and now compressing the horn shavings down after I apply the CA glue, repeating until the gap is filled.
Getting the gap in that one leaf below the flower filled without putting a bunch of filler-material in the outlying design was... interesting.
I'm not entirely happy about the fine details I lost in getting a good polish, but having dug a piece of pre-restoration photo reference out of my phone's camera means I can (and might) go back in with a dental pick and add the detail back. Getting the leaf shape wasn't horrible. It's doing the CA coat & polish shuffle that's being a larger pain. That whole process of: coat! sand! polish! (find spot where the polish has gone through the coat) re-coat! sand! polish! (start swearing) re-coat! sand.... etc.-Zak Jarvis. Writer. Artist. Bon vivant.
-
03-08-2012, 06:20 AM #3

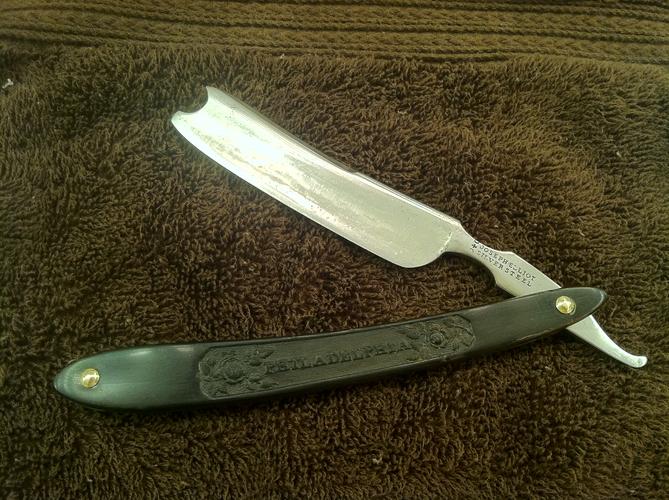
Now I just need to hone it.
I made the washers with some wide #00 brass and my doming block. In a last ditch effort to make the blade look less cruddy I taped the spine and stabilizer and then hit the blade with what remains of my last 320 grit sanding-puff for the Dremel. It doesn't have much virtue left in it, but it did give me small, reasonably consistent scratches that align with what would've been the original grind-marks if they had survived the surface-destroying apocalypse.
Tomorrow I'll get better pictures. The full porno-spread, in fact. -Zak Jarvis. Writer. Artist. Bon vivant.
-
03-08-2012, 06:38 AM #4

wow that looks awesome i have got to find me one of those
-
03-08-2012, 11:03 AM #5

That is a great idea on how to fill those scales with donor horn dust! I am going to try that. Too. I have a bunch of horn scales with nibbles out of them.
-
03-08-2012, 08:24 PM #6

I'm not quite ready to put this in the Restorations gallery. I'd like to get opinions on it.
First up, the razor-porn spread:
BEFORE
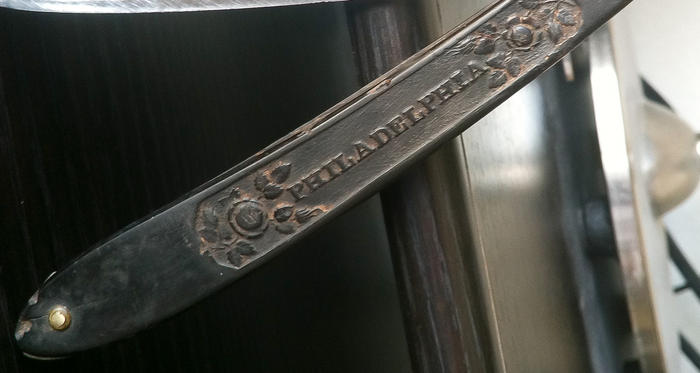
After


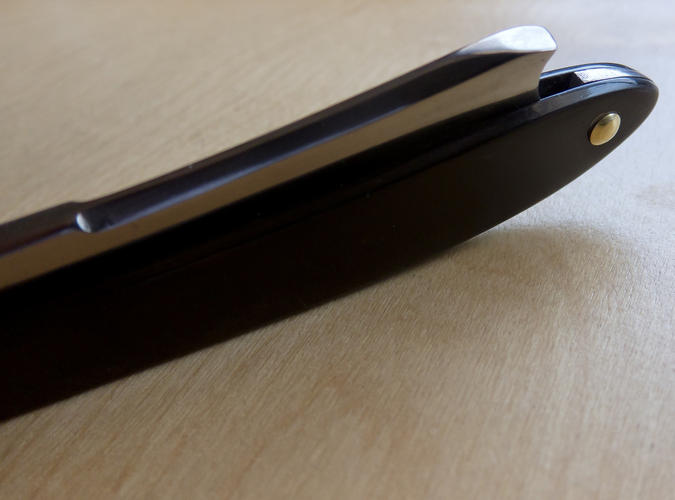
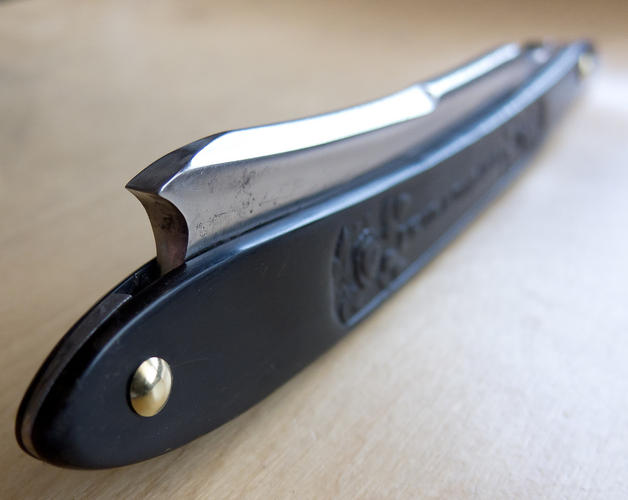
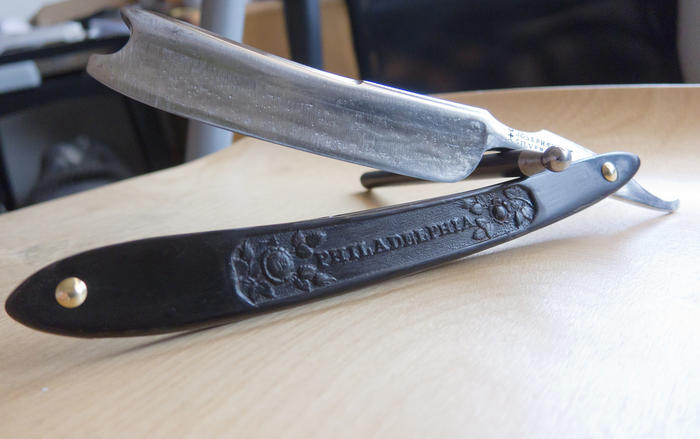
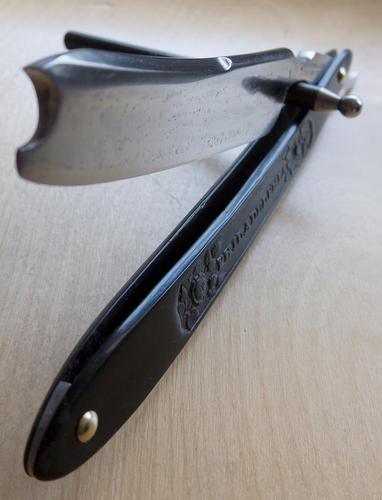
And now I'd like opinions.
Despite executing the domed washers about %99.8 perfectly, I'm not loving the way they look on this razor. I think I should've gone with traditional flat washers. Plus, having done the pins after dark, I didn't notice the spot where my CA coat delaminated around the pivot pin.
Second, the scales look so good I want the blade to look better.
Should I repin and go back to the hand-sand mines until the blade is closer to perfect?Last edited by Voidmonster; 03-08-2012 at 08:27 PM.
-Zak Jarvis. Writer. Artist. Bon vivant.
-
03-08-2012, 08:35 PM #7Poor Fit

- Join Date
- May 2010
- Posts
- 4,562
Thanked: 1263
Looks great. Love that blade
 The pins are personal preferance I guess but you did a really nice job on them. As for the blade, it looks like some deep pitting on it and you'd have to remove alot of steel to get that looking "perfect". If it were me, I'd leave it as is with a bit of character, but thats just my opinion
-
04-11-2012, 07:08 AM #8Junior Member

- Join Date
- Jul 2011
- Location
- Philly Metro Area
- Posts
- 4
Thanked: 0
I'd completely leave it the way it is. Often the trip to "perfect" ends up being the road to ruin. It looks great.


 6Likes
 LinkBack URL
 About LinkBacks


 Reply With Quote