
Results 1 to 3 of 3
 3Likes
 LinkBack URL
 About LinkBacks
-
06-13-2012, 08:00 PM #1Captain ARAD.


- Join Date
- May 2011
- Location
- Pacifica, CA
- Posts
- 2,474
Thanked: 2227 Restoring a Joseph Wostenholm EBRO.
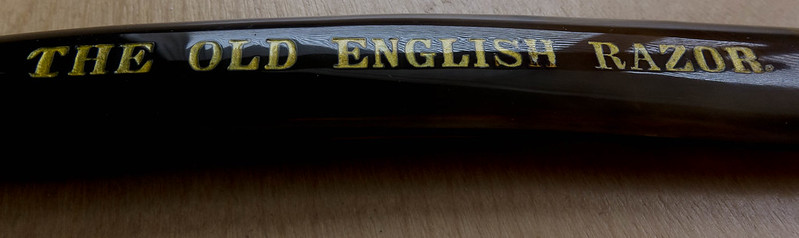
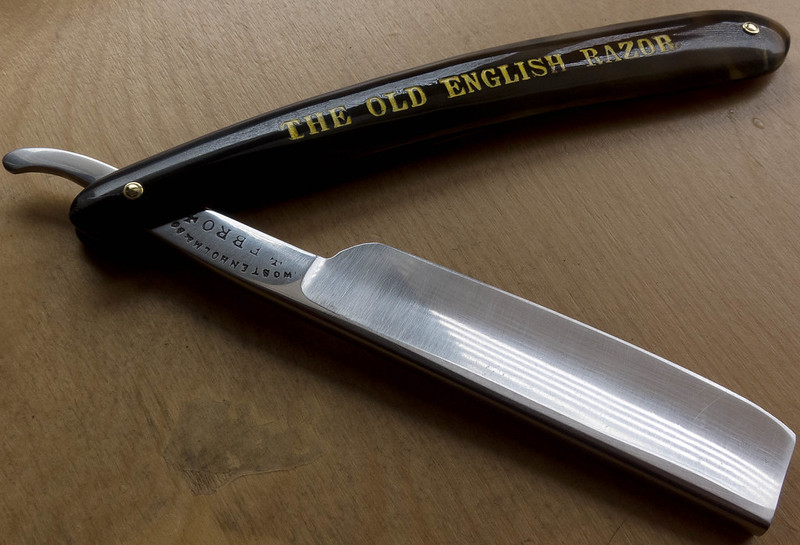
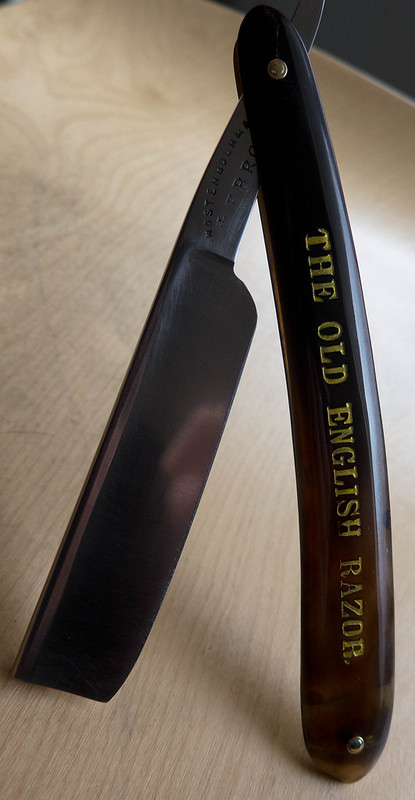

And then I started swearing.
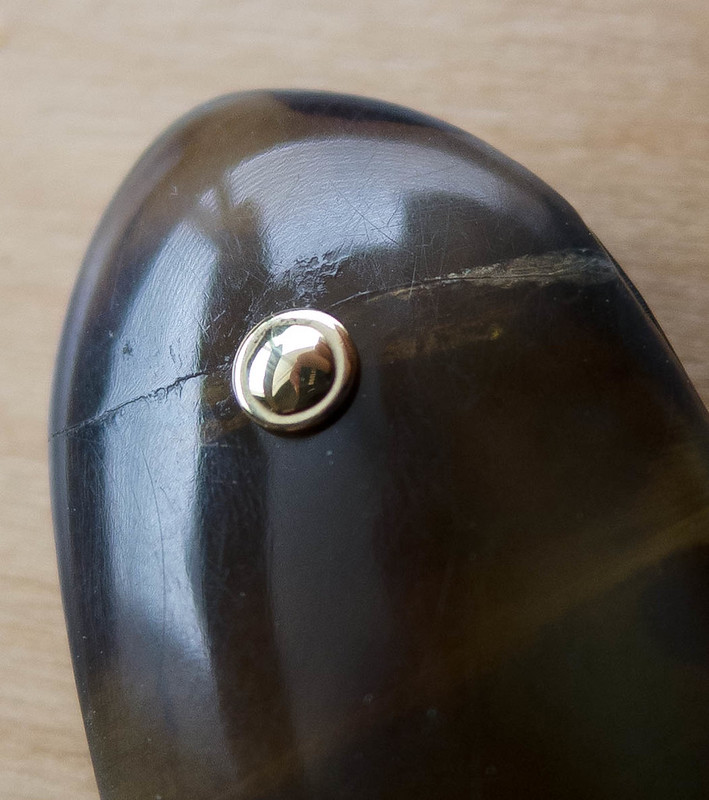
It's all original, and was in bad shape when I got it. The scales were cracked at all the pins, dried out and just generally unattractive. I glued up all the cracks (except ONE!), repainted in the lettering (though I need to fix the H in ENGLISH), polished the living hell out of them and reassembled (oh yeah, there was a ton of hand-sanding on the blade too). Tap, tap, tap, tap, crack.
SWEARS.
So I'll take it apart, fix up the last few defects and call it done. But man, I was so close. SO CLOSE!
The moral to this story is: if you think a crack won't cause problems, it will specifically cause problems.
Thankfully, the cracked pivots are solid like rock, but I took those completely apart and glued them very thoroughly. It was that little hairline at the toe that I thought 'I'll just surface glue it and move on' which got me.
Oh, and if it looks like the scales are graduated from translucent to glossy solid black, that's because they are. They're really lovely. EXCEPT THE CRACK.
-
06-13-2012, 08:06 PM #2Senior Member

- Join Date
- Jul 2009
- Location
- Brampton, Ontario
- Posts
- 635
Thanked: 121
That's a great looking blade!
Voidmonster likes this.
-
06-14-2012, 11:39 PM #3Captain ARAD.
- Join Date
- May 2011
- Location
- Pacifica, CA
- Posts
- 2,474
Thanked: 2227
As it turned out, fixing the cracked toe ended up being considerably easier than repainting the 'H' in ENGLISH. I had to get out the dental picks and extreme magnification to really clean it out. Once that was done, everything went quick. It's all fixed up now (I'll get pictures and put it into the restorations gallery soonish).
I can also say, unequivocally, that the glued pivots are structurally sound. Instead of taking it completely apart to fix things, I left the pivot in place. The scales did a LOT of flopping around and flexing in ways that it never, ever will in use, and both sides remained perfect.
To fix the toe I snapped it completely off and glued it, then filled the pin-holes, sanded and re-drilled to 5/32nds instead of 1/16th. I learned that trick from Glen, and ho boy is it a good one. I'm positive the toe cracked in the first place because the pin hole was snug with the brass, so peening it caused enough compression swelling to bust it open. (A sentence that sounds so much more salacious than it actually is.) Ideally I would've cut off the pivot and drilled new holes there too, but I'm going with the 'ain't broke/don't fix' method.


 Reply With Quote