
Results 1 to 9 of 9
 4Likes
 LinkBack URL
 About LinkBacks
-
07-18-2012, 07:32 AM #1Senior Member


- Join Date
- Feb 2012
- Location
- Menominee,MI
- Posts
- 1,624
Thanked: 325 Coloring Embossed Celluloid Scales
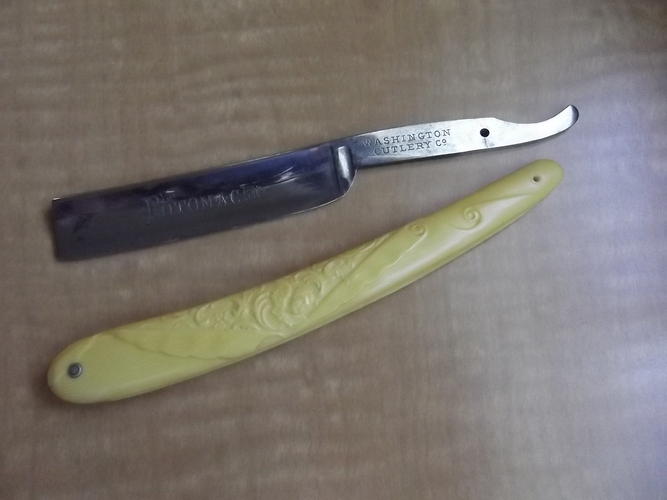
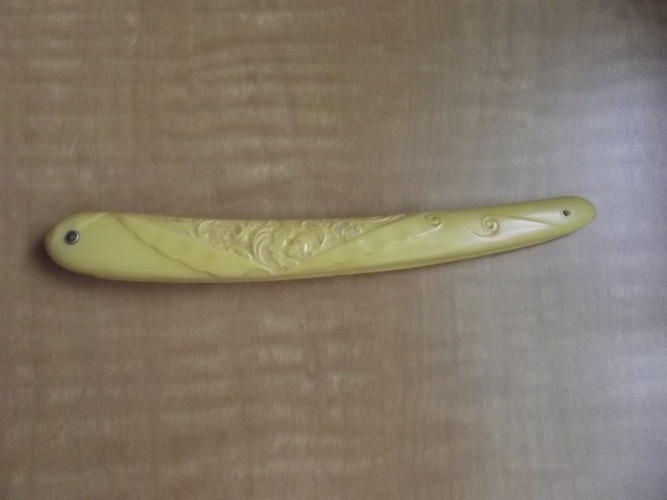
I have a set of yellow embossed celluloid scales that I cleaned and I want to add alittle color to highlight the design. I was wondering if taking some paint and lightly wiping it over the scales and then wiping off the excess would do the job. Anyone have any ideas if this would work or what process would work better and what type of paint to use if possible.
-
07-20-2012, 02:28 PM #2Mack

- Join Date
- Oct 2009
- Location
- Florida
- Posts
- 632
Thanked: 187
I have a set like that and I put gold oil based paint on the embossing and used magnafication and a toothpick to do it . It came out good but the gold doesn't show up well on the yellow green scales. I'm not sure what color would look good so I haven't done it again.
-
The Following 2 Users Say Thank You to mackie For This Useful Post:
JSmith1983 (07-20-2012), rolodave (07-29-2012)
-
07-20-2012, 07:52 PM #3Senior Member

- Join Date
- Mar 2012
- Location
- Tulsa, Oklahoma, United States
- Posts
- 1,031
Thanked: 163
You could try doing a wash like you'd do to bring out details on a plastic model kit. Mix up a shade of acrylic model paint to a thin watery consistency, a color slightly darker than the scales you're using. Then flow it over the scales, thinly. Let it dry a bit then buff it off the high areas with a paper towel before it's totally dry. The idea is that it'll settle in the recesses, and if you didn't use too dark a color, it'll just highlight the rest without looking too dark and stark.
It works beautifully on plastic models, no idea about razor scales though.
-
The Following User Says Thank You to maddafinga For This Useful Post:
JSmith1983 (07-20-2012)
-
07-20-2012, 08:20 PM #4It's bloodletting with style! - Jim

- Join Date
- Jul 2011
- Location
- ~ California, USA ~ The state of denial!!!
- Posts
- 615
Thanked: 118
 Originally Posted by maddafinga

I agree with the Acrylic wash, but I would recommend a contrasting color like Black, Dark Brown, Red, etc. Other wise you'll end up with the same issue as Mack with it not showing up well.
Good luck! and don't forget to post before and after pics so we can see how it looks.
-
The Following User Says Thank You to KindestCutOfAll For This Useful Post:
JSmith1983 (07-20-2012)
-
07-20-2012, 10:58 PM #5Razor Vulture


- Join Date
- Oct 2010
- Location
- Lone Star State
- Posts
- 26,104
Thanked: 8612
You can get paint markers at hobby stores like "Sharpie Paint" and others. Brush tips and felt tips, fine points too. They work nicely. You can also use the cheaper water-based ones. Nice as you can wash away mistakes, but you must clear coat as you finish.
 Neil Miller likes this.
-
The Following User Says Thank You to sharptonn For This Useful Post:
JSmith1983 (07-20-2012)
-
07-20-2012, 11:01 PM #6Razor Vulture
- Join Date
- Oct 2010
- Location
- Lone Star State
- Posts
- 26,104
Thanked: 8612
Hobby stores also sell Rub n Buff. Gold leaf type in several types. Easy to apply and wipe off excess
-
The Following User Says Thank You to sharptonn For This Useful Post:
JSmith1983 (07-20-2012)
-
07-20-2012, 11:18 PM #7Senior Member
- Join Date
- Feb 2012
- Location
- Menominee,MI
- Posts
- 1,624
Thanked: 325
Thanks to everyone for all the info. I have alot of options now. I will try it out and post some pics of the results.
-
07-22-2012, 11:30 AM #8Senior Member
- Join Date
- Feb 2012
- Location
- Menominee,MI
- Posts
- 1,624
Thanked: 325
Update. Ok I used some rust red paint and thinned it down and lightly coated the design and then wiped off the excess. The highlights are light, but lets you be able to see what the design is. I wasn't going to post some after pictures cause it is hard to tell the difference in the pictures. I might try to darken it alittle, but I like it light to where it just brings out the design. Thanks again to everyone for the ideas.
Last edited by JSmith1983; 07-22-2012 at 11:33 AM.
-
07-22-2012, 11:36 AM #9Senior Member
- Join Date
- Feb 2012
- Location
- Menominee,MI
- Posts
- 1,624
Thanked: 325
In case anyone is wonder I got the razor mainly for the scales since it was cheap and the blade had some rust on the edge. I figured if the edge didn't clean up enough I still had the scales. Turns out after cleaning some dirt from the monkey tail there was the distinctive Boker tree so I thought I would try alittle harder to restore it.


 Reply With Quote