
Results 1 to 10 of 37
 25Likes
Thread: First Kamisori Re-wrap
 LinkBack URL
 About LinkBacks
Hybrid View
-
03-10-2013, 05:29 PM #1Senior Member


- Join Date
- Nov 2012
- Location
- London, UK
- Posts
- 810
Thanked: 70 First Kamisori Re-wrap
Ok, so that's a little misleading as the handle wasn't wrapped beforeit had one of those blue plastic grips.
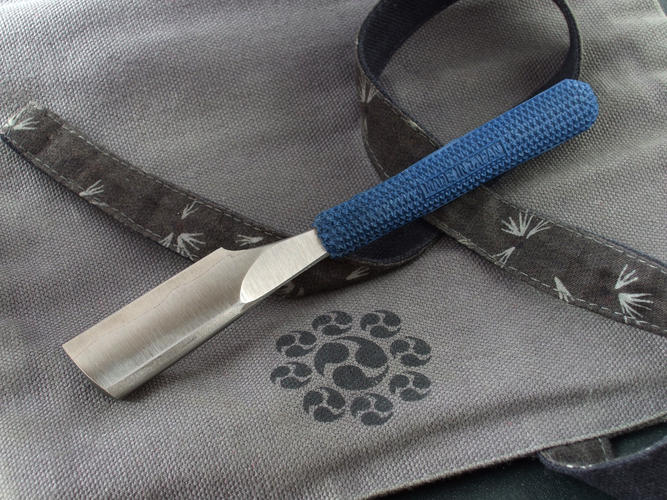
But anyway, I bought this Henkotsu kamisori from Tierdaen a couple of weeks ago:
Although it did it's job pretty well, I didn't particularly like the blue grip, so I thought I'd attempt to get it off and wrap it in something else.
I knew what I was expecting to be under the plastic handle butespecially not having done it beforeI was taking a bit of a risk with something I'd paid a fair amount of money for. Nevertheless, I taped up the blade, out came the Dremel and I cut the plastic grip away (actually after I cut away the plastic along the spine and then half of one side, the rest just slid off).
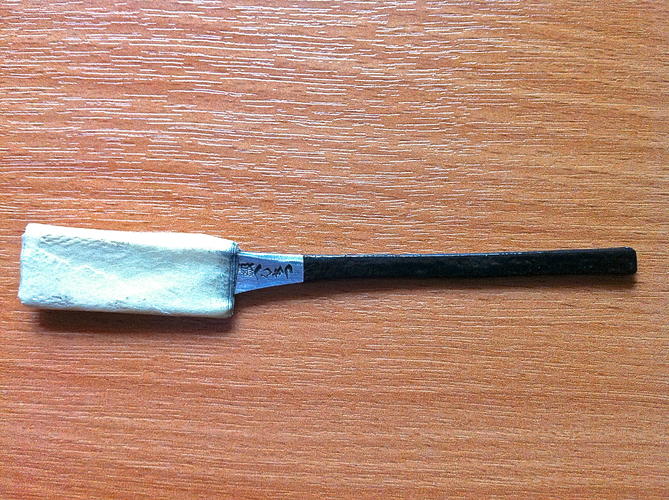
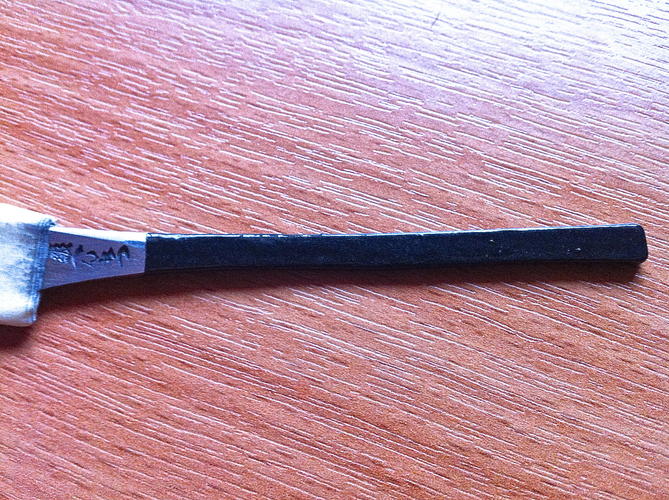
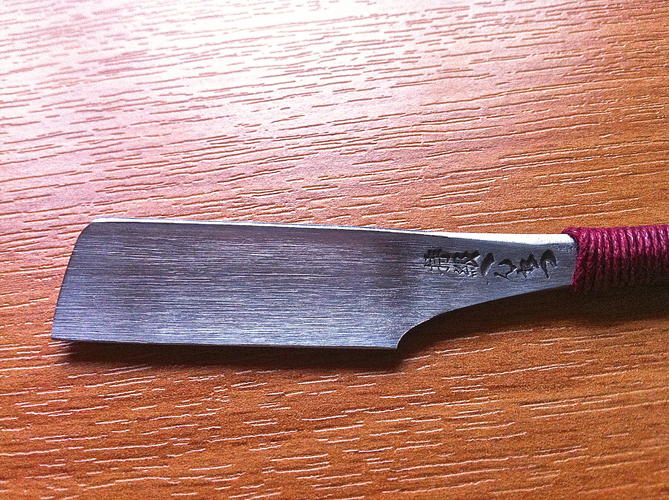
I sanded down the tang with some wet and dry and rounded the end a bit with a file, then gave it two coats of black, textured Hammerite.
So far so goodthis is how it looked this morning, after the paint had thoroughly dried over night (note that you can now see all of the stamping, which was half obscured by the original grip):
Last week, I had a little look around on old eBay for some waxed cotton cord. So many colours (for the price, I could have bought several just to compare) but in the end I settled on dark red 1mm cord.
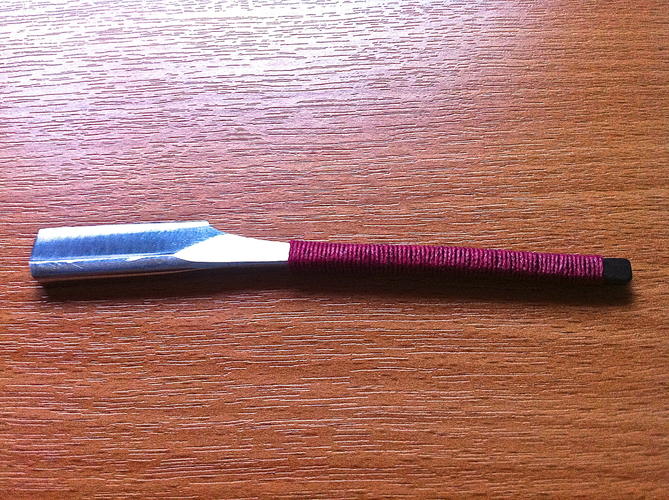
I set about wrapping the tang with my cord and this was the result:
I was mostly pleased but after some consideration, I decided that the last loop of cord was a little loose and that I'd left too much tang poking out...so I took it off and wrapped it a second time (I did buy ten metres of the stuff)!
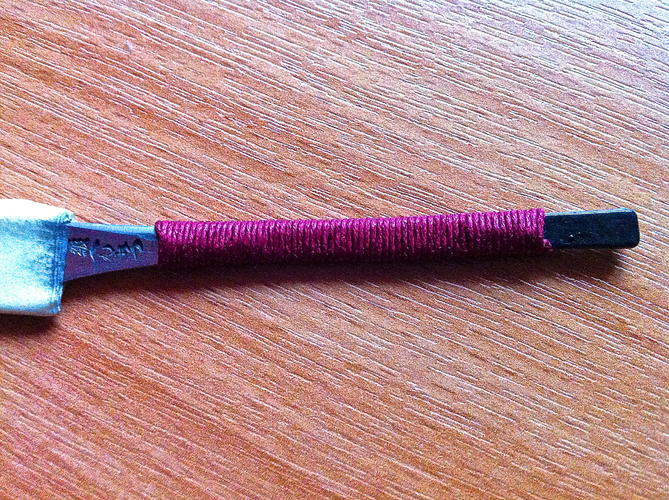
So here, after surprisingly little effort, is the second and final wrapping:
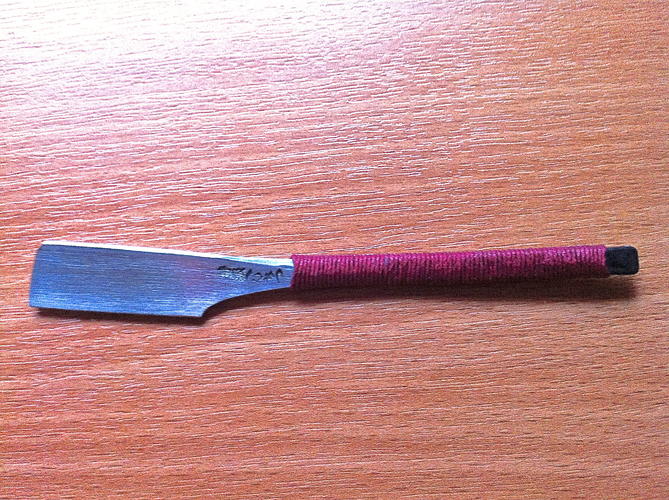

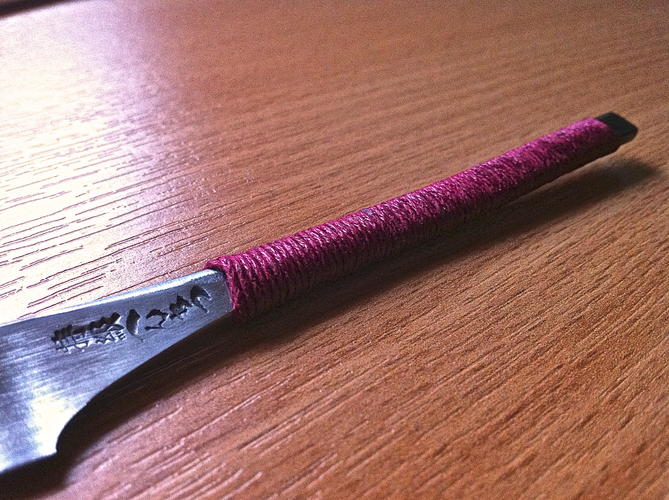
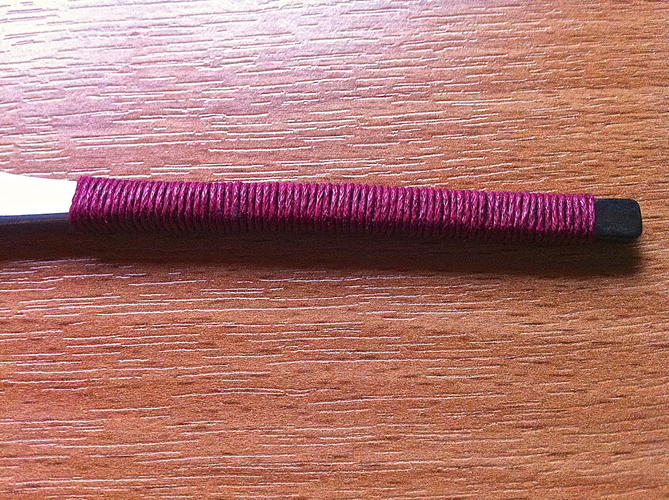
I'm really pleased with both, the colour and the way the whole thing turned out.
It was sharp before (I've already used it once) but, just to be sure, I took it to the hone for a few laps, stropped 60 linen and 100 leather and now I'm ready to go and shave with it again!
-
-
03-10-2013, 05:34 PM #2Poor Fit
- Join Date
- May 2010
- Posts
- 4,562
Thanked: 1263
Nicely done. The red compliments quite nicely.
-
03-10-2013, 05:43 PM #3At this point in time...


- Join Date
- Jun 2007
- Location
- North Idaho Redoubt
- Posts
- 27,069
- Blog Entries
- 1
Thanked: 13249
Very nicely done, I have never been able to get them right

-
03-10-2013, 05:59 PM #4Senior Member
- Join Date
- Feb 2008
- Location
- Taiwan
- Posts
- 226
Thanked: 44
Good work. To clarify, the first pic is actually my own Henkotsu, not the one I sold to you. Yours was the following:


I think they're similar enough that it's no big deal. Very glad the tang came out with a good shape for wrapping. It's a cool razor.Last edited by Tierdaen; 03-10-2013 at 06:01 PM.
-
The Following User Says Thank You to Tierdaen For This Useful Post:
PigHog (03-10-2013)
-
03-10-2013, 06:40 PM #5Senior Member
- Join Date
- Nov 2012
- Location
- London, UK
- Posts
- 810
Thanked: 70
Haha...close enough. I didn't realise that wasn't even my one! I'll leave my post how it is, though—it makes little difference.
I will save those pics though!
-
04-10-2014, 12:08 PM #6Senior Member

- Join Date
- Aug 2013
- Location
- London, UK
- Posts
- 149
Thanked: 7
Just landed here. Amazing how this turned out, been wanting to remove the wrapping on my Iwasaki (it's not well done) and do my own. Originally Posted by PigHog

How did it perform? I see it was done last year
Did you glue underneath or just tightly wrap it?
-
04-10-2014, 12:12 PM #7Senior Member
- Join Date
- Nov 2012
- Location
- London, UK
- Posts
- 810
Thanked: 70
Just wrapped tightly. It's the same now as it was a year ago. I don't use it as much as I'd like to, though -- the edge has never felt quite right, no matter what I do with it. I want to send it for pro honing but haven't gotten around to it yet.
-
04-10-2014, 07:05 PM #8lobeless


- Join Date
- Feb 2012
- Location
- Kansas
- Posts
- 4,864
Thanked: 762
Hey PigHog! It darn near kills me that you don't shave with it. Maybe because I know exactly how you feel! Originally Posted by PigHog
I too had a kami which I ended up rehandaling (used leather) only to find I couldn't hone it worth a bean. I did the three to one thing, I did... well I did all kinds of things that got close, but it always felt like I was shaving tree trunks.
Anyway I put it away for a year or so and then just recently, decided to go for it again. Using only Nani Superstones, I ran the blade very quickly back and forth on one side till it "felt right" then flipped and did the same thing. After that side felt right, I stropped it on the stone equally between sides for about 10/20 back and forths. Did that all the way up to 10 k spending almost as much time on the 1k as the others combined.
Then off to the strop and low and behold!!!! Butter!! Unorthodox maybe? But the shave... Oh the shave.
I know this works for mine as I just did it again after I got silly later on and tryed to put an even keener edge on it via a natural which ultimately killed the edge.
I hope that may help or at least encourage you to trytry again. I am so happy with my kami now, I have to force myself to use my other blades.
Do you have a picture of it from head on so we can see the bevels from that angle??
Best of luck mate!Double0757 likes this.
-
04-10-2014, 12:23 PM #9Senior Member
- Join Date
- Aug 2013
- Location
- London, UK
- Posts
- 149
Thanked: 7
What about the end points? Just tuck them underneath and apply some glue? I guess if I find a nice chord one day I can give it a try.
Just don't know what to expect underneath my original wrapping.. Might need to sand it off.
But I know what u mean about the edge, had a Wacker that gave me hell until I got it done right. It was very difficult because of its hard steel
-
04-10-2014, 12:30 PM #10Senior Member
- Join Date
- Nov 2012
- Location
- London, UK
- Posts
- 810
Thanked: 70
The ends are wrapped underneath -- you can see it in some of the pictures. Shouldn't need any glue.
Somebody had a good diagram showing how to do it, somewhere.


 Reply With Quote