
Results 1 to 5 of 5
 7Likes
Thread: How to fix a "crumbly" edge ?
 LinkBack URL
 About LinkBacks
-
03-28-2013, 09:49 AM #1Senior Member


- Join Date
- Dec 2012
- Location
- Perth, West Australia
- Posts
- 1,431
Thanked: 497 How to fix a "crumbly" edge ?
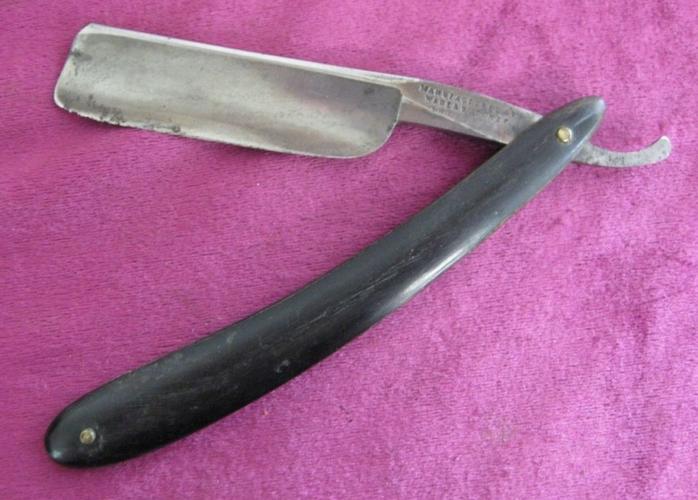

Hi there fellow forumites.
I just scored this W and B for $26.00 off the 'bay.
As you can see from the pics, it has a damaged edge.
I've read here about the pros and cons of "breadknifing" in order to fix a blade edge,
and the alternatives to this extreme form of restoration.I would like your advice about
how to proceed one way or the other.
Last week I put in an order to Brad from Maggard Razors (great guy to deal with and very reasonable cost !)
and next week I will have the following Naniwa stones to work on this razor with:
1k, 5k, 8k, 12k. I hope this helps with your advice to me.
Happy Easter everyone,
Bongo
-
03-28-2013, 10:25 AM #2Scheerlijk

- Join Date
- Feb 2013
- Location
- The Hague, the Netherlands
- Posts
- 1,184
Thanked: 164
I'm not sure the 1K will be fast enough to fix that much crumble. You could try a low-grit sand paper (say 220), holding the razor at a 45 degree angle rather than flat on the paper and making edge-trailing strokes only. Keep an eye on the shape of the blade, see that steel is removed evenly across the edge. That should remove the damage at a reasonable rate, after which you can set a bevel on the 1K. Don't be surprised for that bevel to take 45 minutes to set!
-
The Following User Says Thank You to Laurens For This Useful Post:
bongo (03-28-2013)
-
03-28-2013, 11:14 AM #3Senior Member


- Join Date
- Dec 2010
- Location
- Virginia
- Posts
- 3,362
Thanked: 581
The best use for 'breadknifing" is making a breadknife. If that's not what you want, just hone the blade on 1K and prepare for it to take some time. If you get bored with your progress, don't add pressure, just put the blade away for another day. Honing properly takes time and patience.
JimmyHAD likes this.
-
The Following User Says Thank You to ace For This Useful Post:
bongo (03-28-2013)
-
03-28-2013, 11:20 AM #4< Banned User >
- Join Date
- Dec 2012
- Location
- Long Island NY
- Posts
- 1,378
Thanked: 177
DMT 325 at 45 degree angle until your at good metal. Then lots of strokes on the 325 to get your bevel. I would then go to 600 1200dmt. And up. Lots of circle between grits to polish out the scratches. YMMV. But that's what I would do. I also dull on glass between grits up to 4k. It may be unorthodox to some people but I have found it works for me.
-
The Following User Says Thank You to bill3152 For This Useful Post:
bongo (03-28-2013)
-
03-28-2013, 11:33 AM #5Senior Member

- Join Date
- Apr 2008
- Location
- Essex, UK
- Posts
- 3,816
Thanked: 3164
I would use a coarse DMT with the blade at an elevated angle, too. I generally use a 600, but have gone down to 325. It's going to take a long while to get past that swiss-cheese at the tip and the razor looks stout enough not to deflect much under a bit of pressure, so use it, or you will get nowhere fast.
When you are nearly past the crumbling (a loupe will pick up small black dots in the bevel while it is still there) lay it down with a layer of tape on it and work to make the bevels meet. Obviously they are going to meet sooner past the damage, so you will probably get a bit of a wire edge, but its not that important at this point. When you have the bevel set you can either renew the tape or remove it and do a bit more work to allow for its thickness to be taken care of.
Moving up to a waterstone of 1k, I would then use half strokes or circles on each side of the blade - that removes a lot of the wire edge if present. Drawing the blade gently down the side of the hone will do the same, as will drawing it through a cork or piece of horn. Then just carry on as normal.
Regards,
Neil
-


 Reply With Quote