Page 1 of 2 12 LastLast
Results 1 to 10 of 18
Like Tree17Likes

Thread: Need advice - hand sanding my first ebay razor.

  1. #1
    Senior Member RADisorder's Avatar
    Join Date
    Apr 2013
    Location
    Houston, TX
    Posts
    199
    Thanked: 28

    Default Need advice - hand sanding my first ebay razor.

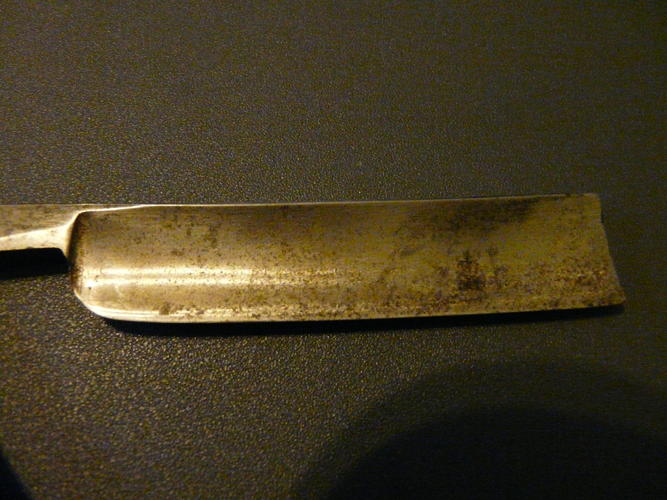
    Here it is after getting it out of the scales this afternoon:
    Name:  P1140181.jpg
Views: 426
Size:  55.7 KB

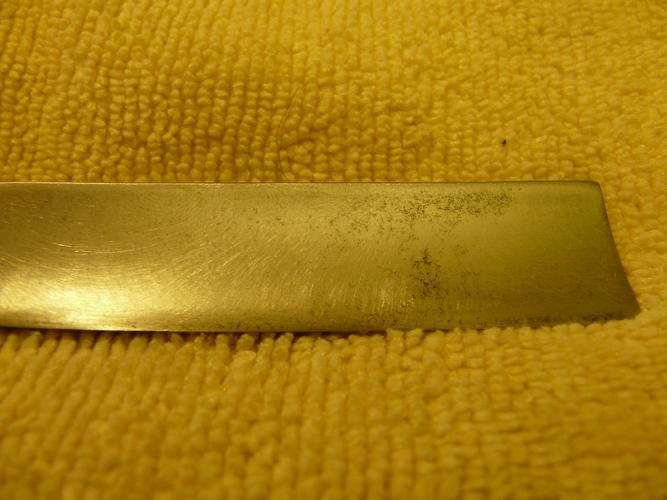
    After sanding with 320 grit 3m auto wet/dry for awhile:
    Name:  P1140186.jpg
Views: 389
Size:  43.9 KB

    What do you call this, a half hollow, a wedge?
    Name:  P1140196.jpg
Views: 425
Size:  15.5 KB

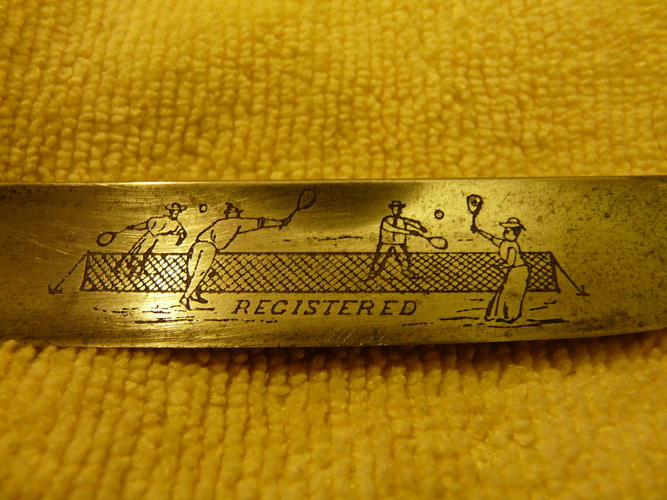
    I'm going to have to be careful with what I do on the front as I chose this one for the etching:
    Name:  P1140188.jpg
Views: 416
Size:  60.7 KB

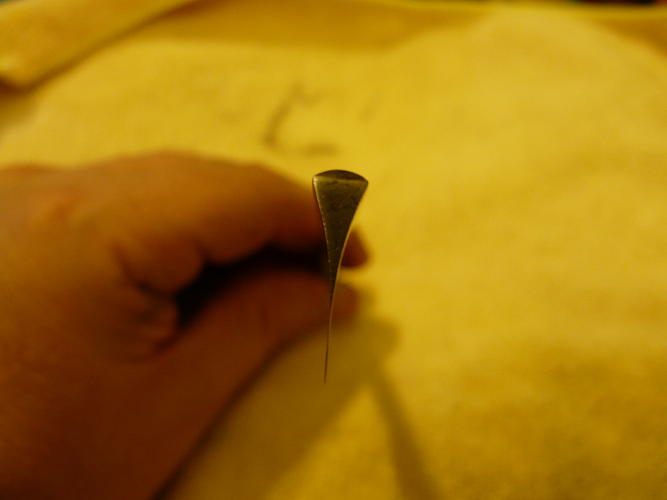
    And not sure how much I can sand the tang:
    Name:  P1140189.jpg
Views: 394
Size:  47.2 KB


    Not knowing how I could damage the razor, I don't want to push my luck removing metal if it will damage it. How do I know when I need to stop? I've got the rest of my sampler packs of 3m, from 320 where I started up to 2500 and some blue magic polish. As I've only read a bit and am in practice a complete beginner, any advice is welcome. I'd like to get it as clean as possible and don't mind how long it takes or the work, but don't want to break it.

    p.s. If anyone is available to help me learn this stuff and honing in Houston I'm willing to pay in cigars, booze, and food.

    -Derek
    goldragon and Kefka like this.

  2. #2
    Senior Member
    Join Date
    Jan 2013
    Location
    Texas City Texas
    Posts
    109
    Thanked: 17

    Default

    Derek, I am down in Texas City. I have been successful using a reloading vibrating tumbler for cleaning and polishing blades. If the etching is deep, looks like yours is, you can put it in this tumbler with some walnut media or corn media with a little additive, (metal polish) and the razor should come out nice and shiny, like new. I have put some old Wade and Butchers in there and one had some engraving on the blade, and it came out fine. Takes a little longer but it does save time sanding by hand. I do not know if you are familiar with a case tumbler or not but the blade does not actually tumble, it pretty much floats in the bed of media while it vibrates around. I would be glad to meet up with you and show you what I can plus we have lots of resources to pull from in the Houston area.
    I also like cigars, booze, and food!

    Robert
    Lemur and Mario like this.

  3. The Following User Says Thank You to DOGRAH For This Useful Post:

    RADisorder (04-23-2013)

  4. #3
    Senior Member Lemur's Avatar
    Join Date
    Jan 2008
    Location
    Sweden, Gotland, Visby
    Posts
    1,888
    Thanked: 222

    Default

    Sounds to me like; - Houston, we solved the problem!
    DOGRAH, MAW76 and RADisorder like this.
    Hur Svenska stålet biter kom låt oss pröfva på.

  5. The Following User Says Thank You to Lemur For This Useful Post:

    DOGRAH (04-23-2013)

  6. #4
    RazorBase DB application developer
    Join Date
    Jan 2012
    Location
    West Midlands, UK
    Posts
    299
    Thanked: 67

    Default

    Nice razor, I like the tennis-match. Can't tell how deep that is, but the marking on the tang looks deeply-cut to me, and I doubt you could sand that out if you wanted to.

    Looks like a full hollow, I think. Hope it comes out well for you.

  7. #5
    The Great & Powerful Oz onimaru55's Avatar
    Join Date
    May 2008
    Location
    Bodalla, NSW
    Posts
    15,596
    Thanked: 3748

    Default

    One thing I always do is note how much flex the razor already has & then & start at the finest grit that will have an effect on the rust etc. I think starting at 320 as you did was a safe bet. You always have to be happy with the job yourself but it is possible to go further than is safe if sanding too long or too coarse.

    I would say you have something in the half hollow range there. You can look at the Henckels ratings here & judge what grind it most closely resembles.
    The straight razor - Straight Razor Place Wiki
    “The white gleam of swords, not the black ink of books, clears doubts and uncertainties and bleak outlooks.”

  8. The Following User Says Thank You to onimaru55 For This Useful Post:

    RADisorder (04-23-2013)

  9. #6
    Senior Member RADisorder's Avatar
    Join Date
    Apr 2013
    Location
    Houston, TX
    Posts
    199
    Thanked: 28

    Default

    Quote Originally Posted by onimaru55 View Post
    One thing I always do is note how much flex the razor already has & then & start at the finest grit that will have an effect on the rust etc. I think starting at 320 as you did was a safe bet. You always have to be happy with the job yourself but it is possible to go further than is safe if sanding too long or too coarse.

    I would say you have something in the half hollow range there. You can look at the Henckels ratings here & judge what grind it most closely resembles.
    The straight razor - Straight Razor Place Wiki
    I've seen people mention the flex. Is this what you feel from just pushing a thumb against the side of the blade? I think this is one of those things that would be easier to be shown than to get from a description in print.

    It's possible I have already sanded too long as when I finished last night it looks like the bottom of the blade is actually a little thicker than than the area with that dark spot I was sanding. Although I sanded across the span of the blade, I did not get the bottom span as well right along the bevel.

    Quote Originally Posted by DOGRAH View Post
    Derek, I am down in Texas City. I have been successful using a reloading vibrating tumbler for cleaning and polishing blades. If the etching is deep, looks like yours is, you can put it in this tumbler with some walnut media or corn media with a little additive, (metal polish) and the razor should come out nice and shiny, like new. I have put some old Wade and Butchers in there and one had some engraving on the blade, and it came out fine. Takes a little longer but it does save time sanding by hand. I do not know if you are familiar with a case tumbler or not but the blade does not actually tumble, it pretty much floats in the bed of media while it vibrates around. I would be glad to meet up with you and show you what I can plus we have lots of resources to pull from in the Houston area.
    I also like cigars, booze, and food!

    Robert
    Hey Robert, I sent you a message with my contact info. I'd read the thread about the vibratory tumbler and signed up for an in-stock notification for the Midway tumbler a few weeks ago. Although I've heard awful things about the Harbor Freight tumbler, I'm tempted to stop by on the way to Costco today.

    I may have sanded too much last night, but I understand the tumbler is very gentle and it's probably my best shot for cleaning it up the rest of the way if I can do it.

  10. #7
    Heat it and beat it Bruno's Avatar
    Join Date
    Nov 2006
    Location
    Belgium
    Posts
    15,130
    Thanked: 5229
    Blog Entries
    10

    Default

    If you want to get rid of the pitting, then 320 is much too fine.
    No matter how fine or coarse you choose the paper, if you want to get rid of the pitting, you're going to have to remove X amount of metal. Choosing a fine grit will do nothing except insure than you're sanding much longer than you have to.
    spazola and Chevhead like this.
    Til shade is gone, til water is gone, Into the shadow with teeth bared, screaming defiance with the last breath.
    To spit in Sightblinder’s eye on the Last Day

  11. #8
    Senior Member RADisorder's Avatar
    Join Date
    Apr 2013
    Location
    Houston, TX
    Posts
    199
    Thanked: 28

    Default

    Quote Originally Posted by Bruno View Post
    If you want to get rid of the pitting, then 320 is much too fine.
    No matter how fine or coarse you choose the paper, if you want to get rid of the pitting, you're going to have to remove X amount of metal. Choosing a fine grit will do nothing except insure than you're sanding much longer than you have to.
    Yes, I was concerned with going too low on the grit and removing too much metal - I may have done so already, but it may very well be OK - I don't know. I did scrub pretty good on it for probably an hour or so, using some WD-40 on it as well. It sounds like I'll be meeting some SRP people locally soon and I'll know more about what I've done to it.

    Since I had to run to the store today anyhow and drove past a Harbor Freight, I went ahead and picked up a tumbler and some crushed English walnut lizzard substrate from Petco (not sure if this is course or fine grade). If it looks like it's going OK and not removing the tennis etching I suppose I'll need to pick up some corncob and mix in the blue magic. I read of some corncob material being sold at Walmart, so will give that a try I guess.

    If the etching looks alright around bedtime tonight, do you think it'll be safe to leave it overnight? I'm wondering about metal above the bevel where I sanded as well. Those pictures I took show where I left off last night but it's probably hard to tell just from them.

  12. #9
    The Great & Powerful Oz onimaru55's Avatar
    Join Date
    May 2008
    Location
    Bodalla, NSW
    Posts
    15,596
    Thanked: 3748

    Default

    Quote Originally Posted by RADisorder View Post
    I've seen people mention the flex. Is this what you feel from just pushing a thumb against the side of the blade? I think this is one of those things that would be easier to be shown than to get from a description in print.

    It's possible I have already sanded too long as when I finished last night it looks like the bottom of the blade is actually a little thicker than than the area with that dark spot I was sanding. Although I sanded across the span of the blade, I did not get the bottom span as well right along the bevel.
    Really it's just a point of reference. When you sand/grind on a blade it becomes thinner. There are many full hollows that shave very well that have a very thin flexible blade. If you are restoring a thicker blade you simply must not exceed the full hollow geometry.

    Pitting removal is often a compromise & etches are almost always less deep than the pitting so getting rid of one gets rid of the other. Hollow blades have less room for error & a light cleanup is often the safest approach, especially for a first time.
    cudarunner likes this.
    “The white gleam of swords, not the black ink of books, clears doubts and uncertainties and bleak outlooks.”

  13. #10
    Huh... Oh here pfries's Avatar
    Join Date
    Oct 2011
    Location
    Tri-Cities TN
    Posts
    2,270
    Thanked: 358

    Default

    I'll weigh in.

    What you have before you looks great,
    Clean up the previous sanding marks,
    Hone and enjoy.

    One of our other members added a beautiful forced patina (as he called it yes you Carl...) to a blade and all can say is WOW,
    For me it really helped capture the blade.
    So many want shiny and new looking, (buy a new blade)
    I enjoy the history, story, and life behind it.

    But alas to each his own, I have no doubt it will look great and shave as well as it looks in the long run.

    Cheers

    Pat
    Last edited by pfries; 04-24-2013 at 03:09 AM.
    Lemur, EAGLESKADU and DDTech like this.
    It is just Whisker Whacking
    Relax and Enjoy!


Page 1 of 2 12 LastLast

Posting Permissions

  • You may not post new threads
  • You may not post replies
  • You may not post attachments
  • You may not edit your posts
  •