
Results 11 to 20 of 24
 9Likes
Thread: New scales help!
 LinkBack URL
 About LinkBacks
-
04-27-2013, 03:52 PM #11Senior Member


- Join Date
- Feb 2013
- Location
- Israel
- Posts
- 106
Thanked: 14
Sound like a very good idea but I would really want to avoid unpinning the wedge as well, I don't think I could save either the scales or the washers after it.
Last edited by OrSh; 04-27-2013 at 04:00 PM.
-
04-27-2013, 04:39 PM #12Senior Member


- Join Date
- Apr 2008
- Location
- Essex, UK
- Posts
- 3,816
Thanked: 3164
It's easy. Pin the blade, then open it, and fit a long length of spacer material between the scales from wedge to pivot, same as the width when the balde is shut. and sit the scales in a tall jar of just-boiled water. do it next to the sink with the cold tap running. Pull the razor out every 30 secs or so (it usually only takes a couple of minutes) and see if the scales flex. Once they become plastic enough, curve them to accommodate the blade and while holding in position douse with cold water to harden them again. You might have to do it a couple of times, and/or you might have to over-bend them if they tend to relax back a bit.
The long spacer is to prevent the scales closing right up or deforming - they go surprisingly plastic. You must thoroughly dry everything - the tang will rust if you don't. Leave the blade out for a good while, as the horn takes on water and takes a while to let it go again. You may need to buff (slowly - no heat generation) or oil the scales after this.
Regards,
Neil
PS: forgot to add that the spacer should be flexible - something like hard wool felt cut to size and taper.Last edited by Neil Miller; 04-27-2013 at 04:44 PM.
Chevhead and RADisorder like this.
-
The Following User Says Thank You to Neil Miller For This Useful Post:
Chevhead (04-30-2013)
-
04-27-2013, 04:55 PM #13Senior Member
- Join Date
- Feb 2013
- Location
- Israel
- Posts
- 106
Thanked: 14
Thank you very much for all the advices!
Neil, that sounds easy indeed, but I couldn't manage set the images right in my head (never heard about this method before)...
Should I unpin the wedge for this? what thickness should the spacer be? what happens if the scales will start to bent too much?
It sounds like a quick and easy way to fix the problem but also an easy way to ruin them with non experienced hands.
-
04-27-2013, 05:06 PM #14Senior Member
- Join Date
- Apr 2008
- Location
- Essex, UK
- Posts
- 3,816
Thanked: 3164
The scales should be pinned both ends. Don't unpin the wedge.
If you do not have a thin spacer between the scales, then when they get hot and plastic and soft they can collapse towards each other when you bend them, leaving very little space for the blade to rest in. If you cant find a long flexible spacer, you can make little spacers, like the wedge, and space them between the scales, quite close together, while the blade is open, so you have the correct gap. Make them so that they don't fall out, but do not push the scales apart. Then when you bend them, the gap is preserved. In practice the horn that is very close together at the wedge takes most of the bending stresses, along with the centre of the scale on the outside of the bend, which must elongate slightly or push the opposite scale out slightly, so a bit of closing up is inevitable.
If you have any scrap horn left, practice with it. If it is about the same thickness you will get an idea of how it will behave when you bend it. If it is thick enough you can probably do without the spacers - I generally only use them with thin horn scales of around 2mm and under - these tend to collapse together when hot and wet!
Regards,
NeilChevhead likes this.
-
The Following User Says Thank You to Neil Miller For This Useful Post:
Chevhead (04-30-2013)
-
04-27-2013, 06:31 PM #15Senior Member
- Join Date
- Feb 2013
- Location
- Israel
- Posts
- 106
Thanked: 14
So, i've decided to jump into the water and try Neil's advice. well....IT WORKED!
It took 4-5 tries before I was satisfied with the results but it was super easy and quick.
I won't say more but I'll let the pics do the rest.
Straightening those scales (pardon me for the sink's condition:-) :
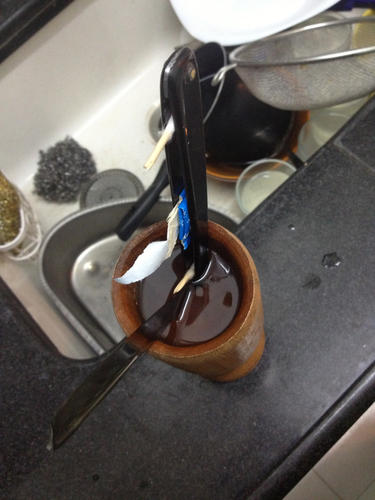
I created the spacer using a q-tip head and a folded piece of cardboard
And the final result!!! My first fully restored, custom-scaled razor. I wanted to leave some of its character without polishing him into a mirror shine, so I hand sanded it with 800-1500 grit and moved to the 400-8k micro fiber cloths.
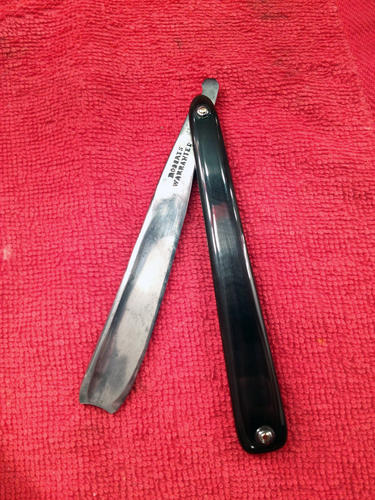
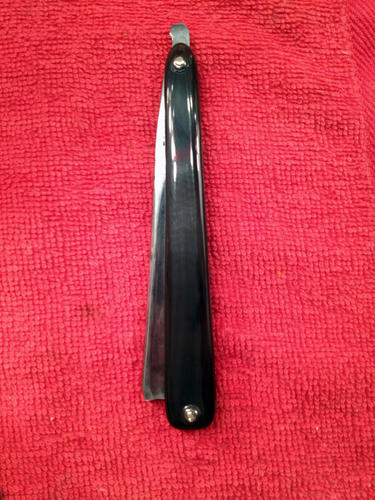
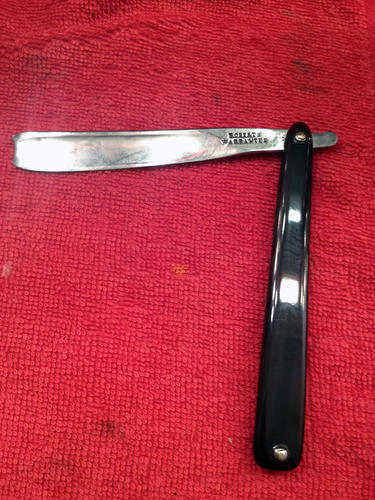
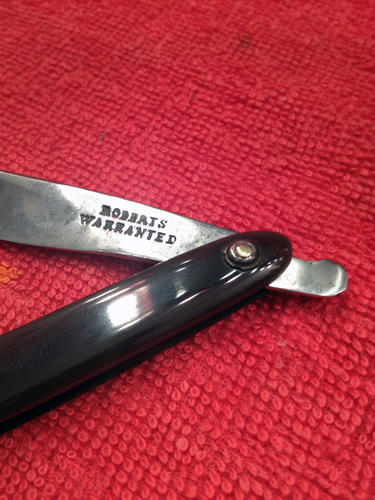
The only thing is that I accidentally miscalculated the scales length and I made them a little bit short, only 5.2" which causes the blades toe become very close to the lead wedge (almost touching it). But in general i'm quite happy with this first time experience.Last edited by OrSh; 04-27-2013 at 06:41 PM.
-
04-29-2013, 12:20 AM #16The Great & Powerful Oz


- Join Date
- May 2008
- Location
- Bodalla, NSW
- Posts
- 15,638
Thanked: 3751
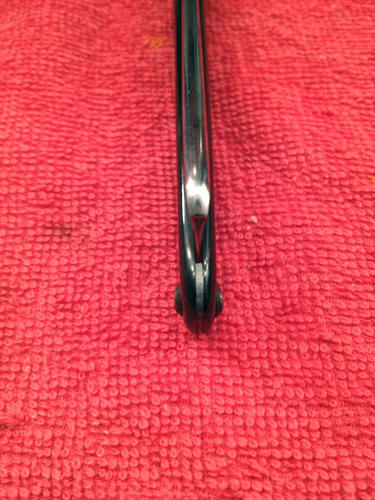
Good advice from Neil. Just want to add that drilling off centre is the least likely culprit for misalignment, unless the pin is really snug in the razor. More often it's an asymmetrically ground tang. From your pics I'm guessing yours was closing to the pile side ?
The white gleam of swords, not the black ink of books, clears doubts and uncertainties and bleak outlooks.
-
04-29-2013, 06:05 AM #17Senior Member
- Join Date
- Feb 2013
- Location
- Israel
- Posts
- 106
Thanked: 14
Yes, it was.
BTW, anyone knows where can I find some proper lead material for making spacers in future projects? Somehow I couldn't find it anywhere...Last edited by OrSh; 04-29-2013 at 06:08 AM.
-
04-29-2013, 07:28 AM #18RazorBase DB application developer
- Join Date
- Jan 2012
- Location
- West Midlands, UK
- Posts
- 299
Thanked: 67
I got a bit of lead sheeting (roofing offcuts) from a scrap metal dealer. They wouldn't sell less than 1 Kg, which cost a couple of pounds, and is enough to make spacers for several thousand razors.
-
04-29-2013, 03:16 PM #19Senior Member
- Join Date
- Apr 2008
- Location
- Essex, UK
- Posts
- 3,816
Thanked: 3164
You can buy lead flashing - it is around 4 inches wide, maybe 6 inches, from builders merchants. You then need a flat surface to hammer it into a wedge on.
Regards,
Neil
-
04-30-2013, 01:06 AM #20The Great & Powerful Oz
- Join Date
- May 2008
- Location
- Bodalla, NSW
- Posts
- 15,638
Thanked: 3751
Thought so. Look at your 2nd pic. You can see the tang is not ground symmetrically. If your pinning alignment had anything to do with centring it would actually correct the problem. Razors like that are the source of much cussing & hair pulling till you do a few successfully. Looks like you're well on the road now . Originally Posted by OrSh

 The white gleam of swords, not the black ink of books, clears doubts and uncertainties and bleak outlooks.


 Reply With Quote