
Results 11 to 20 of 20
 33Likes
 LinkBack URL
 About LinkBacks
-
01-22-2013, 03:42 AM #11Senior Member


- Join Date
- Mar 2012
- Location
- Tulsa, Oklahoma, United States
- Posts
- 1,031
Thanked: 163 Re: Revere Silversmiths Sterling brush
That's another beautiful brush!
How did you get the old knot out? I've got an old metal dubl duck brush that I want to put a new knot in.sharptonn likes this.When the Dude is recognized in the world, unDudeness will be seen everywhere--- the Dude de Ching
-
The Following User Says Thank You to maddafinga For This Useful Post:
sharptonn (01-22-2013)
-
01-22-2013, 05:23 AM #12Historically Inquisitive


- Join Date
- Aug 2011
- Location
- Upstate New York
- Posts
- 5,782
- Blog Entries
- 1
Thanked: 4249
Truly stunning brush, and a great restoration Well Done!
sharptonn likes this.
-
The Following User Says Thank You to Martin103 For This Useful Post:
sharptonn (01-22-2013)
-
01-22-2013, 03:35 PM #13Razor Vulture

- Join Date
- Oct 2010
- Location
- Lone Star State
- Posts
- 26,128
Thanked: 8612
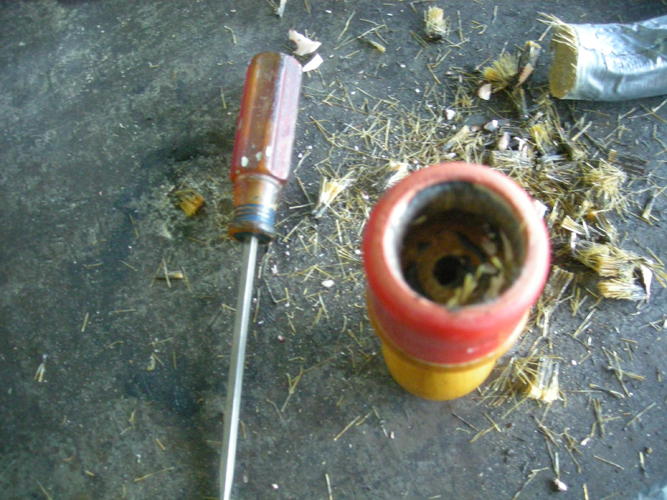
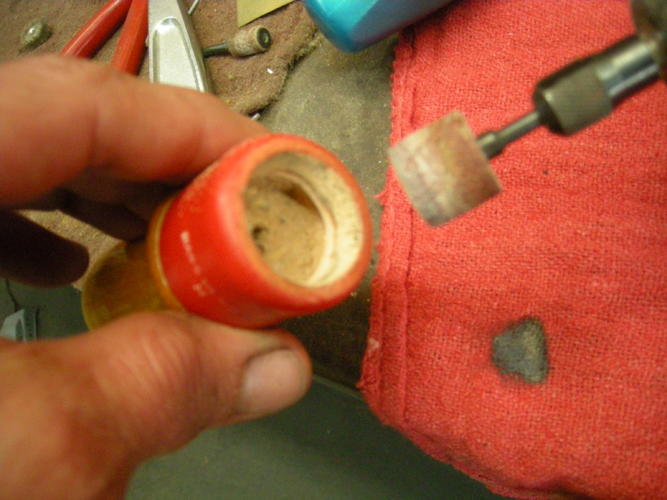
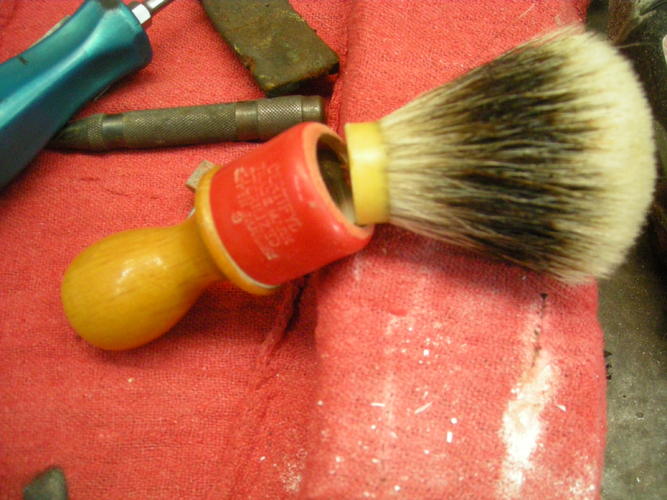
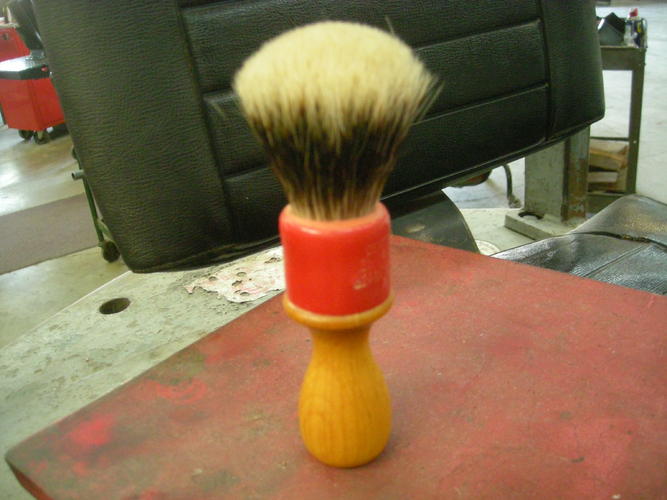
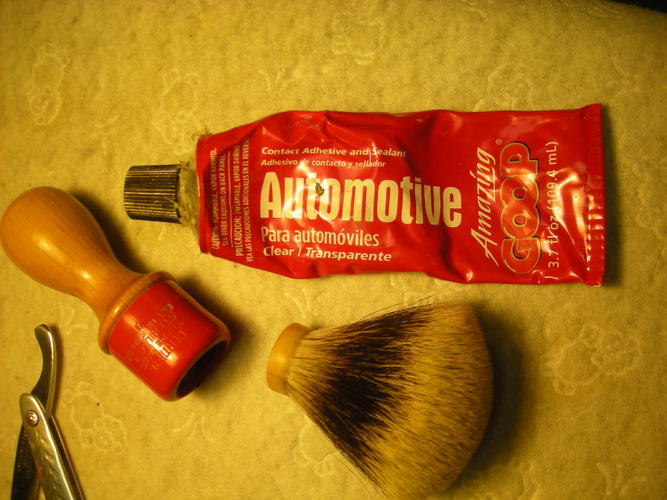
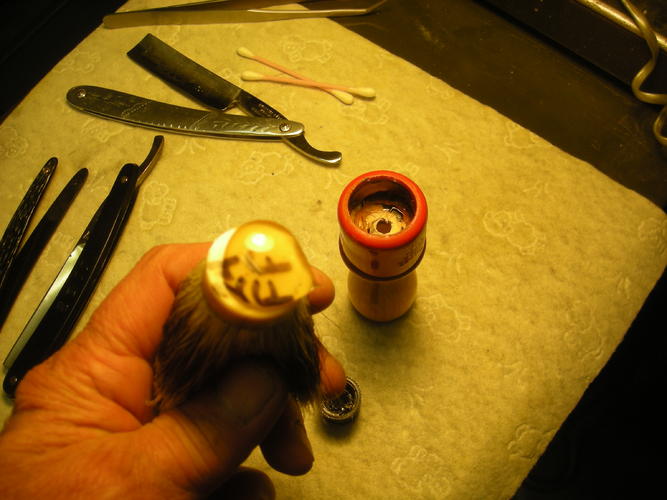
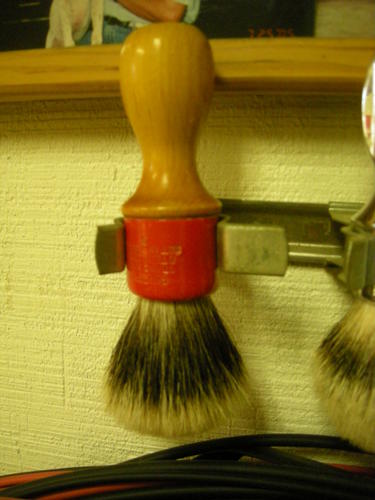
I have developed a sort of technique. I wrap the old bristles as tightly as possible in duct tape and smash them in a vise. Holding the handle out, I the use a hacksaw to cut them as closely to the handle as possible. The tape keeps the hairs from going everywhere! That done, I hold the handle in one hand and use a cordless drill on low speed with a 3/8 bit and drill the old knot thru the middle. From there, I can usually pick it out, sometimes using a dremel drum. I can also oversize the handle a bit to accomodate a size bigger knot using the drum sander on some brush handles. I don't use Epoxy, but Goop to adhere the new knot. Less messy to me, and more forgiving. I smear some on the inside of the handle and place a big wad on the top of the new knot and shove it in, holding the brush upside down. I adjust as necessary and hang the brush upside down using a broom holder wall clamp. The goop slowly runs down around the base of the knot and really works well. Takes a week or so to dry good in there, tho! Originally Posted by maddafinga

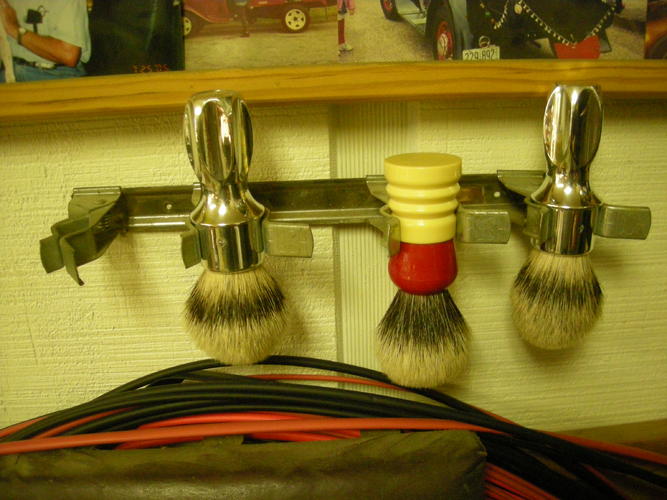
Here's 3 on the "drying rack"
Last edited by sharptonn; 01-22-2013 at 03:52 PM.
Hirlau and maddafinga like this."Don't be stubborn. You are missing out."
I rest my case.
-
The Following User Says Thank You to sharptonn For This Useful Post:
maddafinga (01-22-2013)
-
01-22-2013, 03:50 PM #14Senior Member


- Join Date
- Sep 2010
- Location
- Oslo Norway
- Posts
- 1,848
Thanked: 438
Oh my, lovely indeed! Shiiny preccc-cious!
 sharptonn likes this.
-
The Following User Says Thank You to str8fencer For This Useful Post:
sharptonn (01-22-2013)
-
01-22-2013, 03:57 PM #15Historically Inquisitive
- Join Date
- Aug 2011
- Location
- Upstate New York
- Posts
- 5,782
- Blog Entries
- 1
Thanked: 4249
Originally Posted by sharptonn
Interesting, i was thinking that you just boiled them off since the handle is metal, i use that method to boil off plastic handle of chisels, let them boil for a few minutes and the plastic handle slide right off the inserted shank.maddafinga likes this.
-
The Following User Says Thank You to Martin103 For This Useful Post:
maddafinga (01-22-2013)
-
01-22-2013, 10:09 PM #16Razor Vulture
- Join Date
- Oct 2010
- Location
- Lone Star State
- Posts
- 26,128
Thanked: 8612
Heres some pics to explain! In the 5th pic, I found my 24mm 2 band fan would almost fit, so I enlarged the top of the hole a bit with the drum sander. This one is wood/celluloid, so boiling it is out, Martin! Originally Posted by sharptonn
 "Don't be stubborn. You are missing out."
I rest my case.
-
The Following 4 Users Say Thank You to sharptonn For This Useful Post:
maddafinga (01-23-2013), Martin103 (01-22-2013), SirStropalot (01-23-2013), Tarkus (01-24-2013)
-
01-23-2013, 12:17 AM #17Senior Member


- Join Date
- Dec 2010
- Location
- South Florida
- Posts
- 13,530
Thanked: 3530
Thank you for this picture step-by-step on the brush restoration. I have never seen the other end of the brush hair. I have heard the term "knot" used before, but no idea what it looked like.
This type of work looks like something I could learn & enjoy.
............beats the heck out of battling wedges.sharptonn and SirStropalot like this.
-
The Following User Says Thank You to Hirlau For This Useful Post:
sharptonn (01-23-2013)
-
01-23-2013, 03:24 AM #18Not with my razor 🚫

- Join Date
- Oct 2011
- Posts
- 1,859
Thanked: 568
Hey Tom,
That Revere Silver is a beaut. Just saw a piece on Paul Revere silver the other day and they were showing some tea pots from him that were to be auctioned off this month. I'd never realized the connection before between him and the company.
Like Hirlau, I learned a lot from your above pics and explanation. I'd never seen a knot out of the handle before either.. Good Stuff!! Thanks for the lesson!!
Regards,
Howard
sharptonn likes this.
-
The Following User Says Thank You to SirStropalot For This Useful Post:
sharptonn (01-23-2013)
-
01-24-2013, 04:45 PM #19Senior Member

- Join Date
- Dec 2011
- Location
- I'm Gonna Spend Another Fall In Philadelphia
- Posts
- 1,996
Thanked: 498
Tom
I'd like to thank you as well for the inside look at a brush restore step by step. Nothing beats photo driven directions.
 sharptonn likes this.
-
The Following User Says Thank You to Tarkus For This Useful Post:
sharptonn (01-24-2013)
-
01-25-2013, 09:30 AM #20Senior Member

- Join Date
- Apr 2011
- Location
- HELLAS
- Posts
- 399
Thanked: 29
http://straightrazorpalace.com/attac...h-sotd-273.jpg
As a fan of traditional i can say congratulations !
Well done,keep going.sharptonn likes this.
-
The Following User Says Thank You to Doryferon For This Useful Post:
sharptonn (01-25-2013)


 Reply With Quote