
Results 41 to 45 of 45
 14Likes
 LinkBack URL
 About LinkBacks
-
03-04-2014, 01:11 PM #41Senior Member


- Join Date
- Nov 2010
- Location
- Pequea, Pennsylvania
- Posts
- 2,290
Thanked: 375 Bummer! that is odd.....
 Originally Posted by Warpiper
 CHRIS
CHRIS
-
03-04-2014, 01:39 PM #42Senior Member

- Join Date
- Dec 2013
- Location
- Charleston, SC
- Posts
- 176
Thanked: 38
Thanks Nightblade. I've let the brush soak in cold water to just below the handle and when I'm done with the shave, I do exactly what you do, shake it, give it a gentle squeeze, and then hang up side down for drying. Originally Posted by Nightblade
Chris
-
04-01-2014, 03:37 PM #43Senior Member
- Join Date
- Dec 2013
- Location
- Charleston, SC
- Posts
- 176
Thanked: 38
Hi All,
Just a short update. I sent the brush to walleyeman for him to take a look at and see what he thought was going on and here is what he sent back to me. Sweet!
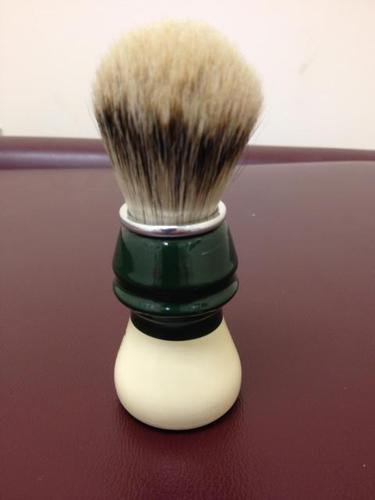
The original knot was missing a binder and the taper between the handle and knot didn't match. Ray replaced the metal ring and put in a 20 mm silver tip. It looks good and feels great! Thanks Ray!Trimmy72 and pixelfixed like this.Chris
-
04-01-2014, 03:44 PM #44Senior Member
- Join Date
- Jan 2011
- Location
- Roseville,Kali
- Posts
- 10,432
Thanked: 2027
Looks great, congrats
 CAUTION
Dangerous within 1 Mile
-
04-02-2014, 12:46 AM #45Senior Member
- Join Date
- Dec 2013
- Location
- Charleston, SC
- Posts
- 176
Thanked: 38
Thanks. Ray did a great job.
Chris


 Reply With Quote
