
Results 11 to 20 of 23
 54Likes
Thread: Pipe Brush
 LinkBack URL
 About LinkBacks
-
09-05-2018, 11:57 AM #11Senior Member


- Join Date
- Jun 2015
- Location
- South Carolina
- Posts
- 1,838
Thanked: 516
Well now hold on a sec!
Ya gotta implement some form of logical moderation... it's got to be able to withstand a drop to the floor..
Though IF I were to use such a uhhh an uhhh egg stand.. I might consider carving a nice wooden rim. Wait, hold up, just had an idea! All it needs is a roll cage!!!
Great minds... with our powers combined we can achieve anything! You must unlearn what you have learned.
Yoda
-
09-05-2018, 10:03 PM #12Senior Member


- Join Date
- Oct 2010
- Location
- 50 miles west of randydance
- Posts
- 9,699
Thanked: 1355
I have thought that one of these would make an interesting pipe brush.
21mm or 22mm knot.
https://corncobpipe.com/general-corncob-pipe.html
-
03-03-2019, 11:45 PM #13Senior Member
- Join Date
- Jun 2015
- Location
- South Carolina
- Posts
- 1,838
Thanked: 516
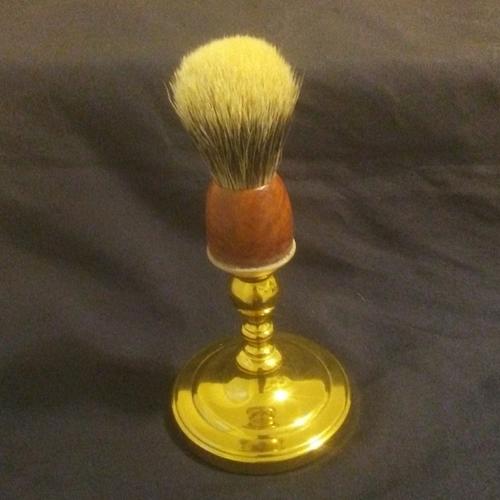
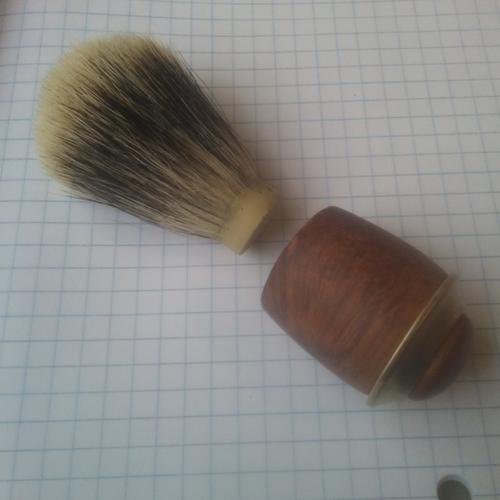
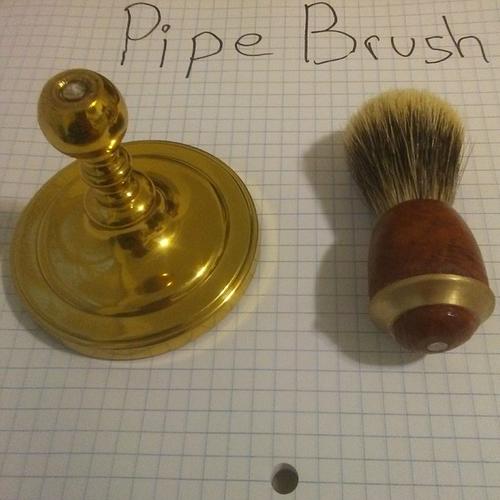
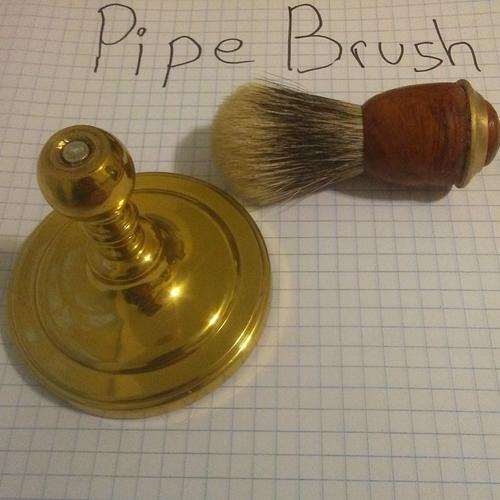
Well I finally got around to finishing this brush.
Still need to complete the CA finish. Don't have any epoxy so I scuffed up the brass and mounted with CA and decided at that moment for a CA finish being that it was all over the handle already!
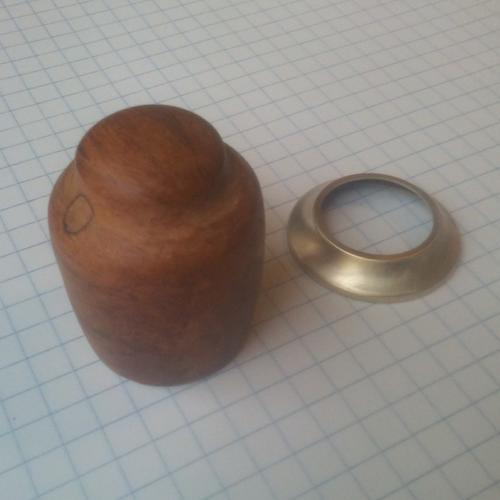
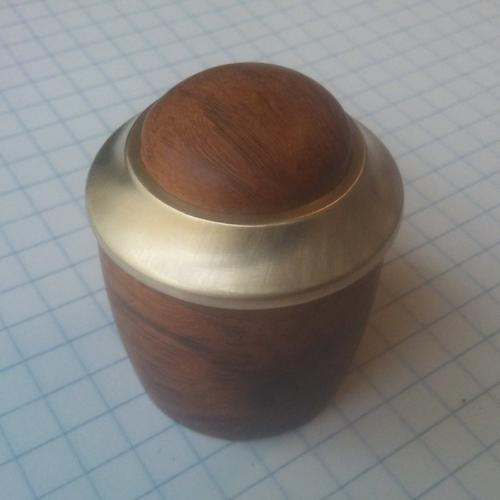
Carved out the relief to inlay the brass into the pipe.
The rim of the pipe was too thick, so I carved it thin with a knife and sanded it smooth so that it comes down to the thickness of the knot.
I think it's an 18mm not.
I put magnets into the candlestick base, and into the base of the pipe.
The knot is not glued in yet, and I'm debating whether or not to use hard wax or epoxy.
But this test is looking good I think.
I dropped the knot lower in on this one than I normally do because B52 gave me a brush recently that has a shorter height and I really like it.
 You must unlearn what you have learned.
Yoda
-
-
03-04-2019, 12:00 AM #14Senior Member
- Join Date
- Jun 2013
- Location
- Pompano Beach, FL
- Posts
- 4,048
Thanked: 636
Nice start. When I did mine I enlarged the bowl with a Dremel and sanding drum. Just be careful not to over do it.
-
03-04-2019, 12:05 AM #15Senior Member
- Join Date
- Jun 2013
- Location
- Pompano Beach, FL
- Posts
- 4,048
Thanked: 636
She is a thing of beauty. Nice curves.
-
The Following User Says Thank You to bouschie For This Useful Post:
MikeT (03-04-2019)
-
03-04-2019, 01:30 AM #16Senior Member
- Join Date
- Jun 2015
- Location
- South Carolina
- Posts
- 1,838
Thanked: 516
Thanks!
That's precisely what I used, the dremel with sanding drum.
Had to really work at it, as this briar is fairly hard.
Had to quit for the night, but finishing the CA and mounting the knot should be no problem.
Not perfect, but I'm happy with the progress.
Edit:
The knot will be a little further down.sharptonn likes this.You must unlearn what you have learned.
Yoda
-
03-05-2019, 02:06 AM #17Razor Vulture


- Join Date
- Oct 2010
- Location
- Lone Star State
- Posts
- 26,197
Thanked: 8624
I think he HAS! An egg art Faberge Brush! Originally Posted by bouschie

 MikeT likes this.
-
The Following User Says Thank You to sharptonn For This Useful Post:
MikeT (03-05-2019)
-
03-05-2019, 02:21 AM #18'with that said'


- Join Date
- Aug 2010
- Location
- Walla Walla in WA State USA
- Posts
- 11,259
Thanked: 4238
Well worth the wait to see the finished product Originally Posted by MikeT
 --Nice touch with the magnet
 Our house is as Neil left it- an Aladdins cave of 'stuff'.
Kim X
-
The Following User Says Thank You to cudarunner For This Useful Post:
MikeT (03-05-2019)
-
03-05-2019, 04:02 AM #19Razor Vulture
- Join Date
- Oct 2010
- Location
- Lone Star State
- Posts
- 26,197
Thanked: 8624
Majesty aside, That should be a little face-lathering dude.
Well-done, MikeT! Finally! MikeT likes this.
-
The Following User Says Thank You to sharptonn For This Useful Post:
MikeT (03-05-2019)
-
03-05-2019, 04:20 AM #20Senior Member
- Join Date
- Jun 2015
- Location
- South Carolina
- Posts
- 1,838
Thanked: 516
Well there you have it, The Faberge Brush!
Thanks Tom, I like it, gonna have to name it that.
Outback named the first one The Liberace Brush...
Which at the time I was not too keen on, but the name caught on just fine..
Now this Faberge name has a classy ring to it! Gonna have to make some more, one of which will have to be engraved with "Atta Boy!!" ... for posterity, of course.
Thanks Roy, I was avoiding finishing this piece, but shouldn't have. I forgot how satisfying these strange brushes are to make.
The magnet is good for sticking to things other than the base, a bit more versatile.sharptonn likes this.You must unlearn what you have learned.
Yoda
-
The Following User Says Thank You to MikeT For This Useful Post:
sharptonn (03-05-2019)


 Reply With Quote