
Results 21 to 29 of 29
 3Likes
Thread: Another Brush Restore
 LinkBack URL
 About LinkBacks
-
07-28-2012, 05:55 AM #21Obsessive compulsive


- Join Date
- Feb 2010
- Location
- New Zealand
- Posts
- 1,315
Thanked: 323
That's a great looking handle. Off to the bay...
-
07-29-2012, 01:16 PM #22BubbleHead-Extraordinaire!
- Join Date
- May 2009
- Location
- Odenton, MD
- Posts
- 50
Thanked: 6
looks really nice

-
08-08-2012, 06:46 PM #23Junior Member

- Join Date
- Jul 2012
- Location
- Arkansas
- Posts
- 9
Thanked: 1
Hey, folks,
Just an update here, for anyone else who's wondering how to remove the cap from this type of brush. I found that steaming the brush for about 30 minutes loosened the cap enough for me to unscrew it. Now I just need to remove the old knot and decide which new one I want to put in its place.
It wasn't all that difficult once I figured out that trick.
-- SammyLast edited by samlark; 08-09-2012 at 04:48 PM. Reason: Added photo.
sharptonn likes this.
-
The Following User Says Thank You to samlark For This Useful Post:
Euclid440 (07-19-2013)
-
08-09-2012, 10:34 AM #24Senior Member


- Join Date
- Jan 2010
- Location
- Amsterdam Holland
- Posts
- 2,124
Thanked: 246
Very nice handle and restore
-
08-21-2012, 04:58 PM #25Junior Member
- Join Date
- Jul 2012
- Location
- Arkansas
- Posts
- 9
Thanked: 1
Hey, guys,
Another update here: I just got done with stripping the old knot out of the handle. I used a dremel tool and sandpaper to remove the stuff inside the cap, which was kind of a chore. Anyway, here it is, ready for re-knotting. I've added the quarter for scale, if anyone was wondering.

-- Sammy
-
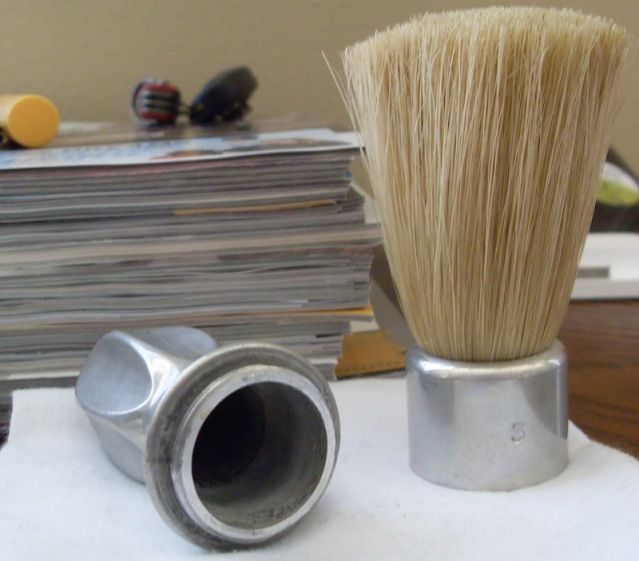
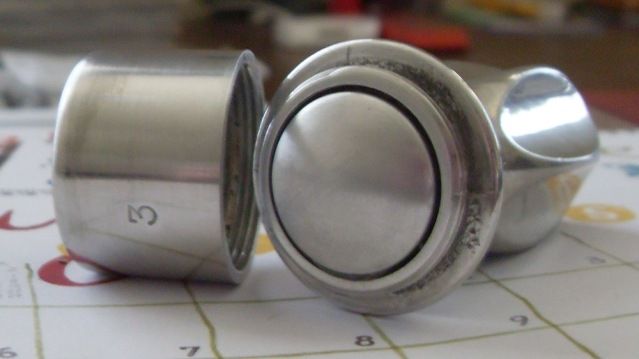
08-22-2012, 02:11 PM #26Junior Member
- Join Date
- Jul 2012
- Location
- Arkansas
- Posts
- 9
Thanked: 1 Original Box Art
In the interest of providing info on this brush's background, I thought I would go ahead and post the artwork found on the original box in which mine was packed. No year is visible, but it appears to be very old.

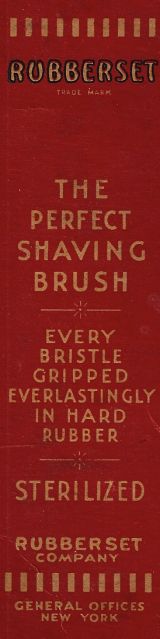
Pretty cool, I must say.
Regards,
Sammy
-
08-22-2012, 07:52 PM #27Junior Member
- Join Date
- Jul 2012
- Location
- Arkansas
- Posts
- 9
Thanked: 1
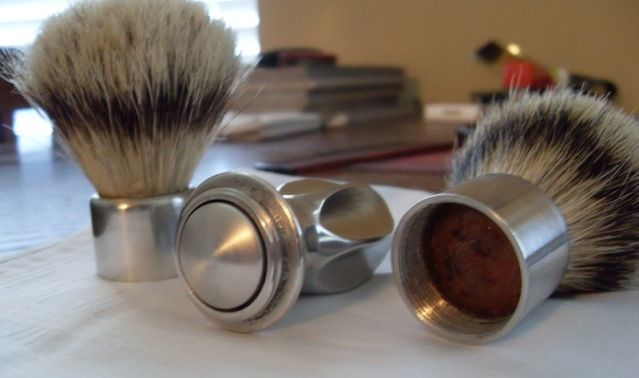
Next update: I filled the handle portion with fishing weights to give it a nice heft. I then topped off the handle with an aluminum button cover. Now I just have to figure out how to get the knot securely into the cap portion. I am doing this to retain my option of unscrewing the cap with the knot attached, leaving the handle as a separate piece.
-- SammyLast edited by samlark; 08-23-2012 at 04:11 AM.
-
08-29-2012, 11:16 PM #28Junior Member
- Join Date
- Jul 2012
- Location
- Arkansas
- Posts
- 9
Thanked: 1
Well, here it is, all finished. I actually have two of these handles, so I went ahead and did two interchangeable brush heads. Sure, it's kind of a gimmick, but I think it's really cool, especially for my first restore.
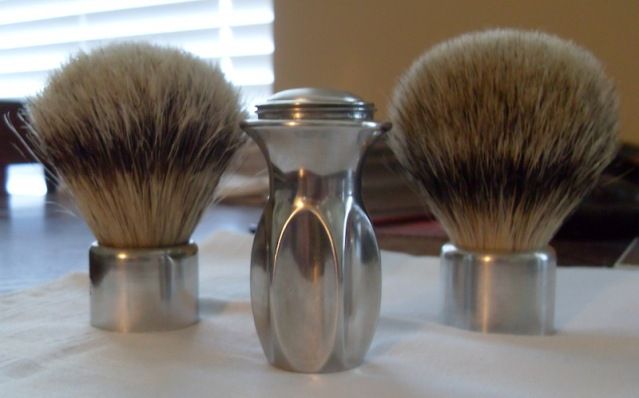
The brush head on the left is all these photos is TGN 24mm Boar Bristle, and the one on the right is TGN 26mm Silvertip.
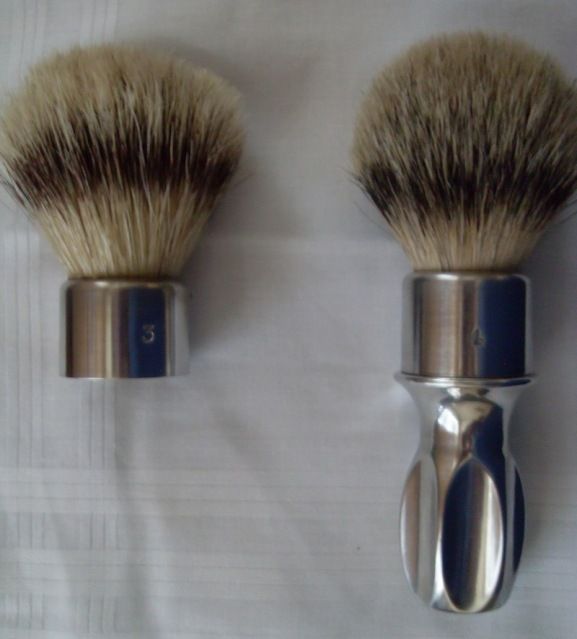
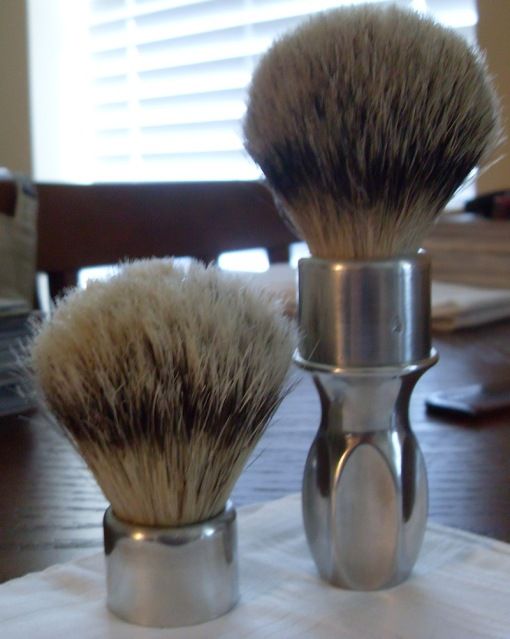
I used the Boar Bristle head this morning, and boy does it make a lot of lather. Cheers!
-- Sammy
-
08-30-2012, 03:30 AM #29Senior Member
- Join Date
- Nov 2010
- Location
- Pequea, Pennsylvania
- Posts
- 2,290
Thanked: 375
I just picked one of these up a couple weeks ago. I like what you did with the brush heads!


 Reply With Quote