Results 1 to 10 of 21
Thread: My first scales!! (Thanks)
Hybrid View
-
05-30-2014, 02:51 AM #1Junior Member

- Join Date
- Jan 2014
- Location
- Brooklyn NY
- Posts
- 6
Thanked: 2 My first scales!! (Thanks)
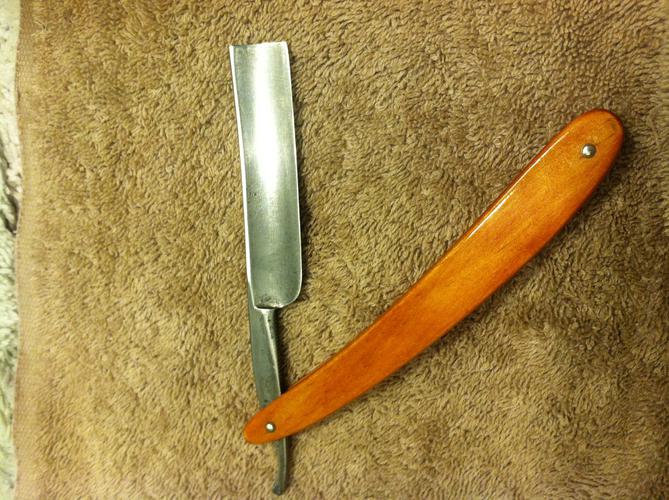
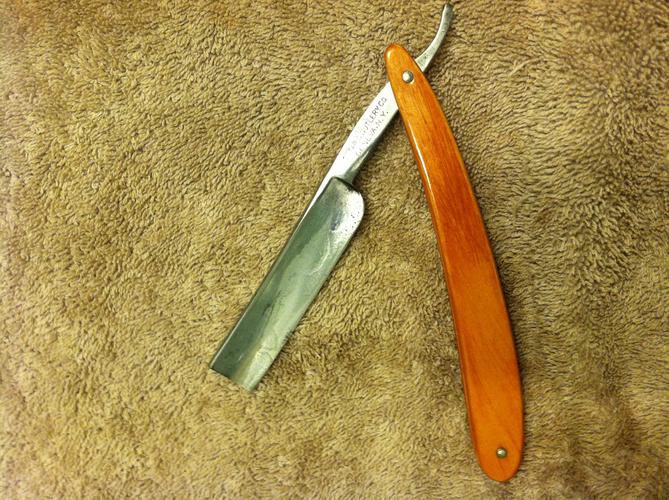
After cleaning a bunch if oldies with the scales on I tried to take off the old ones on this Ontario Cultery. Of course I cracked them. But it gave me the opportunity to try my hand tools and your advise on something completely new, making scales! For a guy with six months wet shaving and no workshop im pretty satisfied for my first time out. Thanks for all the posts.


Thanks again
-MG
-
The Following User Says Thank You to MG144 For This Useful Post:
Steel (06-03-2014)
-
05-30-2014, 02:53 AM #2

Those scales look great!
-
05-30-2014, 03:00 AM #3

very nicely done! what kind of wood, it looks awesome. first time? even more impressive for that fact!
Silverloaf
-
05-30-2014, 03:42 AM #4
-
05-30-2014, 05:19 AM #5Junior Member

- Join Date
- Jan 2014
- Location
- Brooklyn NY
- Posts
- 6
Thanked: 2
They're just pine from the hardware store with 3 coats of Minwax colonial maple and 6 or 8 coats of polyeurothane. I think it'd be nice if they had a bit more weight to them but i didn't want to spend money on nice wood when I had no idea how it would go.
-
05-30-2014, 05:33 AM #6

Very nice. That stain really raised that pine to another level.
-
05-30-2014, 09:18 AM #7
-
05-30-2014, 11:01 PM #8
-
06-03-2014, 06:06 AM #9

Hey mate,
How did you go about this and are there some more photos?
I am trying to do the same with some razors I got recently.
Cheers
-
06-03-2014, 03:11 PM #10Junior Member

- Join Date
- Jan 2014
- Location
- Brooklyn NY
- Posts
- 6
Thanked: 2 I didn’t take pics or record any of the process because I was experimenting and didn’t even think about posting until after I was done. Plus there are so many folks on here with more experience. Next time I’ll think ahead.Hey mate,
How did you go about this and are there some more photos?
I am trying to do the same with some razors I got recently.
Cheers
But here’s what I did:
The library section here has lots of good stuff that got me started.
Straight Razor Place Library - Straight Razor Place Library
I also watched this Youtube video. I have no workshop or drill press or belt sander. I used only hand tools.
http://www.google.com/url?sa=t&rct=j...68191837,d.cWc
And I searched this forum and others for how to pin and peen. For example
Un-pinning and re-pinning a razor - Straight Razor Place Library
Getting the wood stock –
I couldn't find 1/8th wood stock in my neighborhood so instead of ordering some I cut a piece of 1x2 pine long enough to make sure I could trace scales on it. A 1x2 isn’t really one inch thick. It’s more like ¾ inch. I “ripped” it in half the long way with a coping saw and put half of it way. (A Japanese style saw and a vise would probably work much better but I don’t own either and a coping saw let me do it nice and slowly in hand without slicing myself up.) Then I sanded the rough side of my new piece as if I was lapping a hone, with cross hatched pencil lines and all. Then I cut the blank in half again the same way so that I had two pieces, one for each scale, and then I lapped each of those to an even and desirable thickness.
Making the scale shape-
I glued the two pieces together with a few drops of wood glue and a piece of napkin or tissue in between. I traced the old scales on and used the cooping saw (I suppose one could use a power saw for this but I don’t own a scroll or band saw and I didn't want to use a jig saw for fine work close to my hands) to cut along the outside of the line making sure to keep the blade straight, perpendicular to the wide surface I traced onto. Once I had that rough shape cut out I used course grit sand paper (about 60 or 80) to sand up to the tracing line and taper the edges. Basically I sanded the blocky looking thing I cut out until it looked like scales. After that I just smoothed it out with some finer sand paper, like 120 and 220.
Once I had them looking like scales I measured where the pin holes should go. People use drill presses or maybe you could clamp it steady and use a regular hand drill. I used a 1/16th inch bit in a pin vice to do it by hand. Make sure the hole is straight otherwise the razor will be crooked when you pin it.
Next I separated the halves with a box cutter, prying them apart being careful not to splinter or crack them, and then sanded off whatever paper and glue remained on the inside. I then put on three coats of stain and about 6 or 8 coats of polyurethane.
Pinning-
I used #0 stainless steel washers and 16th inch nickel silver rod. Some hardware stores carry these but not in my neighborhood so I ordered washers from Micro fasteners and the rod from a knife making supplier on line. I forget which one, Jantz supplies or Texas Knife. I already had a jeweler’s block to use as an anvil. I had previously used the side of a tack hammer as an anvil to tighten my pins. The wedge I used was the wedge from the old set of scales that I traced in the beginning.
I hope that's helpful. If not what you need is probably in SRP some where. Everything I did I either learned here or is an adjustment of something learned here.
-
The Following User Says Thank You to MG144 For This Useful Post:
andrewmurray86 (06-04-2014)


 26Likes
 LinkBack URL
 About LinkBacks


 Reply With Quote


