
Results 1 to 10 of 12
 21Likes
 LinkBack URL
 About LinkBacks
-
05-30-2014, 04:18 AM #1Senior Member


- Join Date
- Aug 2013
- Location
- St. Louis, MO
- Posts
- 194
Thanked: 31 My second completed restoration--a qualified success
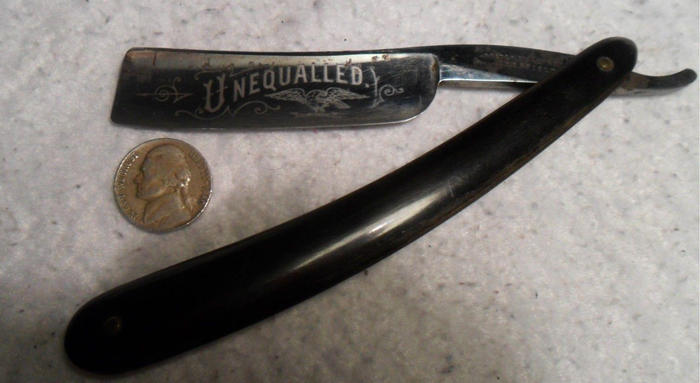
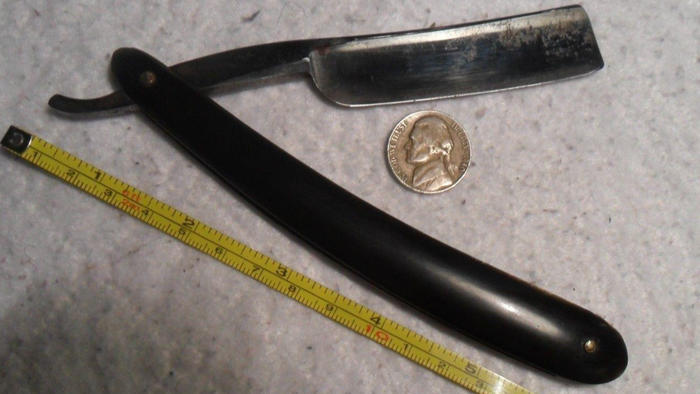
BEFORE:
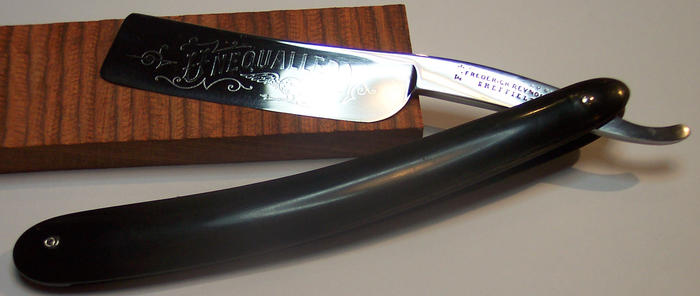
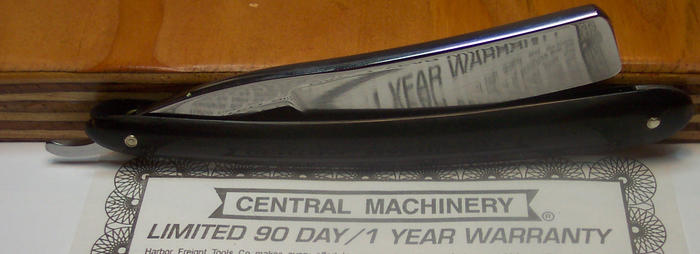
AFTER:
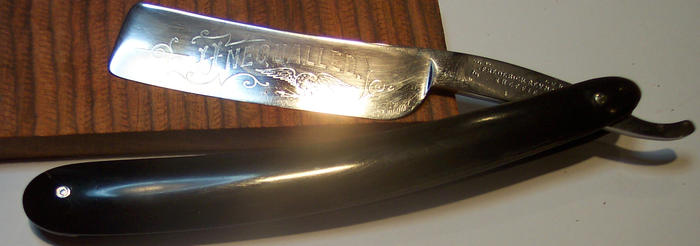
I still have to develop skill in removing scales. (I'm waiting for delivery of a drill press). It took me an hour to get the wedge end of these scales apart, and I left a little crack in the horn, running out from the pin hole. The crack didn't go all the way through, but still, there it is.
There was also some lamination on the inside of the horn and a little at the pivot tip. CA stablilized the crack and lamination.
I also need to develop skill in centering the blade. After I pinned the pivot the first time, the blade caught on a scale when closing, so I took the scales apart again and put an extra washer on one side. That still didn't solve the problem, so I took them apart again and put an extra washer on both sides. Closer, but still no cigar. I can close the blade but do need to be a little careful.
Every time I took the scales apart, I had to repin it and repeen it. When I repeened, I ended up having to sand down the peen to get it round and smooth enough. Every time I did that, I scuffed up the horn around the pin. So every repeening meant resanding also.
I sanded both the blade and the scales from 220 grit to 3000 grit, then polished with Maas.
Still learning basics. This took a long time, a full day or more on the blade, and another full day on the scales. I figure that as I gain basic skill, I'll speed up some.
This ought to make a good shaver.
Joe
-
05-30-2014, 04:30 AM #2Senior Member

- Join Date
- Oct 2013
- Location
- vermont
- Posts
- 778
Thanked: 207
awesome! I really love that blade and it really came out gorgeous! the woes of unpinning will pass..... or maybe not, It still frustrates me sometimes! fixing the little things that don't go so well teach a lot along the way, so chalk it up to a good start!
RezDog likes this.Silverloaf
-
The Following User Says Thank You to silverloaf For This Useful Post:
carrolljc (05-30-2014)
-
05-30-2014, 05:05 AM #3Senior Member


- Join Date
- Feb 2013
- Location
- Haida Gwaii, British Columbia, Canada
- Posts
- 14,455
Thanked: 4830
I feel as though it took me a lot of tries to get my pinning to a point where I didn't think it was embarrassing. That kind of surprised me because I have always been good with my hands. Often there are little challenges that still come up. I think if I wasn't challenged I would be bored. Nice razor by the way. It turned out quite nice.
RoyalCake and silverloaf like this.It's not what you know, it's who you take fishing!
-
05-30-2014, 02:23 PM #4Senior Member
- Join Date
- Aug 2013
- Location
- St. Louis, MO
- Posts
- 194
Thanked: 31
The Brad Maggard 12-part video tutorial on restoring opened my eyes in a lot of ways. One thing he said that surprised and educated me was that he gives about 300 taps with the peening hammer for each penning. Before getting into restoration, I had rescaled a few razors with ready-made scales, and the results had never been good. One reason for that was that I just wasn't giving the pins enough small taps. Originally Posted by RezDog

With the F. R. Reynolds, even after 300 taps, the pin head left a little ledge above the washer. So I sanded those down.
Maybe next time, I'll not sand the scales until after I've done the peening. Then I can sand the pin and scales together.
To tell the truth, I did that once with the wedge-end scales, and had sanded so far that the washer got free from the pin. Had to start over on that one.
I know what you mean about needing challenges not to get bored. So long as I feel I'm making progress, not just spinning my wheels, I'm happy.RezDog likes this.
-
05-30-2014, 02:25 PM #5Senior Member
- Join Date
- Aug 2013
- Location
- St. Louis, MO
- Posts
- 194
Thanked: 31
That's for sure. Originally Posted by silverloaf
Joe
-
05-30-2014, 10:47 PM #6white lightning

- Join Date
- Oct 2013
- Location
- Vancouver
- Posts
- 194
Thanked: 33
i love the etching on that razor. if you end up selling it, let me know.
instagram - @suckerpunch_daycare
-
05-30-2014, 10:55 PM #7Senior Member
- Join Date
- Aug 2013
- Location
- St. Louis, MO
- Posts
- 194
Thanked: 31
Yeah, that's a keeper. My thought as I was working on it was, "I'll keep this one." But who knows? Part of the fun is finding new things. Eventually, this one might go back into circulation. Originally Posted by recklessabandon
Joe
-
05-31-2014, 02:09 AM #8Senior Member

- Join Date
- Sep 2008
- Location
- Crossville, TN
- Posts
- 1,711
Thanked: 304
Nice job! You will find that a properly honed Frederick Reynolds is a mighty fine shaving razor. I own a few, a couple hollow ground, a small 5/8 wedge and a larger 7/8 wedge, some of my finer shavers. Now, they can be a pain to hone but once you get a proper bevel set and the edge honed and polished you will discover it will hold that edge for a long time. Enjoy!!
-
05-31-2014, 02:19 AM #9Senior Member

- Join Date
- Feb 2014
- Location
- California
- Posts
- 463
Thanked: 51
Thats all fine and dandy but did you complete the painting using the full spectrum of buffing compounds? Razor looks great!
-
05-31-2014, 02:40 AM #10Senior Member
- Join Date
- Aug 2013
- Location
- St. Louis, MO
- Posts
- 194
Thanked: 31
No. I had tried Dico buffing compounds with the Dremel felt attachments. For some reason, they left scuff marks. So for the Reynolds, instead of using buffing compounds, I went to 3,000 grit and Maas. Originally Posted by HaiKarate
After watching Brad Maggards's twelve-part YouTube tutorial on restoring, I ordered a full scale two-speed buffer. It was delivered today. I have greaseless compounds for the lower grits and then the finishing compounds. Once I get the buffer set up, that will take the place of the Dremel and presumably side-step the problem of the scuff marks. Before setting up the buffer, though, I have to set up a curtain of 6 mil polyethylene around the buffing area. The workshop is in a furnished room. I'm planning to have the polyethylene sheets roll up on dowels, using pulleys.
I'll be interested to see whether the finishing compounds improve the shine on the Reynolds.
Joe


 Reply With Quote