
Results 1 to 10 of 23
 50Likes
 LinkBack URL
 About LinkBacks
-
08-27-2014, 05:02 AM #1Senior Member


- Join Date
- Jun 2013
- Location
- Gladstone QLD AUSTRALIA
- Posts
- 3,245
Thanked: 804 W&B 6/8" Wedge - Vintage rebuild to original specs
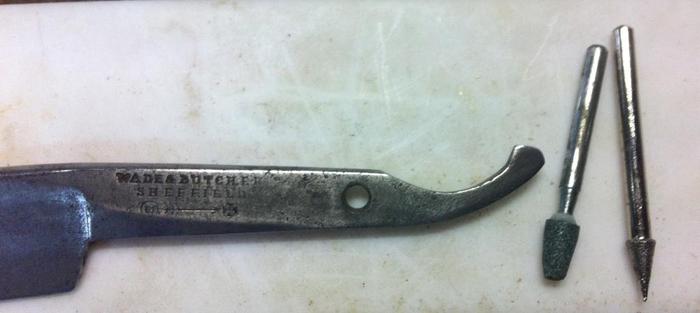
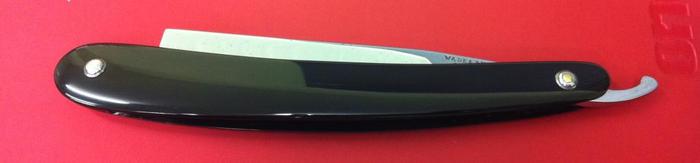
G’day all,
finally finished my Vintage Rebuild of this neglected old Pre-1890 Wade & Butcher 6/8” Wedge
works performed as follows:
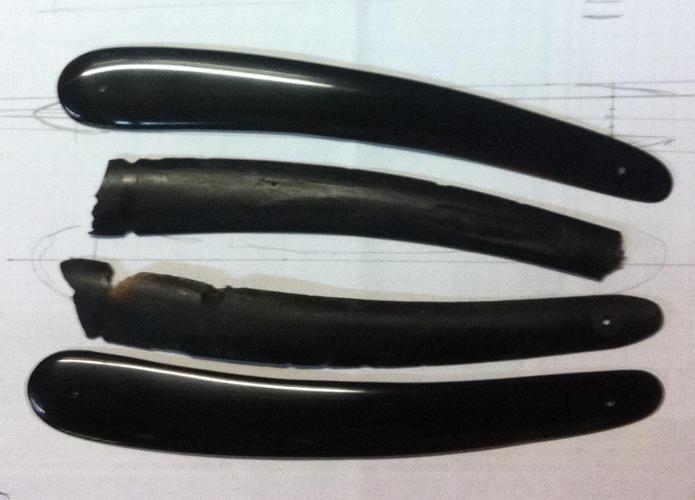
striped down the broken scales thinking it had just lost the wedge & pin found it was a wedgeless scales assembly, this changed my game plan as now had to work out how to do a wedgeless set up.
used what was left of the old scales and another old W&B to fill in the gaps for the new scales template.

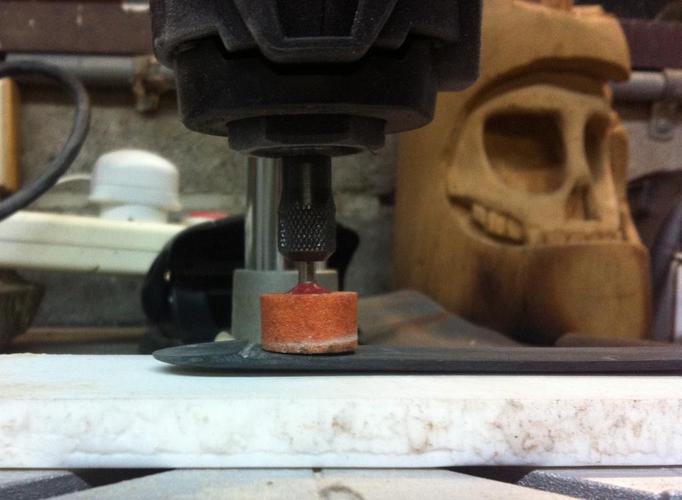
new buffalo horn scales, basically I hand shaped & sanded the outside using the original scales as a guide, but leaving a bit of extra thickness on them,
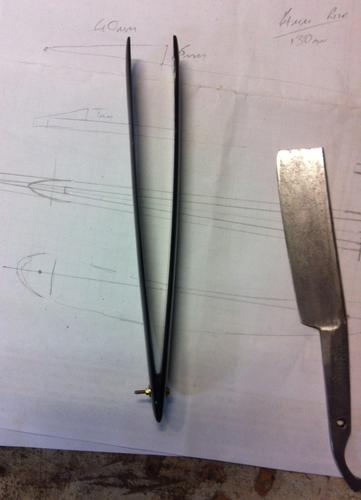
then I used my dremel as a sort of milling machine to make the wedge cuts the same & cut out the inner face of the scales.
any time I saved not needing to make a wedge I made up for working out how to do this, but now I have a technique it should be quite easy to replicate.
more final hand sanding through to 5k inside & out followed by a good Ren. wax polishing
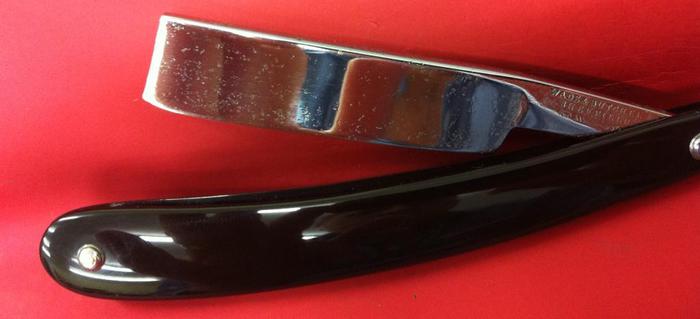
as for the blade
I gave the heavily scaled blade a CLR soak to help free the scaly rust on the blade worked a tret but don’t do it for long once was enough refer post CLR & the light touch post.
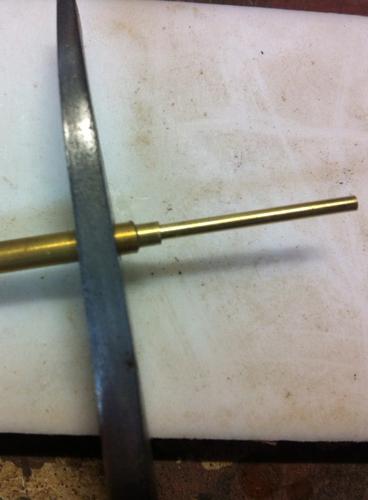
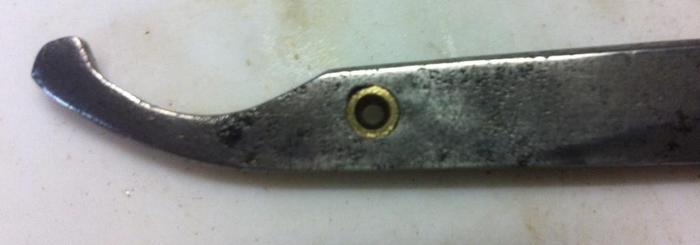
re sized & brass bushed the pivot hole so it is nice & tight now ( not original but the way I like them )
this was all followed by umpteen hours of hand sanding to remove as much pitting as I thought necessary while avoiding the stamp as much as possible, I would say easily in excess of 20hrs of hand cramping from 80 to 5000 grit & I am still not 100%
followed by Autosol polish & a final coat of Ren. wax
Now as the original wedge pin & washers were long gone & the pivot hardware wasn’t far behind it,
I have to give a special thanks to *Hart* for parting with & providing the replacement original bullseye washers so I could keep this as close to original as I could possibly get.

Harts washers were received with pins still intanct, I found when I broke them down last night that 1 of the sets actually had the inner washers also, so I used this on the wedge end for the extra pressure.
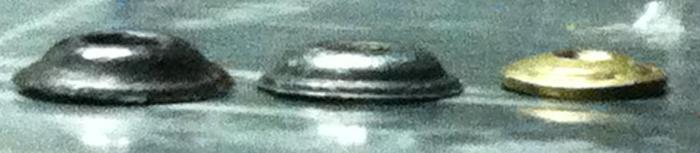
My 1 good original with inner washer, Harts replacement in centre and my rough attempt at making some on the right.
Final assembly
W&B 6/8” Wedge
new wedgeless scales
W&B steel bullseye washers
new brass thrust washers from 10 thou shim
new brass pins
and some more Ren. wax polishing

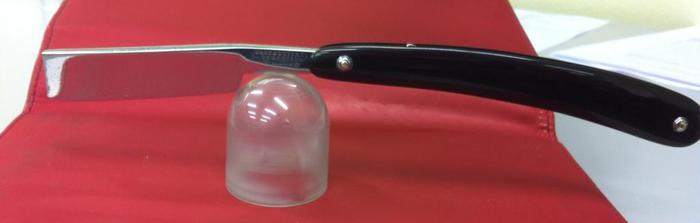
not honed yet but hopefully will be in the next week,
as I have another old W&B full hollow that is only getting hand polished for now,
then I will hone them both together as my arms are getting a bit el natural looking again. LOLLast edited by Substance; 08-27-2014 at 05:05 AM.
Saved,
to shave another day.
-
The Following User Says Thank You to Substance For This Useful Post:
markbignosekelly (08-29-2014)
-
08-27-2014, 05:13 AM #2Senior Member

- Join Date
- Jun 2014
- Location
- Eads, TN
- Posts
- 1,042
Thanked: 161
That is a fantastic restoration and it looks as if it should be sitting in a shop keepers window on Fleet st. I have seen several razors in the condition that yours was in originally and thought of how much I liked that rough and tumble look with the wedge end wrapped in waxed twine. I would like to see one finished like that with all the warts and imperfections open to public view.
Substance likes this.SRP. Where the Wits aren't always as sharp as the Razors
http://straightrazorplace.com/shaving-straight-razor/111719-i-hate-you-all.html
-
08-27-2014, 06:00 AM #3Senior Member
- Join Date
- Jun 2013
- Location
- Gladstone QLD AUSTRALIA
- Posts
- 3,245
Thanked: 804
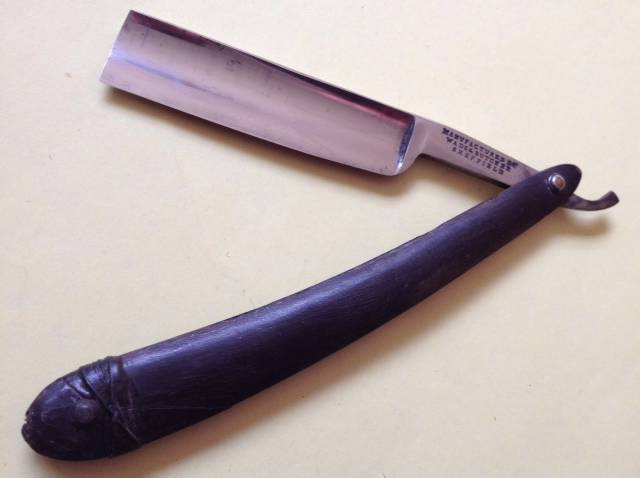
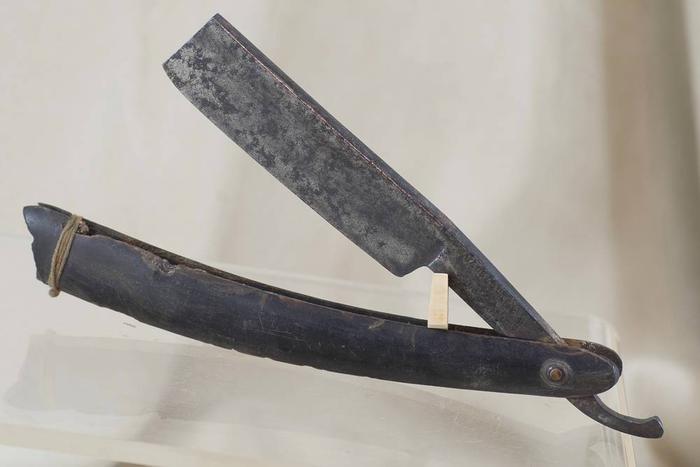
this is the other I mentioned that I am going to hone at the same time,
since the binding is nice & tight it is only getting a clean & light polish, no sanding or other work & will remain as is until it fails in another 100 years maybe
I love the narley true to form old school character that is has, it looks used & loved & the blade is in remarkable shape actually
The scales are almost identical to & what i used to complete the details for the wedge scales.Saved,
to shave another day.
-
08-27-2014, 09:21 AM #4Senior Member

- Join Date
- Dec 2012
- Location
- Perth, West Australia
- Posts
- 1,431
Thanked: 497
Hey Mate, that's a lovely restoration and this thread is going straight in my "Tips and Tricks" folder
 http://straightrazorplace.com/workshop/18504-welcome-workshop-how-do-i-where-do-i-what-do-i-answers-here.html
-
08-27-2014, 02:19 PM #5Razor Vulture


- Join Date
- Oct 2010
- Location
- Lone Star State
- Posts
- 26,122
Thanked: 8612
Great work! It turned out quite nice and looks original!
Substance likes this."Don't be stubborn. You are missing out."
I rest my case.
-
08-27-2014, 03:07 PM #6Historically Inquisitive

- Join Date
- Aug 2011
- Location
- Upstate New York
- Posts
- 5,782
- Blog Entries
- 1
Thanked: 4249
Very nice work and tutorial, time period correct! i have a Wade & butcher from that era with the wedge being part of the scales like you made. On mine the wedge part is only on one side.
-
08-27-2014, 05:12 PM #7'with that said'


- Join Date
- Aug 2010
- Location
- Walla Walla in WA State USA
- Posts
- 11,244
Thanked: 4237
Nothing wrong with that work Bubba! Nice Job and a Great Tutorial! Thank you!
 Substance likes this.Our house is as Neil left it- an Aladdins cave of 'stuff'.
Kim X
-
08-27-2014, 08:52 PM #8Senior Member
- Join Date
- Jun 2013
- Location
- Gladstone QLD AUSTRALIA
- Posts
- 3,245
Thanked: 804
I have a Joseph Rodgers Microtome with a similar 1 sided wedge cut into one scale, but I think is due to the off centred blade arrangement of the Microtome Originally Posted by Martin103
 Saved,
to shave another day.
-
08-27-2014, 09:12 PM #9At this point in time...


- Join Date
- Jun 2007
- Location
- North Idaho Redoubt
- Posts
- 27,037
- Blog Entries
- 1
Thanked: 13249
Very nicely done, you paid particular attention to thinking it through, and taking your time, and the results show it
Substance likes this.
-
08-27-2014, 09:19 PM #10It's bloodletting with style! - Jim

- Join Date
- Jul 2011
- Location
- ~ California, USA ~ The state of denial!!!
- Posts
- 615
Thanked: 118
Fantastic work. I am inspired by work like this. Thx
Substance likes this.May your lather be moist and slick, the sweep of your razor sure, and your edge always keen!


 Reply With Quote