Results 1 to 10 of 45
Thread: Tamahagane work in progress
Threaded View
-
04-01-2015, 01:16 PM #2

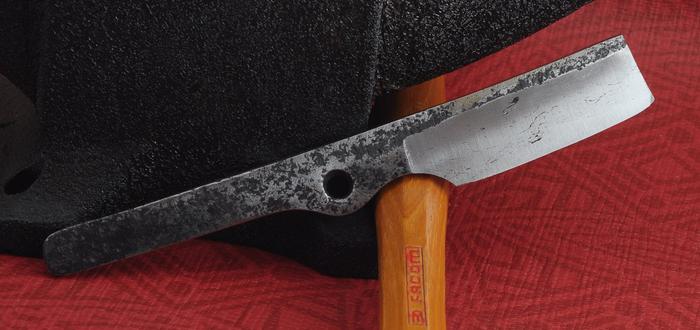
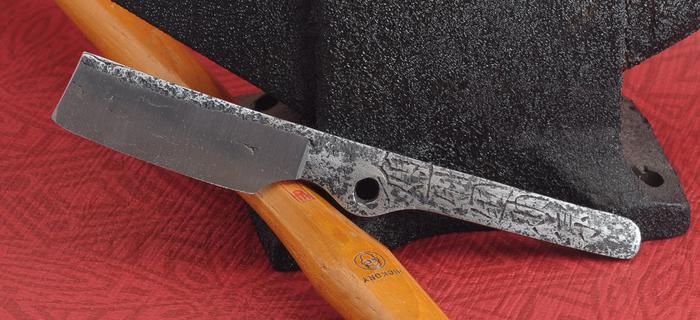
The first one, closest to my calipers, was the worst in terms of rust and pitting. I decided to use that one as a testcase, to see how I could best work this steel, and to get my feet wet with the heat treatment. I decided to turn it into a fixed handle razor for a couple of reasons: The kanji were in a really convenient place for that, the mekugi ana (the hole) is very high in the blade, making it difficult to eliminate, and the blade has pitting. If I'd have to remove the pitting, I'd have to grind away a lot and that wouldn't look good. And as a fixed handle razor, I decided I could get away with the overall state of the blade, because I think it adds character combined with the kanji.
I ground around the makugi ana, and turned it into a nice thumbnotch. Additionally, the hole can be used for cord wrap. The blade is a quarter hollow, and fairly heavy.
Because I cut through various layers of steel with a hollow grind, I decided against a differential heat treatment. Such heat treatment would give me a hamon, which would look cool. However, because I cut through multiple different layers, and because I don't have a lot of metal to spare to grind away, I decided not to risk it, since it could warp bad. I don't have too many of those pieces to work with.
The end result is what you see below. A couple of things are to be observed:
There is no hamon. Near the edge you see a different in hardness that looks a bit hamon-like. This is simply due to the fact that my grind cuts through different layers, and the edge layer is harder than the other. It looks vaguely like a hamon, but isn't technically one. It also photographs badly. There are also the expected kitae kizu (lit. folding scars) which are welding flaws. This is perfectly in line with expectations, and what you get if you work with apprentices and sledgehammers instead of a powerhammer.
What I really love in this blade is the fact that the hada has become visible under etching. Hada is the grain pattern of the steel surface, and caused by the folding of the steel. The transitions from one layer to the other will become visible and give a nice grain structure to the surface, when when sanded smooth. You can think of this a bit like damascus steel, but with 1 type of steel only. You can find more info about hada here.
Jihada Forms
The hada is especially visible on the back side, where you can clearly see the wavy pattern of the welding lines.

 Til shade is gone, til water is gone, Into the shadow with teeth bared, screaming defiance with the last breath.
To spit in Sightblinder’s eye on the Last Day
-


 180Likes
 LinkBack URL
 About LinkBacks


 Reply With Quote