
Results 1 to 10 of 18
 63Likes
Thread: Smith & Hawksley's Customised
 LinkBack URL
 About LinkBacks
-
04-25-2019, 09:21 PM #1www.edge-dynamics.com


- Join Date
- Feb 2013
- Location
- London
- Posts
- 3,066
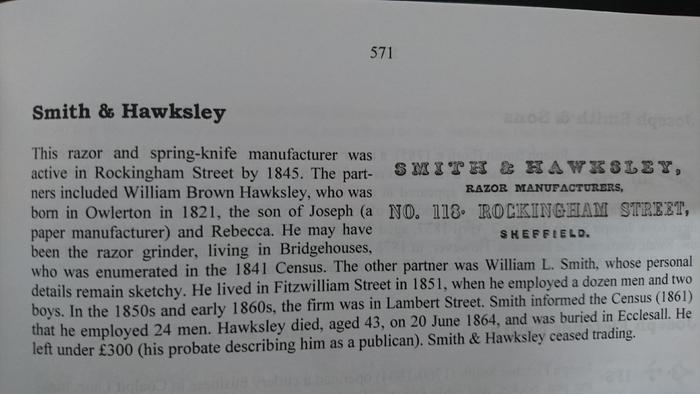
Thanked: 512 Smith & Hawksley's Customised
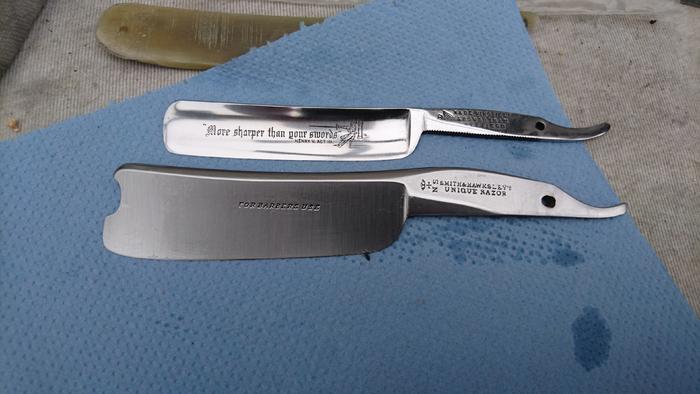
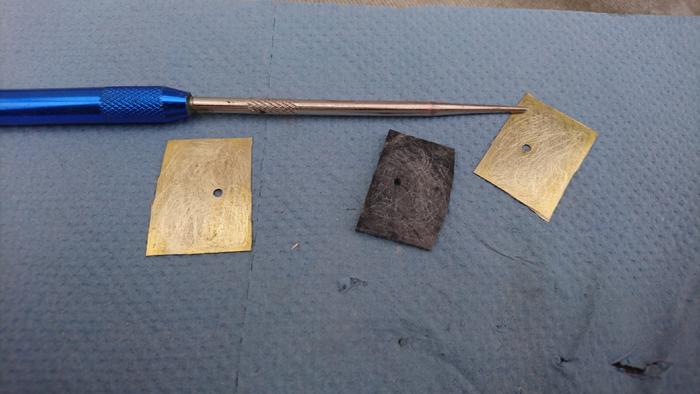
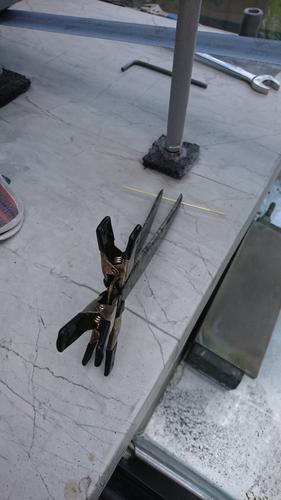
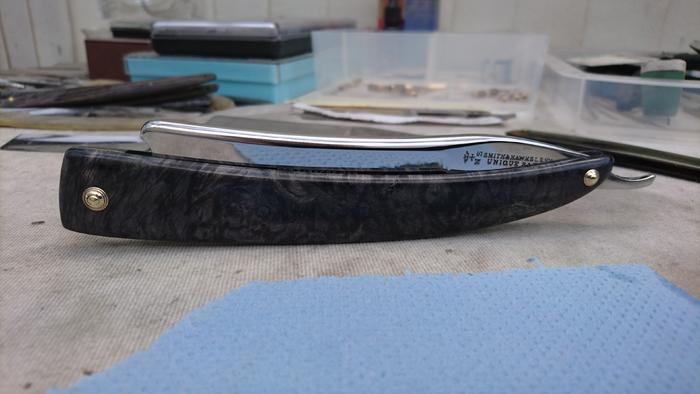
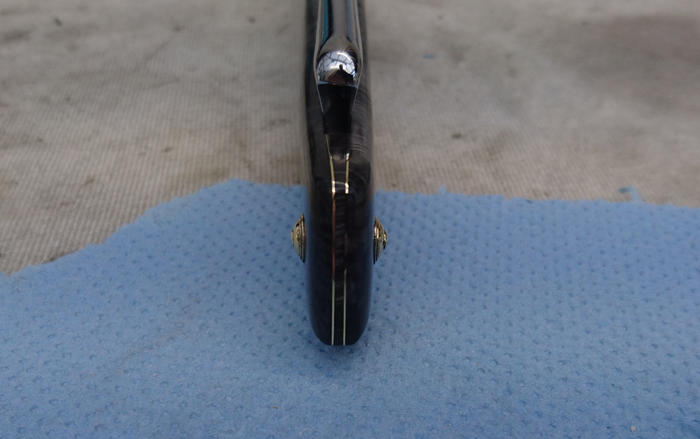
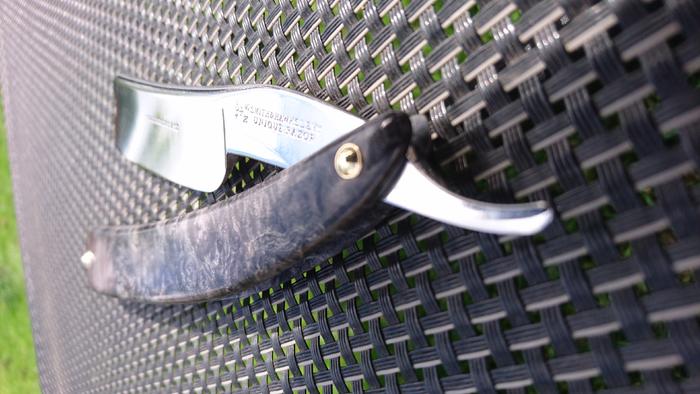
Smith & Hawksley's 8/8ths.
Took a few pictures along the way
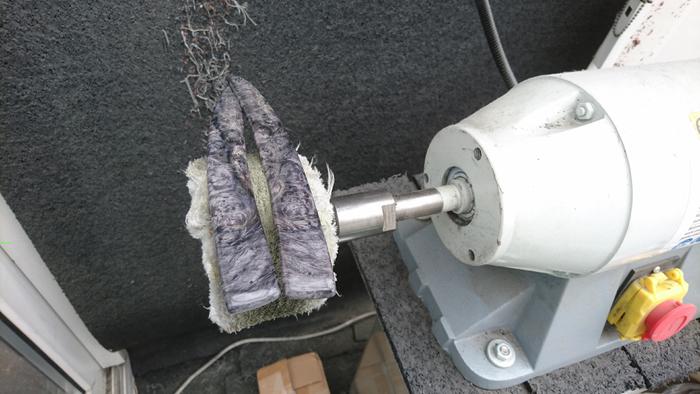
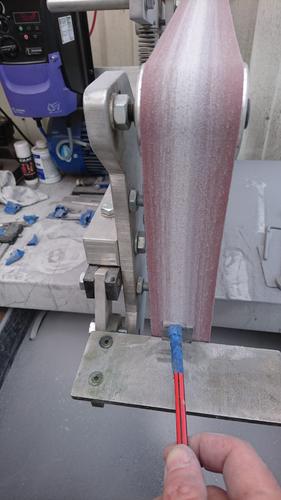
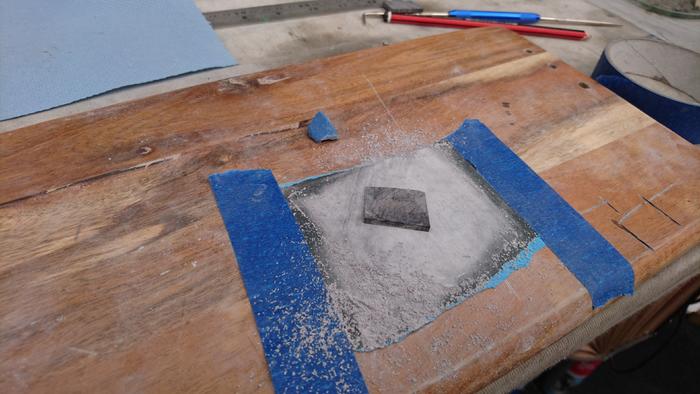
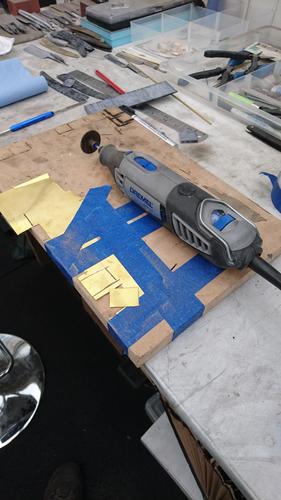
Info
Satin Finish but I ended up with a polished finish.
Cut the scales from stabilised burr
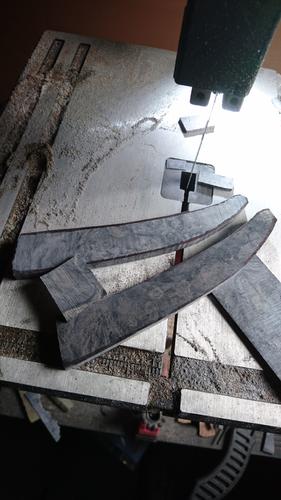
Thinned them.
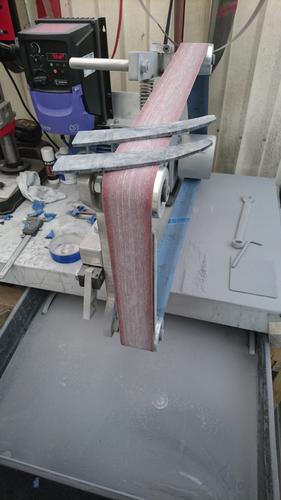
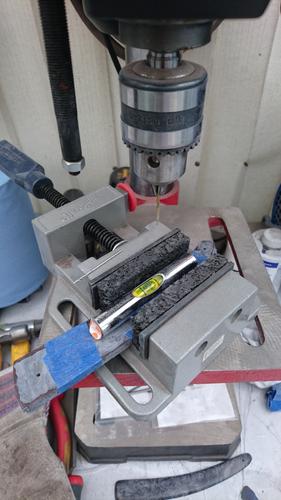
Drilled the pin holes / Small bit first followed by a larger bit.
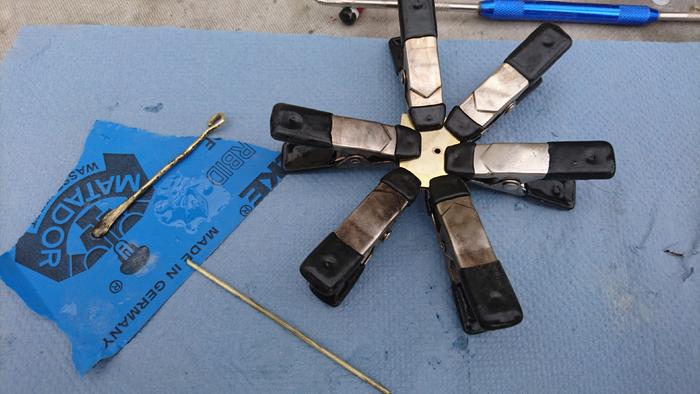
Making sure they are flat.
Now I can join the scales and profile them.
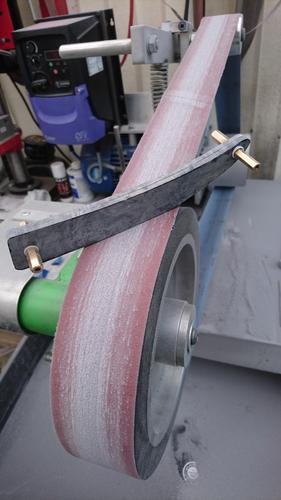
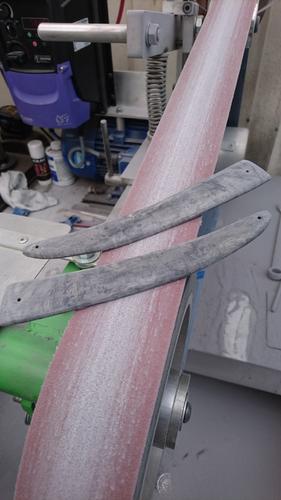
Bevel the edges.
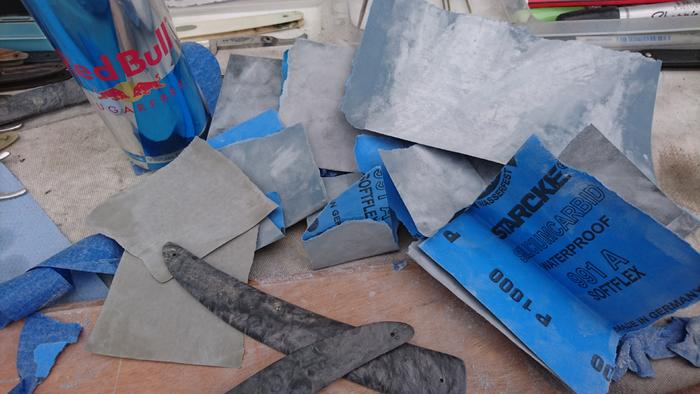
Hand sanding 400/1000/2000/3000. Red Bull Needed.
Buffed them.
Fashion a wedge.
Finished by hand
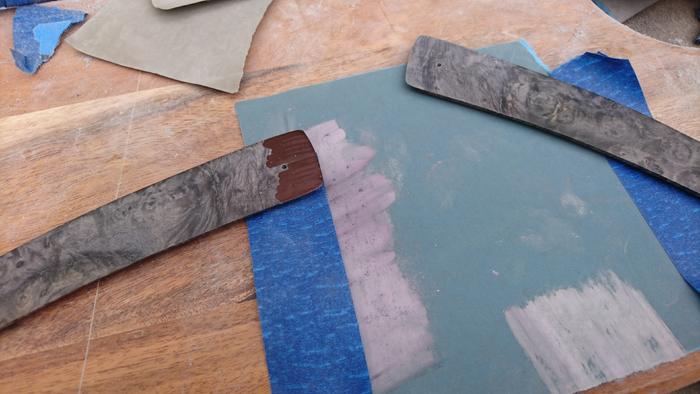
Cut the lining. Slow speed & 2 hands.
Scratch up the sides
Glue & clamp them
Flatten the scale ends. Not easy to do.
Mock up time , Blade is a little too low ,sand the wedge a bit.
Glue and clamp the wedge to the scales
-
The Following User Says Thank You to JOB15 For This Useful Post:
Thaeris (04-27-2019)
-
04-25-2019, 09:27 PM #2www.edge-dynamics.com
- Join Date
- Feb 2013
- Location
- London
- Posts
- 3,066
Thanked: 512
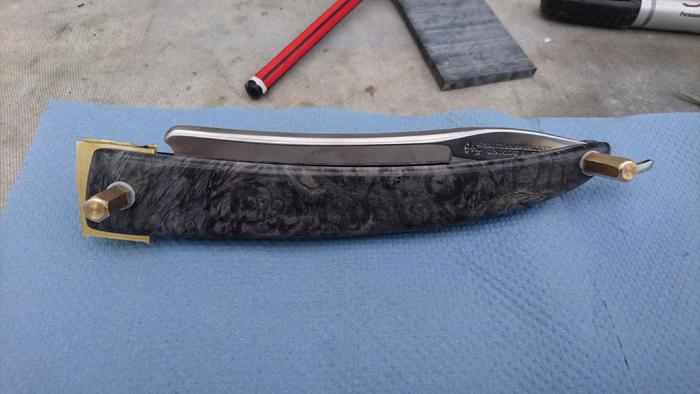
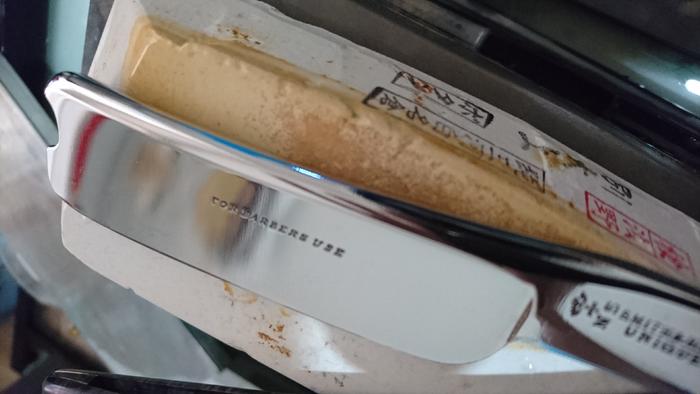
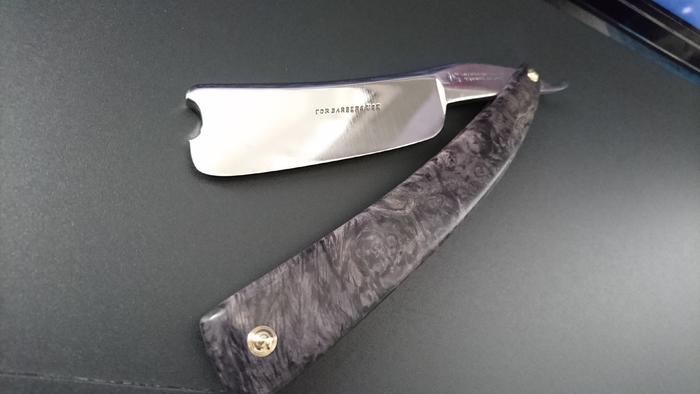
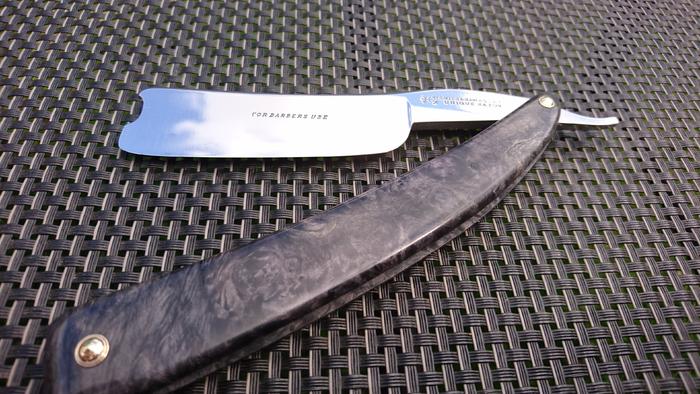
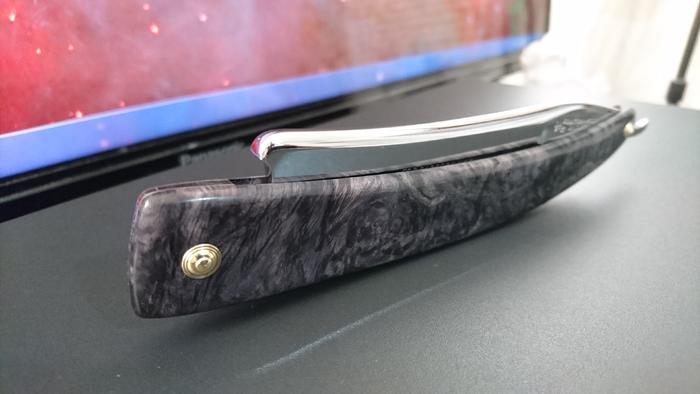
A Few Finished Pictures..
Honing this was pure pleasure.
1 layer scotch tape & 1 layer Kapton gave a bevel angle of 17.3 degrees.
Full progression an the Nakayama no dilutions and a soft tomo.
The HHT is the best it can be.
A great thin even bevel.
-
The Following 11 Users Say Thank You to JOB15 For This Useful Post:
-
04-25-2019, 10:24 PM #3Senior Member


- Join Date
- Mar 2012
- Location
- Thunder Bay, Ontario, Canada
- Posts
- 17,331
Thanked: 3228
First class work.
BobJOB15 likes this.Life is a terminal illness in the end
-
04-25-2019, 10:30 PM #4www.edge-dynamics.com
- Join Date
- Feb 2013
- Location
- London
- Posts
- 3,066
Thanked: 512
Thanks Bob Originally Posted by BobH

-
04-25-2019, 10:52 PM #5Senior Member


- Join Date
- May 2010
- Location
- Upstate South Carolina
- Posts
- 3,308
Thanked: 987
Wow, that is literally how it's done. Thanks for the tutorial-I'm still working out issues with the wedge end; just did my 1st 2 with liners; let's just say they're not quite up to your level. That stabilized burl is gorgeous-one of the finest looking razors I've seen on here in a while!
There are many roads to sharp.
-
04-25-2019, 11:01 PM #6www.edge-dynamics.com
- Join Date
- Feb 2013
- Location
- London
- Posts
- 3,066
Thanked: 512
Cheers.. Appreciated. Originally Posted by ScoutHikerDad
-
04-25-2019, 11:07 PM #7Senior Member

- Join Date
- Mar 2015
- Location
- Indiana, Portland
- Posts
- 321
Thanked: 70
Very nice work. You have great taste.
JOB15 likes this.
-
04-25-2019, 11:58 PM #8Senior Member


- Join Date
- Feb 2008
- Location
- Bergen County,N.J.
- Posts
- 4,340
Thanked: 832
Everything about that razor is gorgeous and the work you did is fantastic. LOVE IT!
JOB15 likes this.Having Fun Shaving
-
04-26-2019, 01:38 AM #9barba crescit caput nescit


- Join Date
- Jul 2013
- Location
- Toronto, Canada
- Posts
- 9,664
Thanked: 2693
Some beautiful blades with some grand scale work, sheesh, haven't blacked out from seeing a razor in quite awhile....love it!
I gather that will be a centerpiece in your rotation?ScoutHikerDad and JOB15 like this.
-
04-26-2019, 02:14 AM #10~ Life is but a Dream ~

- Join Date
- Dec 2014
- Location
- Oakham, Ma.
- Posts
- 3,844
Thanked: 1218
Awesome work and great documentation.
Pete <:-}JOB15 likes this."Life is short, Break the Rules. Forgive quickly, Kiss Slowly,
Love truly, Laugh uncontrollably, And never regret ANYTHING
That makes you smile." - Mark Twain


 Reply With Quote