
Results 1 to 8 of 8
 35Likes
Thread: WB Horn and Bone Pair
 LinkBack URL
 About LinkBacks
-
04-26-2019, 10:34 PM #1Senior Member


- Join Date
- May 2010
- Location
- Upstate South Carolina
- Posts
- 3,308
Thanked: 987 WB Horn and Bone Pair
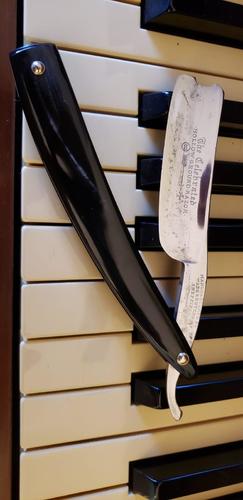
So as I posted about in the Workshop, this is the WB Horn and Bone pair (don't worry, I'll spare you the obvious song reference that was going through my head the entire time I was working on this project, though it also gave me the inspiration for how to photograph them on our otherwise long-neglected piano lol!) The Celebrated Hollow Ground got the horn scales with a brass-lined camel bone wedge, and the Diamond Edge got the opposite: Austin's camel bone scales with a brass-lined horn wedge:

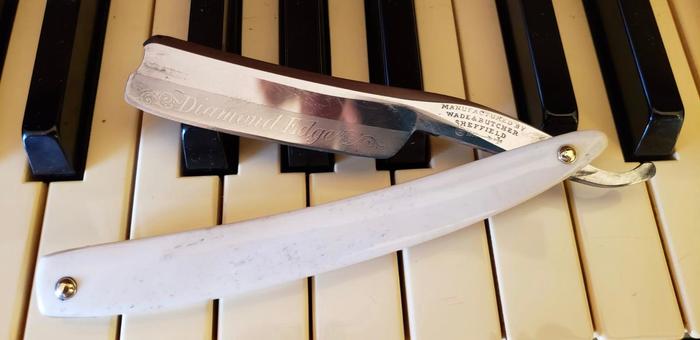
Back side:

I left some character marks on both blades, as a) the carpal tunnel in my grading hand rebels after too much hand sanding, and b) the splayed deep gouges on The Celebrated look to me like someone once tried to use a sisal or maybe even a wire wheel on the blade face, leaving deep scratches on this otherwise beautiful blade that I'm not going after. She's got some miles on her, but she's curvy, which I dig.
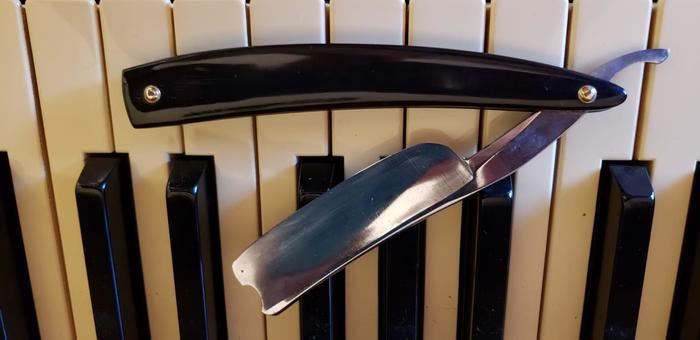
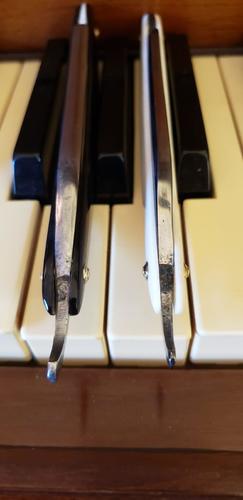
Here's a wedge view: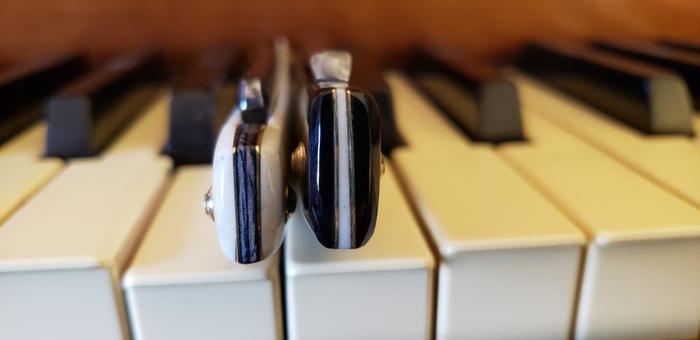
Obviously I've got some QC issues to work out: both wedges are a bit fat, the front ends aren't evenly finished, the Diamond Edge got drilled and pinned a little low (I swear I was dead center when I committed the drill bit!), and I may have polished some compound into the microscopic bone divots that I can't seem to get out, but overall I'm happy with how they turned out. They pinned up nice and tight on both ends in the brass cup collars with brass pins. Plus, I learned a lot doing this that will serve me on future projects.
Pivot end:
Finally, this project provided a couple of firsts for me: the brass-lined wedge, and my 1st time using bone. Thanks Austin/AJ for the camel bone and walking me through how to work with it-now I know why it has to always be so thin! The brass liners I'm going to save for only the most distinctive razors like this, as it was kind of a PITA. As for the camel bone, it is a dream material to work in most respects, very intuitive and predictable (unlike how feathered horn can bow and warp!), and I already have my 2nd set from Austin ready for the right blade.
Anyway, thanks for looking; constructive criticism is always welcome, as my goal is to learn a new technique and improve with every rescale I do.
A-Aron/SHD
edit: Oops, somehow my pics turned upside down-obviously my photography skills haven't improved! I'm gonna go get a generous glug of Laphroiag now and maybe come back to straighten them out.Last edited by ScoutHikerDad; 04-27-2019 at 11:43 AM.
There are many roads to sharp.
-
The Following 5 Users Say Thank You to ScoutHikerDad For This Useful Post:
cheetahmeatpheonix (05-11-2019), Dieseld (04-27-2019), JOB15 (04-27-2019), markbignosekelly (04-27-2019), Steel (04-28-2019)
-
04-26-2019, 10:59 PM #2Senior Member

- Join Date
- Jun 2013
- Location
- archbold ohio
- Posts
- 2,379
Thanked: 546
nice job! They do "live together in perfect harmony" (just couldn't resist
 )
)
-
04-26-2019, 11:05 PM #3Senior Member

- Join Date
- May 2010
- Location
- toronto
- Posts
- 1,156
Thanked: 406
Beautiful!!
ScoutHikerDad likes this.
-
04-26-2019, 11:54 PM #4Senior Member


- Join Date
- Feb 2013
- Location
- Haida Gwaii, British Columbia, Canada
- Posts
- 14,457
Thanked: 4830
Good job, they are a pretty good looking pair.
ScoutHikerDad likes this.It's not what you know, it's who you take fishing!
-
04-27-2019, 12:57 AM #5Str8Faced Gent.


- Join Date
- Aug 2013
- Location
- Orangeville, Ontario
- Posts
- 8,467
- Blog Entries
- 1
Thanked: 4207
Nice works. Both look really well proportioned.

Being cognizant of the spine contour of your chosen blade as you shape the upper curve of the scales helps with the overall visual appeal when closed I find with the builds Ive done that I like best.
Not saying you didnt already know this, just throwing out a tip.
"Depression is just anger,, without the enthusiasm."
Steven Wright
https://mobro.co/michaelbolton65?mc=5
-
The Following User Says Thank You to MikeB52 For This Useful Post:
ScoutHikerDad (04-27-2019)
-
04-27-2019, 03:01 AM #6Senior Member


- Join Date
- Oct 2011
- Location
- Standish, Maine
- Posts
- 816
Thanked: 954
Use white rouge for bone after all the hand polishing and sanding. Any of the darker compounds tend to fill open grain in bone and add dark color to the grain. Consider following a more straight line following the radius you started on the lower profile of the scale at the wedge end rather than pinching down the wedge end profile of the scales. Just my opinion on the scales but I tend to be very traditional in the way I shape my scales.
Bone makes for some very distinctive scales and one I favor but you will be challenged when you come up against a tang that is not symmetrically ground and the blade will not center. Horn is easily manipulated to center a blade. Bone not so much. Keep the bone thin as it is very stiff material.Last edited by karlej; 04-27-2019 at 11:56 AM.
ScoutHikerDad and MikeB52 like this.
-
The Following User Says Thank You to karlej For This Useful Post:
ScoutHikerDad (04-27-2019)
-
04-27-2019, 10:24 AM #7Senior Member
- Join Date
- May 2010
- Location
- Upstate South Carolina
- Posts
- 3,308
Thanked: 987
Thanks Mike and Karl for the tips-In retrospect, that pin hole WAS dead-center before I started shaping the wedge end and trying to sand and polish it down flush; in fact, the bone scales were cut from the same template as the horn. Maybe I need to get off the belt for that end and do it by hand (files and paper), then just use the higher-grit belts for a gentle final polish so as not to remove so much material.
I will keep the polishing tip in mind, too-I should have known that would happen, as Fabuluster always leaves compound behind off the buffer; even acetone wouldn't get it out of that bone, though.There are many roads to sharp.
-
04-27-2019, 10:34 AM #8www.edge-dynamics.com

- Join Date
- Feb 2013
- Location
- London
- Posts
- 3,066
Thanked: 512
Nice work. I like the etching still in tact ..
Probably ,maybe, your pin holes were perfectly in line but an un perfect wedge pushed them off line?


 Reply With Quote