
Results 1 to 9 of 9
Thread: First Restoration Attempt...
 LinkBack URL
 About LinkBacks
-
02-27-2011, 08:53 AM #1Member

- Join Date
- Jan 2011
- Posts
- 78
Thanked: 43 First Restoration Attempt...
...complete! (And semi-successful)

Found an old Boker Puritan about a month ago. Heavy pitting, some rust, garbage scales. Had some fun and learned a freakin TON!
Not the best work - nothing anyone would ever pay for! Haha. But I love it.
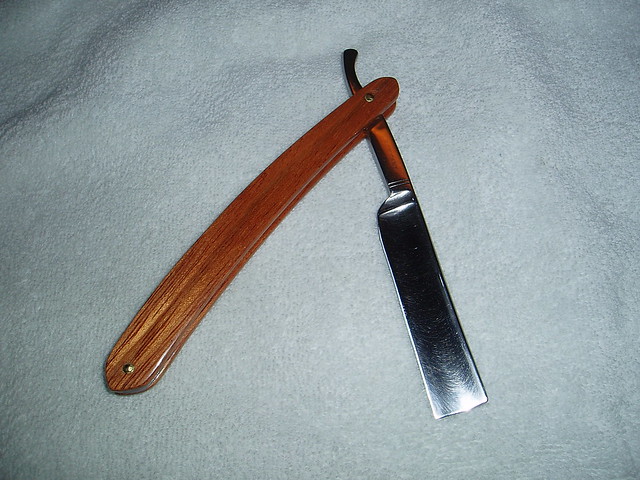
Brazilian Cherry scales. Wedge is two guitar pics glued and sanded down. Etching on the blade had little chance regardless of this being my first attempt, and my newbie stripes came out when I basically sanded off the tang stamps on each side before I discovered the wonders of a wire brush.
Did nearly everything by hand. I had someone cut me 1/8" blanks. Then all sanding (blade too) was done with elbow grease. Only power tools I used were a power drill to make way for the pins, and a dremel to shape the scales.
CA Glue for the finish. Sanded down to 12000 with the micromesh. Shiny!
Two biggest issues that I came across - 1. The holes for the pins weren't perfectly aligned, so I ended up popping a small sliver of the scale out when I tried to "assist" the rod through with my ball peen. 2. Gaps where the inner edge of the scales meet the outer edges of the wedge - due to tapering when sanding. Live and learn.
Things I learned:
*Shape BOTH scales at the same time (DUH! Stupid newbie)
*Make sure there is absolutely NO taper/rounding on the inside edge of the scales - makes for a sloppy fitting wedge
*Drill the holes for the pins with both scales together. Yeah - another brilliant newbie maneuver to do those separately.
*Get some power tools!
All in all - great fun. A HUGE learning experience. And I can't wait to do it all again!
Oh - I honed the dang thing myself too! Thanks Glen for the videos!
OK - Finally some pics. Sorry for no "before" pics. Was a ding-dong and forgot to take them.
In this pic you can see the area where the sliver popped out by the pivot pin, and that I slapped some CA in there to seal the wood and I have yet to sand again. I was too eager to shave with my project.

Pic 2 - with the flash - shows the grain a little better I feel.
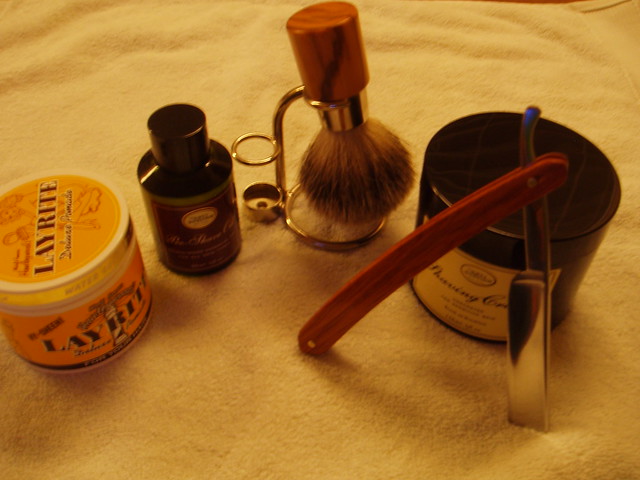
Pic 3 - my shave of the day!
I know that there are plenty of issues with my finished product, but I'm proud of my first attempt. I plan to fix this one up again, but I'll enjoy the shaves in the meantime. Just wanted to share my experiences. Thanks for taking a look.
-
-
02-27-2011, 09:35 AM #2The Great & Powerful Oz


- Join Date
- May 2008
- Location
- Bodalla, NSW
- Posts
- 15,638
Thanked: 3751
Congrats. From what I can see you did a great job apart from a few errors we all made/make
Looks like you got a nice finish on the blade & timber & by the looks of that neat straight bevel you have a sweet shaver on your hands.The white gleam of swords, not the black ink of books, clears doubts and uncertainties and bleak outlooks.
-
02-27-2011, 09:57 AM #3Lookin like a crim


- Join Date
- Apr 2009
- Location
- Coffs Harbour Australia, Home of the Big Banana
- Posts
- 2,706
Thanked: 1072
Very nice work. Sounds like you learnt all the important lessons.
Except maybe the one about Dremels and blades, you don't want to learn that lesson the hard way.
Grant"I aint like that no more...my wife, she cured me of drinking and wickedness"
Clint Eastwood as William Munny in Unforgiven
-
02-27-2011, 04:22 PM #4..mama I know we broke the rules...


- Join Date
- Feb 2010
- Location
- Toronto, Ontario, Canada
- Posts
- 2,895
- Blog Entries
- 8
Thanked: 993
That looks great! It's a great feeling to fix a razor up, hone it, and shave. Very satisfying indeed.
-
02-27-2011, 04:23 PM #5Senior Member


- Join Date
- Dec 2006
- Location
- Burkburnett TX
- Posts
- 3,100
Thanked: 2392
I would be proud to shave with that razor, it is a fine looking razor.
Charlie
-
02-27-2011, 06:32 PM #6Razor Vulture

- Join Date
- Oct 2010
- Location
- Lone Star State
- Posts
- 26,208
Thanked: 8626
Really nice! We learn by doing. As for the stamps, You know what it is! Thats what matters! Good looker!
 Glad it shaves good!
"Don't be stubborn. You are missing out."
Glad it shaves good!
"Don't be stubborn. You are missing out."
I rest my case.
-
02-28-2011, 07:54 AM #7Member
- Join Date
- Jan 2011
- Posts
- 78
Thanked: 43
Thanks for the positive feedback guys. Upon closer inspection, I noticed that the new edge doesn't continue all the way to the heel (as you can see, the previous owner/owners were a bit heavy-handed toward the heel creating a slope in the width of the blade) on the opposite side shown in the pics. It still shaves like a champ
 , but I think I'll take it back to the Norton combo and tinker a bit later this week.
-
02-28-2011, 06:28 PM #8Poor Fit
- Join Date
- May 2010
- Posts
- 4,562
Thanked: 1263
Great work on your first! It's always a great feeling and lessons learned are good. Congrats.
-
05-04-2011, 05:55 AM #9Dr. Pepper

- Join Date
- Mar 2011
- Location
- New Jersey
- Posts
- 118
Thanked: 8
Loved the idea with the guitar picks for the wedge. Originally Posted by smreno77


 Reply With Quote