
Results 1 to 5 of 5
 1Likes
Thread: My first restore\rebuild Thistle
 LinkBack URL
 About LinkBacks
-
02-28-2011, 06:16 PM #1Junior Member

- Join Date
- Feb 2011
- Posts
- 3
Thanked: 3 My first restore\rebuild Thistle
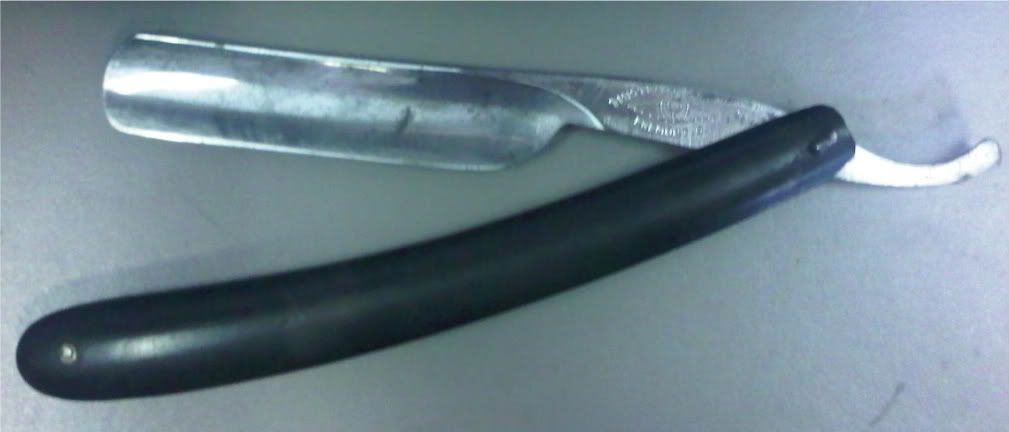
Here is the first Razor the I restored to shave ready. It is a Thistle from Fremont O. It was one of two I picked up from a local antique store I got both for $15. It was my first try at honing on a Japanese water stone as well, I've got to say there was a steep learning curve. Here is what I did to it with a before (already did some saning) and after picture. For all the pictures I took of it before and after here is the album.
Thistle straight razor pictures by L1st3r23 - Photobucket
As purchased it had some surface rust with some minor pitting on the blade, the spine looked really clean and the rust did not extend to the edge of the blade. The pivot was gone and it looked like maybe 30 years ago someone stuck a cotter pin in it for a pivot pin. I noticed the blade was in good shape, straight, and free of large chips. It measured out to 11/16th so my thinking was it may have been a 6/8th when it was first made. the scales were a plastic type, and were damaged at the pivot end which you can see in the pic, which is why I decided to try to rescale this one and customize it. for $7.50 I figured it was a perfect investment for trial and error.
The first thing I did was dismantle and I keep the scales intact and save the spacer to reuse.
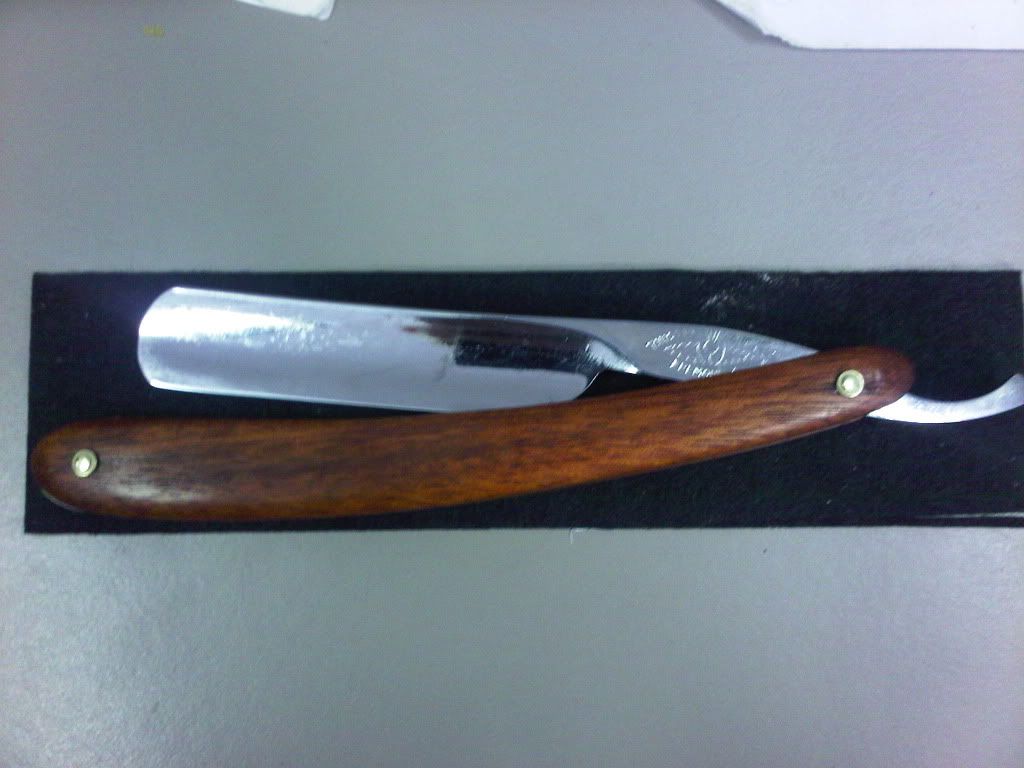
With the blade sanded and looking in good shape I switched over to the scales, which were damaged. I don't like plastic scales personally so I decided rather than sanding them down to reshape the end that was damaged and then polishing them up to remove the scratches I would take some scrap wood I had and make my own. I had a piece of 1/8th inch bloodwood (Satine Rubane) that was the right size and I used the old scales as a pattern to create them and used the original spacer for the end. Now all I need to do is put the finish on the scales.
After a couple days, some brass bits, a ball peen hammer, polishing, honing, stropping, honing, and then finally some more polishing and stropping here is the result. The first shave was great, I am going to start on the second blade I got next, and am thinking of making my own seven day set from razors I can restore.
 PaulCam likes this.
-
-
02-28-2011, 06:38 PM #2Poor Fit
- Join Date
- May 2010
- Posts
- 4,562
Thanked: 1263
Good job. Very clean looking work.
-
The Following User Says Thank You to Catrentshaving For This Useful Post:
SeppoIlmarinen (03-01-2011)
-
02-28-2011, 09:47 PM #3..mama I know we broke the rules...


- Join Date
- Feb 2010
- Location
- Toronto, Ontario, Canada
- Posts
- 2,895
- Blog Entries
- 8
Thanked: 993
Really nice looking razor. Very clean scales. Great job!
-
The Following User Says Thank You to Maxi For This Useful Post:
SeppoIlmarinen (03-01-2011)
-
02-28-2011, 10:06 PM #4The Shell Whisperer

- Join Date
- May 2008
- Location
- Sin City
- Posts
- 5,597
Thanked: 3384
That's a sweet looking transformation. Job well done. Thanks for sharing.
əˌfisyəˈnädō | pərˈfekSH(ə)nəst | eS'prəSSo | düvəl ləvər
-
The Following User Says Thank You to Maximilian For This Useful Post:
SeppoIlmarinen (03-01-2011)
-
02-28-2011, 11:46 PM #5Member
- Join Date
- Jan 2011
- Posts
- 78
Thanked: 43
Looks great. Having just complete my first attempt at resurrecting and oldie, I must say - top notch. I hope my next project comes out looking that nice.
-
The Following User Says Thank You to smreno77 For This Useful Post:
SeppoIlmarinen (03-01-2011)


 Reply With Quote