
Results 1 to 9 of 9
 1Likes
 LinkBack URL
 About LinkBacks
-
08-07-2011, 08:08 PM #1Senior Member

- Join Date
- Jul 2011
- Location
- Jacksonville, FL
- Posts
- 142
Thanked: 20 First and second restorations before and after, thoughts?
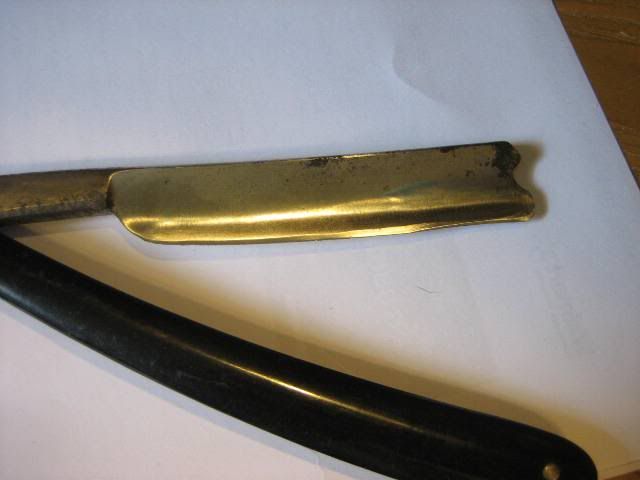
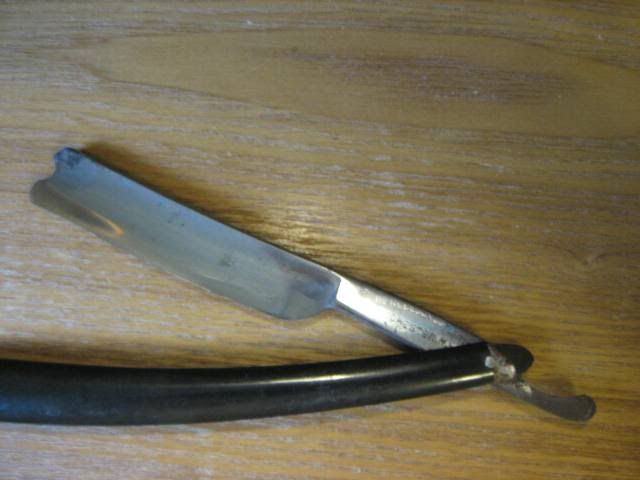
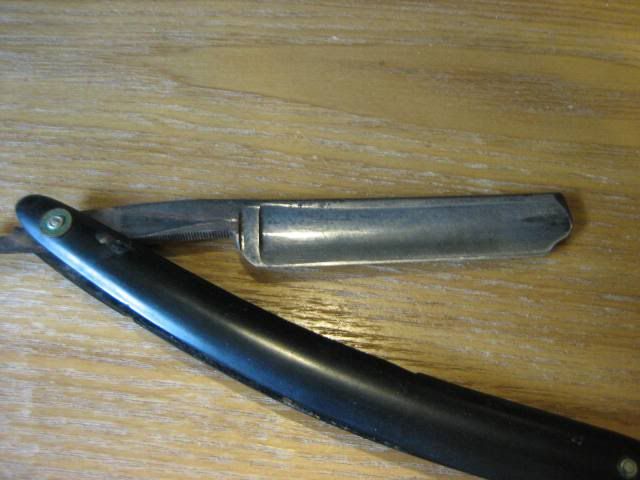
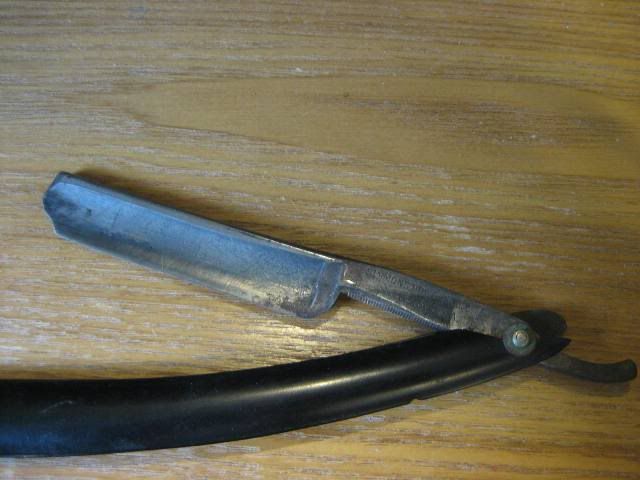
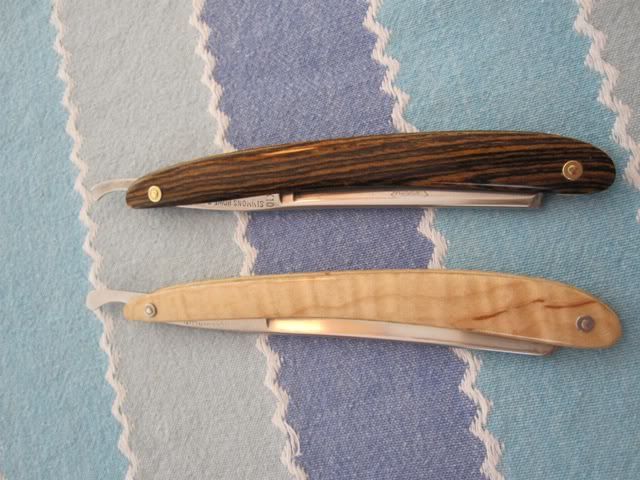
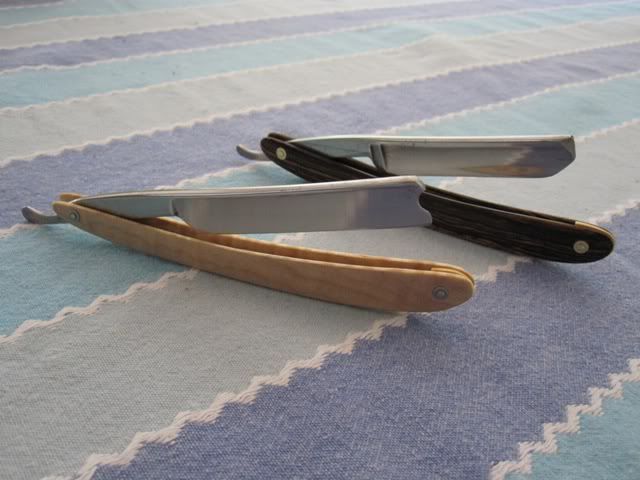
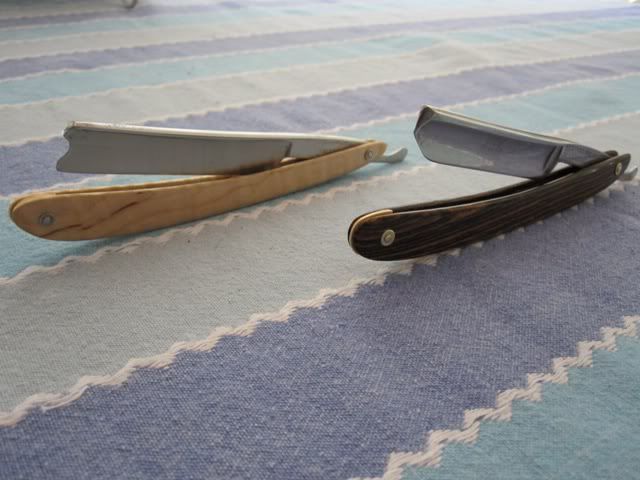
Keen Kutter got a tip fix, breadknifed the slight frown out of it, hand sanded the blade, and bocote scales w/CA. Honed it to my version of shave-ready, this one is a gift to LarryAndro since he sent me 4 free blades to practice honing with. Kept the original bearing washers and wedge to give it some character.
The barbers notch needed aggressive breadknifing to correct a very uneven edge and chips. Hand sanded the blade, curly maple scales w/CA, original wedge. Needed a lot of time on the DMT 325 to grind out that breadknifing, but it is shave sharp now.
Thoughts/comments? complimentary or critical welcome.
 Hirlau likes this.
-
08-07-2011, 09:33 PM #2Member

- Join Date
- Apr 2011
- Location
- Brisbane, Australia
- Posts
- 1,434
Thanked: 642
I'd say you did well. The scales turned out well and the finish on the blades is good also. With the nasty chip in the toe it was always going to be hard to get the blade looking great, but it looms servicable now.
What was your finish on the scales?
Well done.
Stu
-
08-07-2011, 09:42 PM #3Senior Member
- Join Date
- Jul 2011
- Location
- Jacksonville, FL
- Posts
- 142
Thanked: 20
Thanks. I used gorilla glue to finish.
-
08-07-2011, 10:26 PM #4Senior Member

- Join Date
- Jun 2011
- Location
- Valdosta, Georgia
- Posts
- 454
Thanked: 92
Nice clean-up! Great job straightening out the edge on the one with the barber's notch. Did you bread knife it?
-
08-07-2011, 10:40 PM #5..mama I know we broke the rules...


- Join Date
- Feb 2010
- Location
- Toronto, Ontario, Canada
- Posts
- 2,895
- Blog Entries
- 8
Thanked: 993
I think you did really well. The blades look good, and the scales are really nice. I think you used the grain of both woods very nicely, especially on the curly maple where the grain seems to effortlessly float towards the tang. Really nice. My one "maybe next time I'll try...." would be for the wedge fitting. It's still the hardest part of the whole restore process for me.
One thing that I've found, is that when I'm working with wood, I'll often drill the toe hole, put the wedge in, and then belt sand to flush. Sanding towards the higher grits, I don't touch the toe very much....just enough to take the scratches out. It takes some fiddling....but I've found it works for me. Hope this helps.
-
08-07-2011, 11:03 PM #6Senior Member
- Join Date
- Jul 2011
- Location
- Jacksonville, FL
- Posts
- 142
Thanked: 20
Thanks for the encouragement guys. I'm going to be doing quite a few more of these.
-
08-09-2011, 01:32 AM #7Senior Member

- Join Date
- Jan 2010
- Location
- St. Louis, MO
- Posts
- 259
Thanked: 48
The finish, wood, and overall effect of the scales looks great! As Maxi mentioned I think you can improve on your wedge fit. Judging by the quality of the rest of the work I feel you just need some direction in technique, not in your ability as a craftsman. Since I use the gorilla glue finish also, I will give you a quick overview of how I fit and finish the wedge. After I have gotten the scales to the shape that I want (for reference I stop shaping at 400-600 grit sandpaper), I start working on the wedge. I take whatever thin stock I want to use for the wedge and trace the end of the scales onto the wood. I usually cut the wedge a little longer than it needs to be. I will then take some double stick tape or rubber cement and affix the wedge to one side of the scales. I should also note that I already have to holes drilled in the scales. Using the same 1/16" bit I gently drill a hole through the wedge, through the scale. Disassemble the wedge and use a piece of sandpaper glued onto a flat piece of wood to work the wedge down to a taper that gives you the fit you want. It is important that the wedge is flat on both sides, also! Then if I have too much stock on the edges I will use a small saw to take off some corners of the wedge stock. I use microfasteners to mock up the wedge and then sand it down smooth with the scales (probably 100-->400 grit sandpaper). With a good fit I go up my sanding progression on the whole assembly.
To finish I cover the scales and wedge in gorilla glue and then get to sanding. The wedge I sand back flat on the sanding block from earlier (600 grit usually). It is important to get all the shiny spots gone from the flat parts of the wedge, and also from the inside of the scales. I usually sand the wedge-ends of the scales flat on the block too. pending a good fit, I gently sand the edge of the wedge with 600 grit paper. Typically I will mock the wedge back up and do all the rest of the sanding in two parts: the first part focuses on the wedge end of the scales, all the way up my progression to 2.5k; I will then sand the rest of the scales, feathering the sanding into the previously done parts. Hope this helps! And again, great job on the scales!
-
08-09-2011, 01:57 AM #8Senior Member
- Join Date
- Jul 2011
- Location
- Jacksonville, FL
- Posts
- 142
Thanked: 20
Thanks for the tips, I was anxious to get these done so I didn't spend as much time on the wedge end as I should have. I will be sure to concentrate on getting a nicer wedge fit next time. I spent way too much time worrying about how to finish these, poly, tung, CA... Finally decided on the CA and I'm glad I did, although it is very hard to get all those tiny shiny spots in the grain out without burning through the finish.
Again, thanks for the tips and compliments!Last edited by UPD; 08-09-2011 at 01:59 AM.
-
08-09-2011, 02:09 AM #9Senior Member


- Join Date
- Dec 2010
- Location
- South Florida
- Posts
- 13,530
Thanked: 3530
Great job, two more workhorses back on the line.


 Reply With Quote