
Results 1 to 7 of 7
 1Likes
 LinkBack URL
 About LinkBacks
-
08-11-2011, 06:47 PM #1Senior Member


- Join Date
- Mar 2011
- Location
- North Carolina
- Posts
- 407
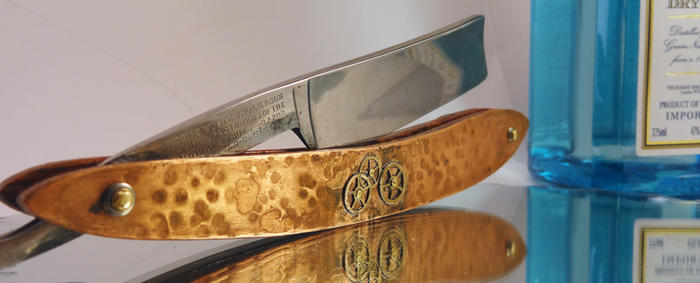
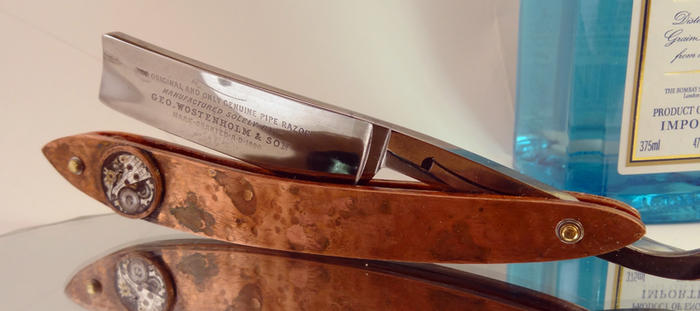
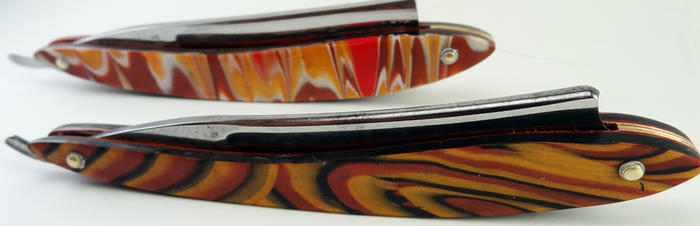
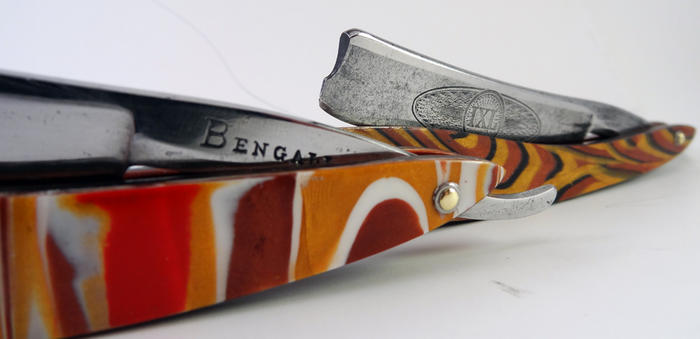
Thanked: 72 Steampunk + 2 Polymer Clay Scales for a Bengall & IXL
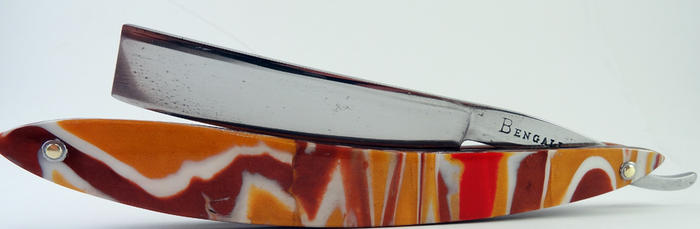
I just finished up this round of steampunk scales for a customer. I'm also happy to see some other guys doing steampunk themed scales and brushes

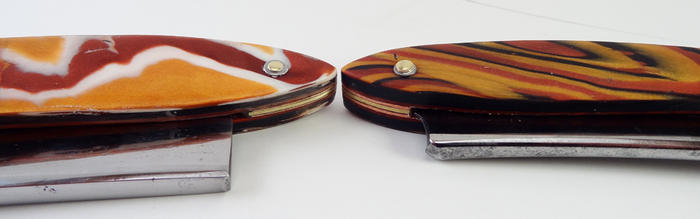
I have also had some success using polymer clay as a scale material.
 Disburden likes this.
-
The Following User Says Thank You to tumtatty For This Useful Post:
CTKnife (08-12-2011)
-
08-11-2011, 08:29 PM #2Eagle-eyed


- Join Date
- Jan 2011
- Location
- Slemmestad, Norway
- Posts
- 1,535
Thanked: 418
Nice work Tim

The steampunk scales are really cool, the polymer scales....well I find them kinda funny (in a good way) because of the colors.Need help or tutoring? Check out the .
Rune
-
The Following User Says Thank You to Zephyr For This Useful Post:
tumtatty (08-12-2011)
-
08-12-2011, 02:22 AM #3..mama I know we broke the rules...

- Join Date
- Feb 2010
- Location
- Toronto, Ontario, Canada
- Posts
- 2,895
- Blog Entries
- 8
Thanked: 993
Nice job Tim,
And the pinning on the polymer clay looks really tight!
-
The Following User Says Thank You to Maxi For This Useful Post:
tumtatty (08-12-2011)
-
08-12-2011, 10:33 AM #4Predictably Unpredictiable

- Join Date
- Jan 2010
- Location
- Northern NJ
- Posts
- 3,588
Thanked: 1487
Very nice work.
Two things are infinite: the universe and human stupidity; and I'm not sure about the universe.
Albert Einstein
-
The Following User Says Thank You to Mvcrash For This Useful Post:
tumtatty (08-12-2011)
-
08-12-2011, 10:40 AM #5I Bleed Slurry

- Join Date
- Feb 2009
- Location
- Carmel, NY
- Posts
- 2,458
Thanked: 545
Steampunk is difinitely an awesome idea for scales. Love it!
-
The Following User Says Thank You to Disburden For This Useful Post:
tumtatty (08-12-2011)
-
08-12-2011, 05:11 PM #6Senior Member

- Join Date
- Jun 2011
- Location
- Valdosta, Georgia
- Posts
- 454
Thanked: 92
Is that first set copper? If not how did you get that look of aged copper? Thanks.
-
08-12-2011, 06:16 PM #7Senior Member
- Join Date
- Mar 2011
- Location
- North Carolina
- Posts
- 407
Thanked: 72
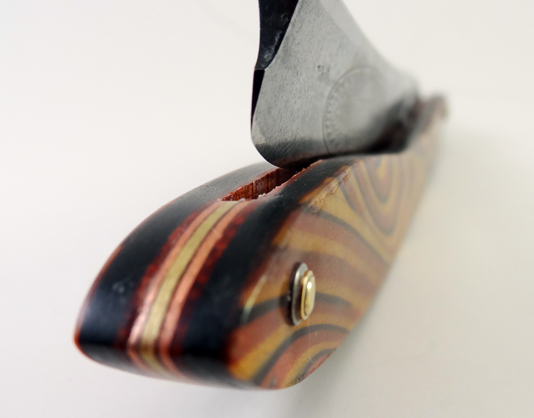
Yep its copper. I epoxy the copper to lacewood. Before epoxying I hammer the copper with a ballpeen hammer. After everything is assembled I put a patina on the metal. I've tried 2 different methods. Originally Posted by Mastershake

1)Amonia +Salt
2) Vinegar + Salt
Both work well. I get a tub with a lid and fill the base with the fluid +salt mixture. I made a hammock for the scales to sit on (out of packaging tape) just above the liquid and then put the lid over it all. The fumes (especially from the amonia) will add some patina to the copper. Sometimes I put a few drops directly on the metal itself. Doing this will give "smudges" and put some verdigris (green) on the scales. Many times I sand most of the patina off and leave only what has accumulated in the dimples (from being hammered).
When I'm happy with the patina I put an oil-based sealer (Arm-R-Seal) over the whole set of scales. (I actually use "Gloss")

This adds some protection to both the wood and the metal while keeping the patina from wiping off or getting "worse" over time. We only want it look aged and worn...not actually be that way
-
The Following User Says Thank You to tumtatty For This Useful Post:
Mastershake (08-12-2011)


 Reply With Quote