Page 2 of 3 FirstFirst 123 LastLast
Results 11 to 20 of 23
Like Tree16Likes

Thread: Yet more scales and lessons learned

  1. #11
    Senior Member JSmith1983's Avatar
    Join Date
    Feb 2012
    Location
    Menominee,MI
    Posts
    1,624
    Thanked: 325

    Default

    I like the look of those scales. Very nicely done.

  2. #12
    At this point in time... gssixgun's Avatar
    Join Date
    Jun 2007
    Location
    North Idaho Redoubt
    Posts
    27,029
    Thanked: 13245
    Blog Entries
    1

    Default

    ok I looked 3 times

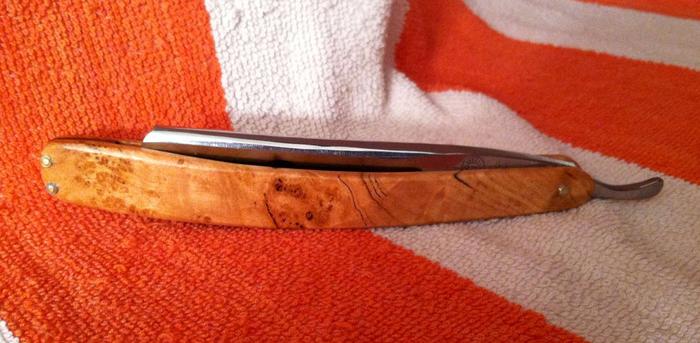
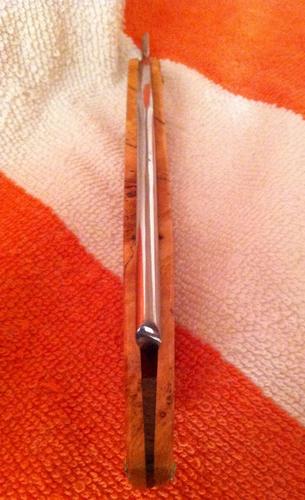
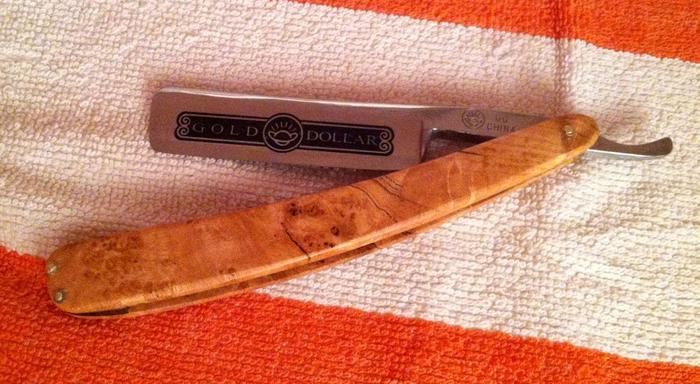
    You cut the oversized wedge back, along with the end of the scales, and re-drilled the scales eliminating the pins that were too close to the wedge end, looks like new finish too.. So you fixed the problems and saved the scales

    That is what I think you did, please correct me if I am wrong


    g

  3. #13
    Obsessive compulsive EisenFaust's Avatar
    Join Date
    Feb 2010
    Location
    New Zealand
    Posts
    1,315
    Thanked: 323

    Default

    Awesome! much more streamlined.

  4. #14
    Senior Member Johnus's Avatar
    Join Date
    Sep 2011
    Posts
    1,979
    Thanked: 196

    Default

    Hi unfortunately my Red Point scales deteriorated in my hands this morning. 4 pieces. Broken beyond repair, was thinking JB Weld but to many pieces.
    I have the possibility of two older razors to scavenge from; one wood, one plastic. Which do you think would be the easiest for a beginner to work with??
    Thanks

  5. #15
    Señor Member (the name is Dave) DFriedl's Avatar
    Join Date
    Feb 2012
    Location
    Sarver, Pennsylvania, United States
    Posts
    683
    Thanked: 88

    Default

    Glen, you nailed it: cut back, sanded, pinned, and the finish touched up.

    Thanks to everyone for the feedback!

    Johnus, I'm limited to how much I can post during the day, but basically, with donor scales, go with whichever ones fit the blade best. You don't want them to be too big so the blade closes too fr into them; you don't want them to be too long do that there's a big gap between the wedge an the end of the blade when closed, you don't want them to be to small so that the edge protrudes through the bottom. Basically, eye them up and see if they're a fit.

    Also, make sure you know how you're going to pin them before you start. See the wiki for details.

  6. #16
    Senior Member Johnus's Avatar
    Join Date
    Sep 2011
    Posts
    1,979
    Thanked: 196

    Default

    Thank you.

  7. #17
    Senior Member UKRob's Avatar
    Join Date
    Feb 2012
    Location
    West Midlands, UK
    Posts
    1,263
    Thanked: 360

    Default

    I quite liked the 'Snake Eye' look of the originals.

  8. #18
    Señor Member (the name is Dave) DFriedl's Avatar
    Join Date
    Feb 2012
    Location
    Sarver, Pennsylvania, United States
    Posts
    683
    Thanked: 88

    Default

    You're referring to the double pins in the wedge end? I liked them, too, but I failed to execute them well. I'll use multiple pins in the wedge again in a future set, but not until I get another big blade to justify the wide scales.

  9. #19
    Zen & the art of the cut throat mav13's Avatar
    Join Date
    Sep 2011
    Location
    Adelaide
    Posts
    160
    Thanked: 25

    Default

    Nice looking scales, really awesome actually. Great thinking on the do over.

    I too have been making some scales and its like anything else: you make mistakes
    but you learn from them. I love the process however its tons of fun.

    Working on buffalo horn pair at the moment.

    Chris

  10. #20
    50 year str. shaver mrsell63's Avatar
    Join Date
    Aug 2008
    Location
    Pothole County, PA
    Posts
    2,258
    Thanked: 522
    Blog Entries
    2

    Lightbulb

    DFriedl

    Here is a photo of a Weltmeister with buckeye burl scales that had a weak spot in the center of the rear scale. A coworker pinched the scales together and the wood snapped in half.

    The scales were originally made by Dave Stephens who was kind enough to repair this break by glueing a maple liner inside each scale. Worked great. So don't pinch your scales together. You seem to have two mini-knots and an inclusion in the center of your front scale. Be careful.

    I was broken hearted when mine broke. Bill Ellis lines some of his burl wood scales with aluminum. I have a TI with burl that he did. Good luck with your scales.....

    JERRY
    _____

    Name:  IMGP3942.jpg
Views: 103
Size:  36.7 KB

  11. The Following User Says Thank You to mrsell63 For This Useful Post:

    DFriedl (06-15-2012)

Page 2 of 3 FirstFirst 123 LastLast

Posting Permissions

  • You may not post new threads
  • You may not post replies
  • You may not post attachments
  • You may not edit your posts
  •