
Results 1 to 10 of 10
 13Likes
 LinkBack URL
 About LinkBacks
-
03-31-2013, 10:10 PM #1Senior Member


- Join Date
- Sep 2011
- Location
- Nova Scotia
- Posts
- 265
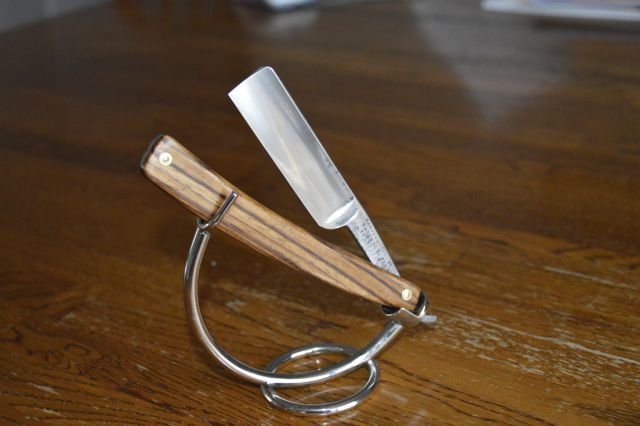
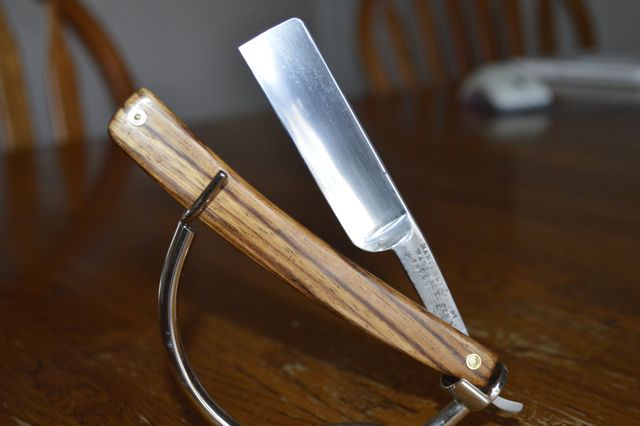
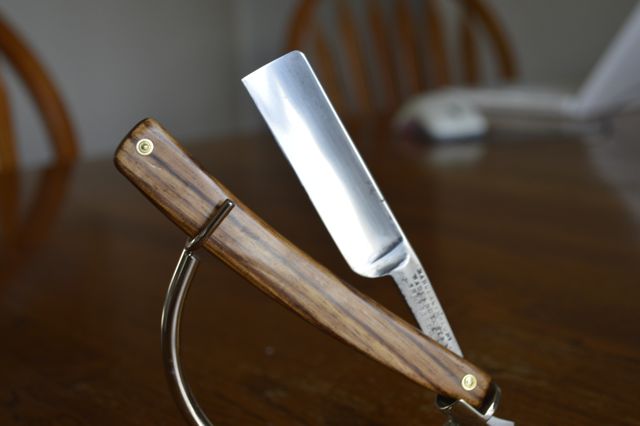
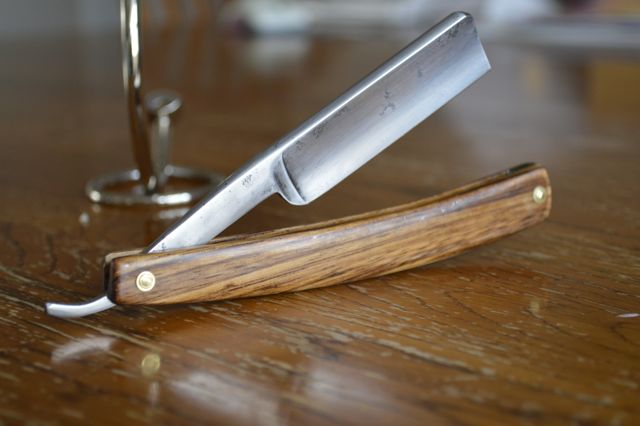
Thanked: 30 6/8 W&B Regrind in Epoxy coated Zebra wood scales.
Well, thanks to NinjaMaster (SRP Member) I finally got to try my hand at regrinding a few blades.
Here is the first one that I have totally finished.
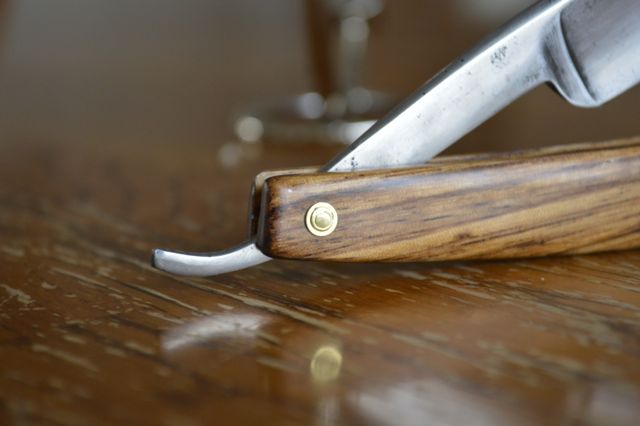
Before I went at it with the tools, it had a BIG crack/chip on the toe.
I had to remove about 3/32 from the end of the blade.
Interestingly enough, it was just enough to make the point nice and square again!
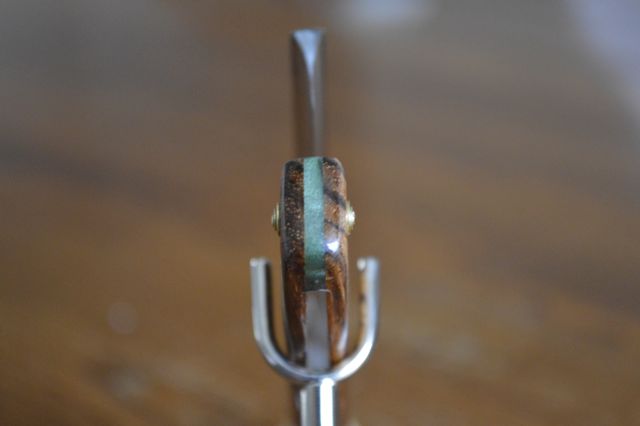
Oh yeah, scales are zebra wood with a gree/black acetate wedge. Pins and hardware are all brass.
Cheers!
 Through the mud and the blood, to the green fields beyond.
-
03-31-2013, 10:18 PM #2
Looks really NICE.
GOOD JOB!
-
03-31-2013, 10:35 PM #3Poor Fit
- Join Date
- May 2010
- Posts
- 4,562
Thanked: 1263
What part did you regrind?
Edit: Ah nevermind, I read again and you shortened the toe. I thought you meant reground as in revamped the entire blade.Last edited by Catrentshaving; 03-31-2013 at 10:52 PM.
-
03-31-2013, 10:36 PM #4Senior Member

- Join Date
- Jan 2013
- Location
- Greece
- Posts
- 150
Thanked: 11
Great work on the regrinding, the scales also look awesome!!!
-
03-31-2013, 11:09 PM #5Senior Member
- Join Date
- Sep 2011
- Location
- Nova Scotia
- Posts
- 265
Thanked: 30
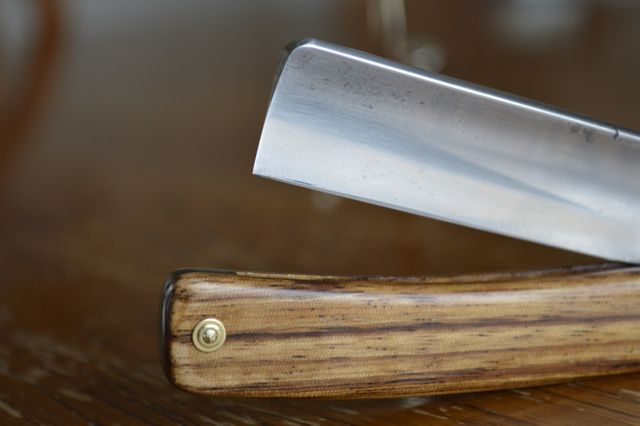
I actually did regrind the whole blade. Just enough to even out the old hone wear.
It must have worked right, because the bevel is straight as an arrow now!Through the mud and the blood, to the green fields beyond.
-
03-31-2013, 11:25 PM #6Senior Member


- Join Date
- Feb 2010
- Location
- California
- Posts
- 4,833
Thanked: 1841
You did a great job with that.
Bob
"God is a Havana smoker. I have seen his gray clouds" Gainsburg
-
04-01-2013, 01:02 AM #7the deepest roots

- Join Date
- Feb 2011
- Location
- Seattle
- Posts
- 1,221
Thanked: 169
that point scares me, but nice work

-
04-01-2013, 01:09 AM #8Just a guy with free time.
- Join Date
- Oct 2011
- Location
- Mid state Illinois
- Posts
- 1,448
Thanked: 247
Way better than my first attempt. Congrats! So now we need details. What size wheel, grinder specs, etc.

-
04-01-2013, 03:25 AM #9Poor Fit
- Join Date
- May 2010
- Posts
- 4,562
Thanked: 1263
Can you explain? If you reground the blade then why the remaining pitting? Originally Posted by ironsidegnr
 Ryan82 likes this.
-
04-01-2013, 10:32 AM #10Senior Member
- Join Date
- Sep 2011
- Location
- Nova Scotia
- Posts
- 265
Thanked: 30
Sorry guys, let me clarify.
I reground the entire toe to remove a huge crack/chip make it square again.
I then used the unsupported section of a 1'' bench sander to re-work the spine and tang.
which allowed some 'flex' in the belt to get some of the rounder spots.
I didn't have wheels to get into the hollows of the blade.
Honestly, I think it may have been too hollow to do that to anyways.
The hollows in the blade were hand sanded to remove the majority of the rust that's all.
I wish I had taked 'before' pics. This thing was in terrible condition. The whole blade was
very black with lots of deep old corrosion.
I'm still researching wheels speeds etc. Gotta figure out how to make a useable wheel
for my sander so that I can work on hollows.
Hope this clarifies everything.
Thanks for all the interest!TwistedOak and brooksie967 like this.Through the mud and the blood, to the green fields beyond.


 Reply With Quote


