
Results 21 to 25 of 25
 25Likes
Thread: My 3rd restore! Its kind of big!
 LinkBack URL
 About LinkBacks
-
07-09-2013, 09:23 PM #21Member


- Join Date
- Jun 2013
- Location
- Chicago, IL
- Posts
- 93
Thanked: 16
I will echo all the kudos - that is one beautiful razor!
-
07-09-2013, 09:29 PM #22Member

- Join Date
- Jun 2013
- Location
- coldest state in the nation--MN
- Posts
- 69
Thanked: 11
You did and excellent job on everything...look great.
-
07-10-2013, 12:10 AM #23Member
- Join Date
- Jun 2013
- Location
- Berkshire, UK
- Posts
- 62
Thanked: 19
 Originally Posted by cvernon7

Could I ask what you are using for hand sanding? Wet & Dry? Micro-Mesh emery? And what progression of grits?
I've 7 vintage razors, needing varying levels of refurbishment...at the moment I haven't decided what I'm going to use, but your results on this razor are amazing, so would love to know what you used!
Thanks!
-
07-10-2013, 04:17 PM #24Junior Member

- Join Date
- Jan 2013
- Location
- Clive, IA
- Posts
- 8
Thanked: 3
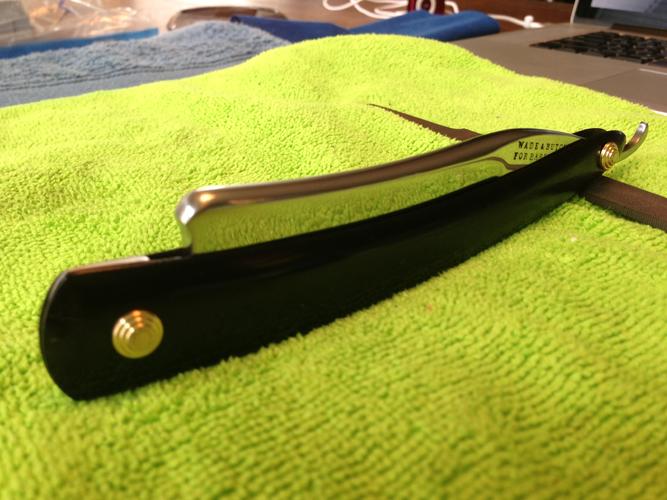
Thanks for everyones opinions I do appreciate them. And to krytonsjaw there are other ways that will be faster and less work than hand-sanding but for a broke college student(I mean me)I think this does a great job and is really cheap. Now I use Wet-Dry sand paper With WD-40. The lowest I go would be 320 grit. I started with 320 then moved to 400/600/1000/1500/2000. Now that is the grits I used on this razor but I have gone up to 3000 and 6000 micro mesh but I don't think that it makes that much of a difference. After the 2000 I used a dremel polishing kit to buff it. I think it makes a difference but the razor still looks great without having to do that. Originally Posted by KrytonsJaw
If you want to learn some tricks about hand-sanding I would recomend you click on this link. Hand sanding a blade - Straight Razor Place Wiki
Now I sand with one grit across the length of the blade until all the pits are gone or till I'm satisfied. Then I go up to the next grit and I sand the width of the blade because I think it goes faster and it is easier to see if you got all of the of the scratches out from the previous grit. Getting all the scratches out is key to making it look great. After I get them out I repeat the process switching directions each time I go up in grit until I finish with 2000. Now at the end if you are going the width of the blade with 2000 I would recommend that after you get the scratches out you should go the length of the blade to finish. This is important because it makes the razor look a lot better.
Now after all that let me be the first to tell you hand-sanding is not very fun to do. I usually watch TV as I sand. But if you put in the time and effort you can have some awesome looking razors. Good Luck with your projects!!Raven312 likes this.
-
The Following User Says Thank You to cvernon7 For This Useful Post:
walleyeman (07-11-2013)
-
07-10-2013, 04:35 PM #25Senior Member

- Join Date
- Nov 2012
- Location
- Brooklyn, NY
- Posts
- 111
Thanked: 12
I'm drooling over this razor.
There is always a solution, whether it's already present or if you have to make it.


 Reply With Quote