
Results 1 to 10 of 23
 10Likes
 LinkBack URL
 About LinkBacks
Threaded View
-
10-29-2011, 06:04 PM #1Member


- Join Date
- Jan 2011
- Location
- Polk City, Florida, United States
- Posts
- 65
Thanked: 17 Kerosene60 custom build Step by Step
I decided to not only show the progress of a custom but also to show how I build my razors step by step.
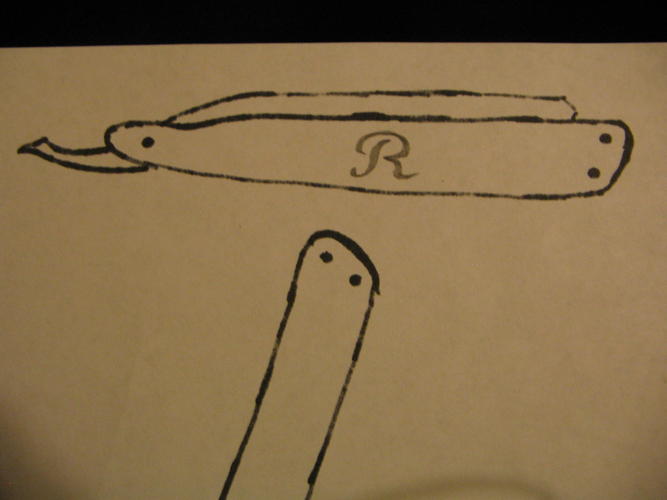
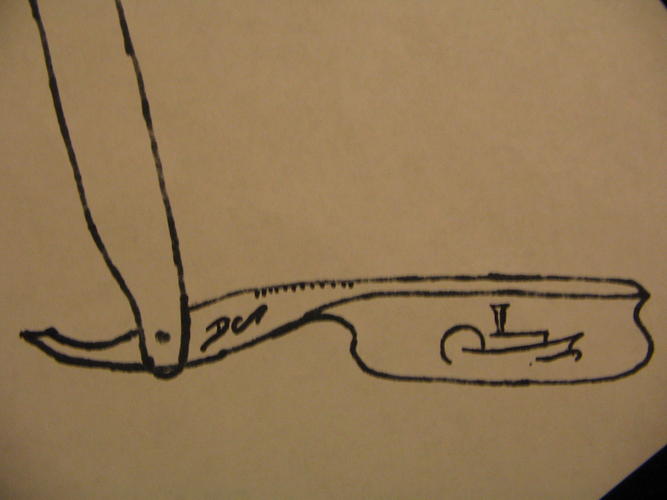
Step one design:
This step is just as it sounds, I draw the razor in full scale. The design below in the first three pics is the final design.

Step two:
I grind the blade. I built my own hollow grinder for this. It differs from knife hollow grinders in that it turns the other direction. This allowed me to build a blade clamp that can feed the blade into the stones accurately. I can cut a blade in two passes.
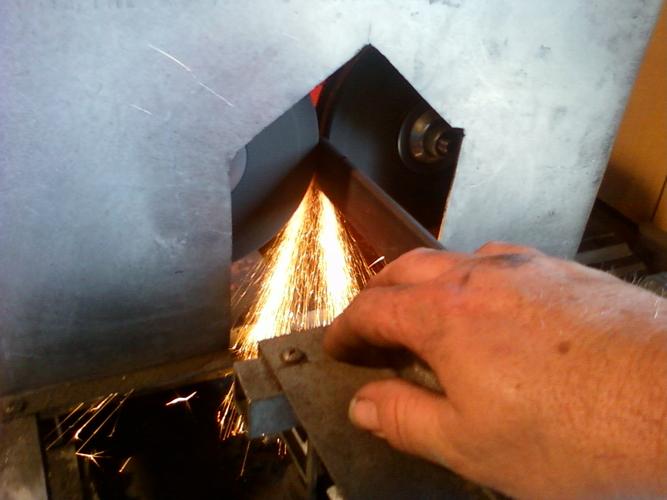
Safety Note:
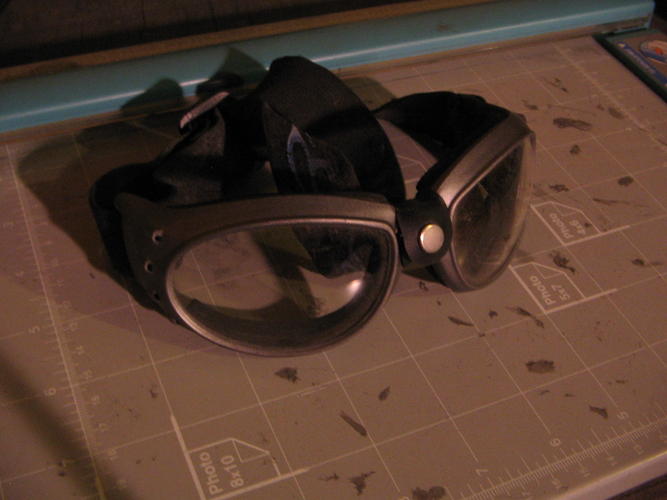
Grinding, power sanding, and polishing aerosols small particles of steel, aluminum oxide, carbides, and other crystal structures that are damaging to lungs, eyes, and ears. WEAR PROTECTION! Not just the normal kind either, safety glasses will not stop aerosol steel, it just floats around the sides. I use motorcycle goggles because they are designed to stop airflow. I use a washable air mask that seals to my face, this is important because ground particles are so light and small they can hide in your mask only to be inhaled later. Ear protection is a must for more reasons than I can count.
Below:
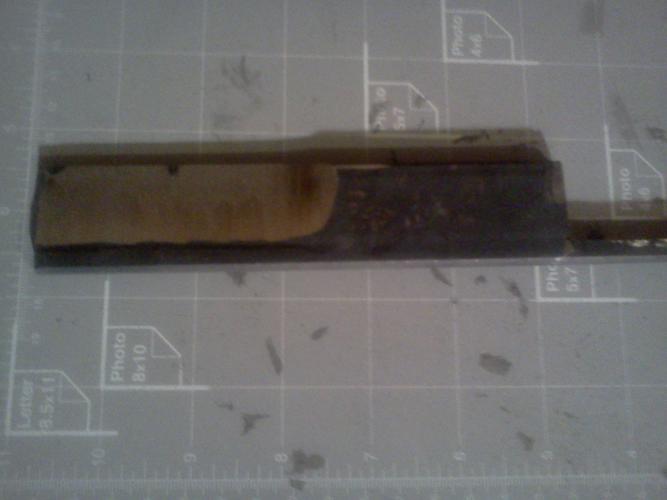
This is the rough ground blade after the second pass in the hollow grinder
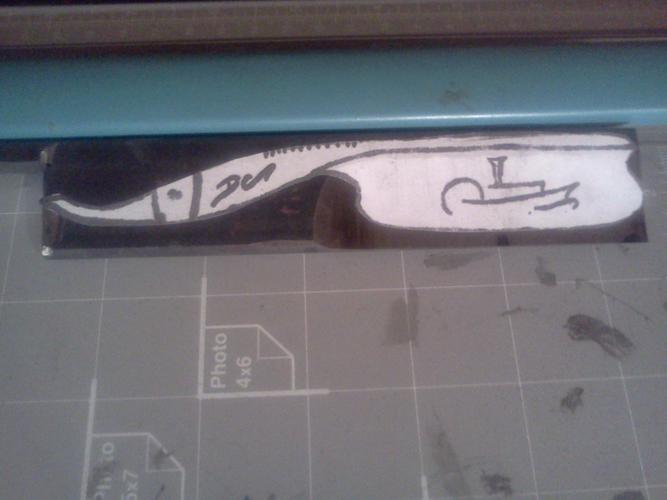
I then attach, temporally, the pattern to the steel using a glue stick. I then use first a marks-a-lot then a sharpie to trace the pattern to the steel. The combination of the two lets the marking handle heat, water, and rubbing longer than either alone.
I then use a fiber cut off blade to remove as much excess material as possible.
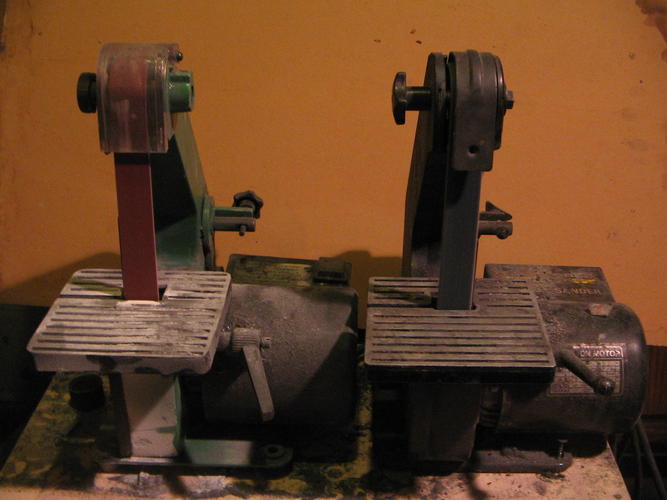
Now I go to my sanders, for this step the sanders are loaded, one with a 40 grit the other a 80 grit belt. All I want here it the rough shape of the razor, 40g to get close quick, 80g to get closer with more caution.
below:
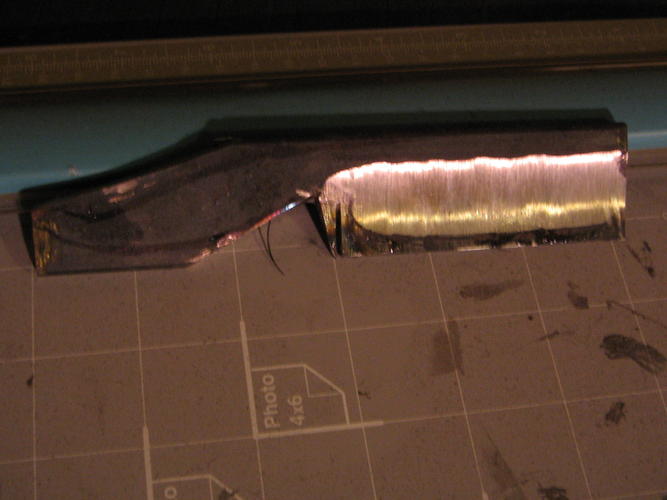
after the first round through the sanders.

That's usually where I stop on the blade for the first day, I take the blade to the forge and re aneal the blade and allow it to rest for at least 12 hours.
Nest time Step three the first day on the scales.

Last edited by Maximilian; 10-29-2011 at 06:29 PM. Reason: removal sales/soliciting


 Reply With Quote