
Results 1 to 10 of 27
 17Likes
Thread: My CNAT Lapping Journey
 LinkBack URL
 About LinkBacks
-
05-23-2017, 06:11 PM #1Senior Member

- Join Date
- Mar 2017
- Location
- Calgary, Alberta, Canada
- Posts
- 321
Thanked: 41 My CNAT Lapping Journey
So I finally got my hands on that CNAT. In a decent shape, but there are a few saw marks left on each side.
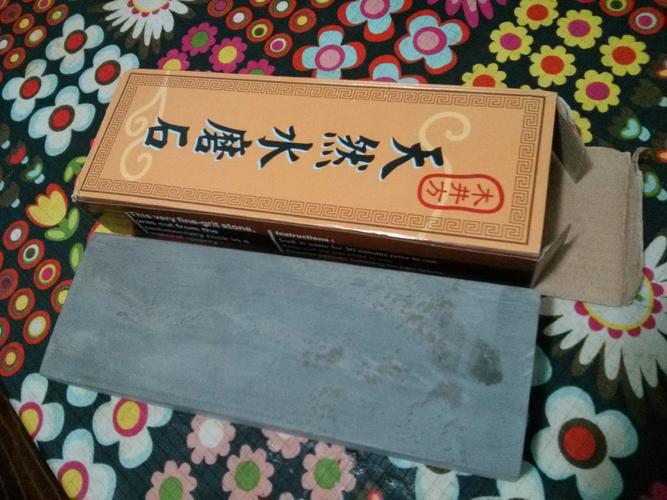
And oh boy does this thing not soak water!

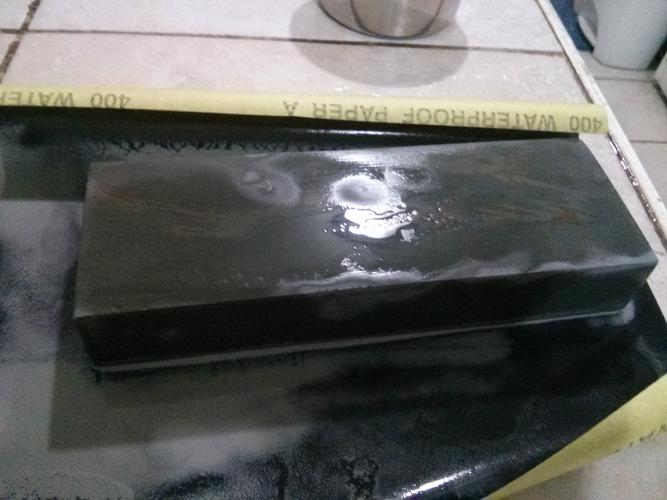
Using the roughest wet or dry sandpaper I could get (400), I got to work. This thing takes forever to lap!
Obviously, I couldn't let all that nice slurry go to waste, so I tried sharpening two knives. The first one was already sharp (with my trusty Lansky 1000 ceramic hone) and the polishing from this hone made it a bit better. My wife was happy about that.
I also tried sharpening another knife 'from scratch', and the resulting edge is nothing to write home about - so that goes along the lines of what we know about those hones.
So, at the end of the day, I had a smooth sandpaper and my hone still had rough spots on <5% of its surface.
Score: CNAT: 1, Me: 0
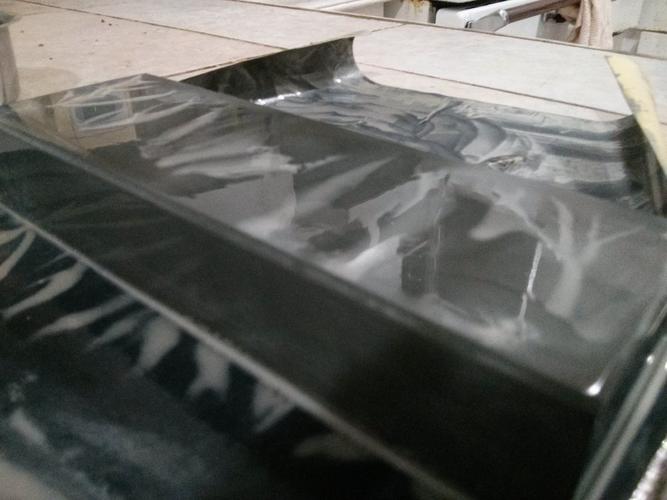
On day 2, I tried a different strategy: a 120/320 hone that is almost the same size.
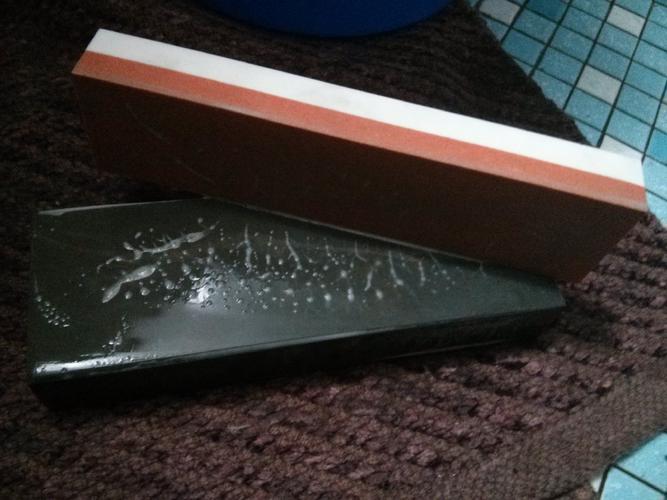
On the plus side, the rough spots are almost all gone and it worked faster. On the minus side, I got some extra scratches on the hone.
Score: CNAT: 2, Me: 0
I'm expecting that stone will be done lapping on its next encounter with the sandpaper.
In other observations: the stone dries fast, even after 30 minutes soaking. And its mud doesn't dissolve in water easily. In fact, I could dip the hone with some mud on it and most of that mud will be left on the hone. And the bucket that hosted the hone and its watered down mud still has marks that don't leave with a brushing and some soap.
-
05-23-2017, 07:41 PM #2Senior Member


- Join Date
- Dec 2014
- Location
- Virginia, USA
- Posts
- 2,224
Thanked: 481
The mud/slurry made with sand paper also has grit particulate from the paper. Something to keep in mind.
They are hard little buggers. Hard is good, when polished up it should impart a nice edge.
They can be used as a splash 'n go hone. No need to soak for extended periods of time.
-
05-23-2017, 08:02 PM #3Senior Member


- Join Date
- Oct 2009
- Location
- Silicon Valley, CA, USA
- Posts
- 3,157
Thanked: 853
These are fun to play with.
Flatten only one side, Write something clever with a waterproof marker on the back.
Perhaps the date and what it is. Just not a grit number.
Find a scrap of mild steel to worry the surface with. You can take a cut off of bar steel
or square tube steel and common sand to speed the surface tidy process.
I wore out a bit of wet sidewalk to get mine flat enough for a visit to sandpaper then a DMT.
Not many are fine enough to shave off but as you discovered they are nice for
touching up a lot of kitchen knives.
They also make nice "stands" for other hones to get them up off the counter.
Use some newspaper as the first layer to catch the grit then the CNAT then a no slip mat and
then your favorite hone. Damp newsprint paper is non slip catches water and grit.
Do watch out for ink transfer to a fancy countertop that we do not want grit from
honing to scratch.
have fun.
-
05-23-2017, 10:22 PM #4< Banned User >
- Join Date
- Oct 2016
- Location
- Saratoga, CA
- Posts
- 597
Thanked: 59
Yes! That's what I use mine for. A stand.
niftyshaving likes this.
-
05-23-2017, 10:35 PM #5Senior Member

- Join Date
- Feb 2012
- Location
- Menominee,MI
- Posts
- 1,624
Thanked: 325
My cnat is the reason I bought a DMT. Went through quite a few sheets of sandpaper before i ordered it. The DMT was well broken in by the time I was done lapping.
Marshal likes this.
-
05-24-2017, 02:38 AM #6Senior Member
- Join Date
- Apr 2012
- Location
- Diamond Bar, CA
- Posts
- 6,553
Thanked: 3215
A 60-grit belt for a belt sander, if you have a hand held, chuck it in a vice upside down, rig a vacuum to catch most of the dust and wear a respirator, and a fan blowing away from your face.
This is the fastest way and will leave a smooth surface, but will trash the belt. Let the belt do the work and use light pressure. Use a straight edge and measure the thickness to create a flat, surface parallel to the other side.
Or 60 grit Silicone Carbide, a steel cookie sheet from the dollar store and a flat piece of cement, (garage floor) will get you flat in 20 minutes or less. Mark a grid with a sharpie and use your body weight. GOTGRIT.com will have all the grits from 60-500, ($15) then go to Wet and Dry once flat.
Stay on the 60 grit, adding a half teaspoon at a time with a squirt of water. The cookie sheet will contain the mess.
Do not use a diamond plate, you will trash it.niftyshaving and Marshal like this.
-
05-24-2017, 11:03 AM #7Senior Member

- Join Date
- May 2008
- Location
- N. Carolina
- Posts
- 1,352
Thanked: 181
Many $50 + diamond plates have been trashed trying to flatten those $20 stones!
-
05-24-2017, 12:45 PM #8Senior Member
- Join Date
- Dec 2014
- Location
- Virginia, USA
- Posts
- 2,224
Thanked: 481
It was an Arkie that did my DMT in. The Cnat just broke it in. Glad I don't have to fiddle with either of them anymore. They'll be flat for a good long while. Originally Posted by kelbro
 niftyshaving likes this.
-
05-31-2017, 04:24 PM #9Junior Member
- Join Date
- Oct 2012
- Posts
- 26
Thanked: 14
From what I see you got e really good and hard one. Properly prepared it should provide a great high grit polishing surface. Euclid has presented to you just what you need to make it really flat, then you will need to burnish it. Ideally prepare two surfaces, one burnished, that will serve as your final water only surface, and one that is a bit rougher, as you would use slurry in it, and/or finish knifes in it. Never slurry on the burnished side. My VG10 and Aus 10 japanese kitchen knifes too, in addition to my razors, love the cnat. I know many people love to trash these stones....and yes, there are quite a bit of bad ones around, but the harder ones,found at times, if you look, at Woodcraft stores..... prepared right, are a treasure. My cnat is now part of my Escher/Thuri sequence. From 8k synth or coticule, I go to a Escher 11k, Vintage Thuri 12-13k, then to CNAT, then to an Escher 13k. The Cnat pushes the edge much higher to a 14-15 k....than any of the thuris/eschers, but while smooth, is a bit agresive, so going back to Escher gives a very smooooth, and very sharp, close to my Nakayama Asagi 5 sharpness level. Prior to using my well prepared CNAT, using thuris/esher edges after using nakayama, ozuku asagi edges you felt you were missing a bit in sharpness on some Fridour/inox/ice or swedish steel razors. On old carbon steel thuris do fine, no need for anything else. The cnat has made my thuris on all blades luxurious.....as now you truly appreciate their smooth profile without missing at all on sharpness.
Last edited by fxt913; 05-31-2017 at 04:40 PM.
niftyshaving likes this.
-
06-01-2017, 02:10 PM #10Senior Member
- Join Date
- Mar 2017
- Location
- Calgary, Alberta, Canada
- Posts
- 321
Thanked: 41
Just making sure I got this right... Here's how I'd accomplish that. (I'm tempted to go for Euclid's suggestion, but I will try to do with what I have right now) Originally Posted by fxt913
For finishing the 'slurry' side, I just keep rubbing with the 400 side sandpaper until even.
For finishing the 'burnished' side, I rub with the 400 side sandpaper until even. Then use my small 600 and then 1000 diamond hones (but not much, so that I don't un-flatten it). Then rub with the flat part of a chisel.
And use a permanent marker on a rough side to indicate which side is which one
Last edited by malaverdiere; 06-01-2017 at 02:14 PM.
niftyshaving likes this.


 Reply With Quote