
Results 1 to 10 of 24
 70Likes
 LinkBack URL
 About LinkBacks
Hybrid View
-
04-04-2020, 02:22 AM #1Senior Member


- Join Date
- May 2010
- Location
- Upstate South Carolina
- Posts
- 3,308
Thanked: 987
JJ-The e-mail through their website will get you nowhere. Best to call, and they are still open (or were earlier this week anyway).
And Jerry-If and until I get it mounted level some kind of way, a towel bunched up strategically around the bottom keeps it level enough. No issues honing on it today.There are many roads to sharp.
-
04-04-2020, 01:08 PM #2Junior Member
- Join Date
- Dec 2015
- Location
- Hudson, NY
- Posts
- 18
Thanked: 8
Instead of "bunching up" a towel, have you considered the English treatment for irregular stones? They set the stone in plaster of Paris.
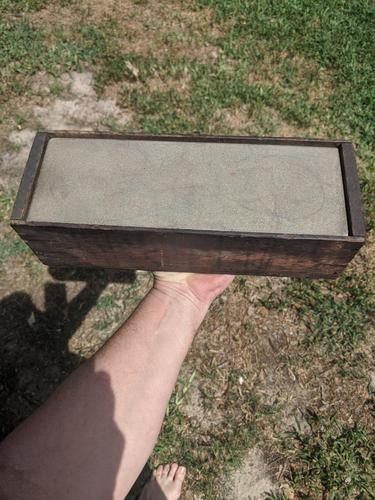
Get a suitable box, or make one, then pour in the moulding material, set the stone "just right" and leave the plaster to set. The Charnley Forest stones were set in permanently, but you could have a layer of thin plastic film over the plaster so that it sets to the perfect shape of your rock, allowing you to remove it easily.
For such a superb rock, an ebony box would be just the thing, with French polish finish - either drilled out of whole wood, or grooved with end stops like Norton boxes. A sterling silver lid would be nice too! Then make a nice label, with locality and provenance information. Dan's quarries are near Hotsprings, Arkansas. I like their novaculite best of all the sharpening stones.
... and use light mineral oil on that surface. Just wipe it clean after use, then add a few more drops to clean it more. I use a micro-fiber cloth wrapped around a magnet. The magnet pulls up any swarf and the cloth removes it in the oil without leaving any lint on the surface. My translucent stones always look spotless.
-
The Following 2 Users Say Thank You to cliveruss For This Useful Post:
PaulFLUS (04-04-2020), ScoutHikerDad (04-04-2020)
-
04-04-2020, 01:34 PM #3Senior Member


- Join Date
- Dec 2018
- Location
- Gainesville, FL
- Posts
- 5,981
Thanked: 608
Yep, that's a big'n. Just don't drop it on your toe.
ScoutHikerDad and markbignosekelly like this.Iron by iron is sharpened, And a man sharpens the face of his friend. PR 27:17
-
04-04-2020, 01:52 PM #4Senior Member
- Join Date
- May 2010
- Location
- Upstate South Carolina
- Posts
- 3,308
Thanked: 987
Cliveruss-My wife actually suggested plaster of paris, and I am considering a fine wood box or stand. I actually thought of ebony-it would be a perfect complement to the stone, and I know from experience finishes up like a dream. I may see what Cook Woods has in stock. Thanks for the suggestion. Originally Posted by cliveruss

And Paul-duly noted!There are many roads to sharp.
-
04-04-2020, 02:23 PM #5Senior Member

- Join Date
- Apr 2012
- Location
- Diamond Bar, CA
- Posts
- 6,553
Thanked: 3215
Nice big stone. To level you can cut some pads from craft foam or yoga matt to shim the low end or corner. Craft foam comes in different thickness and glues well with silicone, in case you ever want to remove them, so you can build up to any thickness needed. If you need to you can sculpt the pads with a sharp snap off blade utility knife once glued on.
I just did the same with a new Jnat. It is nice and stable now.
You can try your finish, then try burnishing it, if you don’t like it burnished, it is easy to go back to a 600 grit and work back up to any grit finish you like.
Flattening is where all the work is, finishing is easy with Wet & Dry.
-
The Following User Says Thank You to Euclid440 For This Useful Post:
ScoutHikerDad (04-04-2020)
-
04-04-2020, 05:57 PM #6Senior Member
- Join Date
- May 2010
- Location
- Upstate South Carolina
- Posts
- 3,308
Thanked: 987
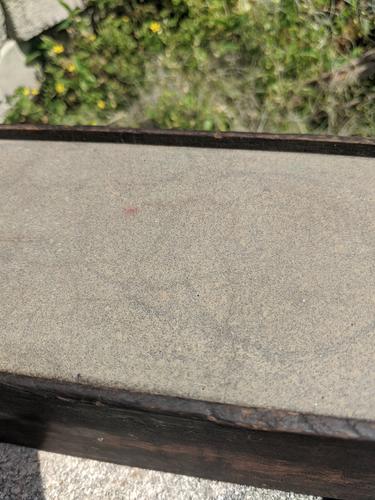
Thanks, Marty-The guys at Dan's flattened it far beyond what I could ever hope to do. As for finishing, on this one only, I went up the grits with sandpaper starting at 600 in a vibrating sander on a wet surface, which worked far better than I anticipated. The key was just to keep it moving around fast, cover all areas evenly, and work the radiuses some more.
I'm probably gonna burnish it a bit with some hard chef's knives today before I put more razors on it. Still thinking about my propping up/stabilizing options. I even thought about making some kind of form, filling it with an appropriate depth of some kind of silicone if I could find some kind thin enough, then slice away excess when it's set, then paint it black.Last edited by ScoutHikerDad; 04-04-2020 at 06:43 PM.
There are many roads to sharp.
-
04-04-2020, 07:03 PM #7Senior Member
- Join Date
- Dec 2018
- Location
- Gainesville, FL
- Posts
- 5,981
Thanked: 608
Not to hijack your thread Aaron but your large stone has inspired me to get this big honkin' thing of my dad's out of mothballs.
(not really in mothballs you understand, Just a metaphor) I played with it a year or so ago and decided at the time that I didn't know enough about hones to do it justice. It was overly smoothed and oiled up like a greased pig. I cleaned it up and then lapped it with my green flattening stone which roughed the top surface too much. It needs to be burnished back some. Not sure how it hones yet but it sure is nice to have that great big long, ponderous stroke. This one is a synthetic though. It's one my dad had from his sharpening business. He told us as kids not to use it for sharpening knives or tools because it was for razors but that's all I know about it.
It has some kind of gem in it but I don't know what it is. You can see how it sparkles in the light.
Still reading up on burnishing stones.ScoutHikerDad and JellyJar like this.Iron by iron is sharpened, And a man sharpens the face of his friend. PR 27:17
-
04-04-2020, 08:39 PM #8Senior Member
- Join Date
- Dec 2018
- Location
- Gainesville, FL
- Posts
- 5,981
Thanked: 608
And now...back to you Aaron
 ScoutHikerDad and Steve56 like this.Iron by iron is sharpened, And a man sharpens the face of his friend. PR 27:17
-
04-05-2020, 05:58 PM #9Member
- Join Date
- Dec 2019
- Location
- Fl
- Posts
- 40
Thanked: 7
Set it face down on a level surface, wrap it with tape, you want the tape wide enough to make the proper depth you want the base to be. Originally Posted by ScoutHikerDad
Run a light coat of Crisco, or something similar around the exposed inside of the tape form with your finger, and pour in a 2 part epoxy.
The Epoxy will finds its own level. Voila, nice level base.
All you need to do after it’s set is trim the edges with a bastard file, if that.
Because of the large area. You shouldn’t use a five minute epoxy. It will start heating up and set up too quick. You want to give yourself enough time to properly mix the epoxy, and pour it. A 30 minutes set time should be OK, but you will still have to work quick. Larger and thicker amounts of epoxy set quicker than a thin layer.
Good luck with the project whatever you decide.
-
The Following User Says Thank You to Sl8r For This Useful Post:
ScoutHikerDad (04-05-2020)
-
04-05-2020, 06:20 PM #10Senior Member

- Join Date
- Oct 2010
- Location
- 50 miles west of randydance
- Posts
- 9,575
Thanked: 1352
I prefer the custom fit wooden box idea but this is a good one also. Originally Posted by Sl8r


 Reply With Quote