
Results 1 to 10 of 18
 9Likes
 LinkBack URL
 About LinkBacks
-
11-25-2014, 06:20 PM #1Senior Member


- Join Date
- Oct 2014
- Location
- Jefferson City, TN
- Posts
- 402
Thanked: 43 Grit progression - What to look for
I have been looking around but I am having trouble finding what I am looking for. So will someone either tell me or point me in the right direction? What am I looking for at the en of each grit in my progression. What I have are the following:
1k
4k
8k
~12k (Chinese)
16k
crox
i already know that the 1k is the bevel setter and that it should easily pop hair all along the edge, but what else should I look for?
I know that that when I am done with the 8k I should be able to test shave smooth after stropping, again what else should I see?
Oh and before I forget, I am lookin what I should see right off the hone, before stropping.
thanksA fool flaunts what wisdom he thinks he has, while a wise man will show that he is wise silently.
-
11-25-2014, 07:48 PM #2Member
- Join Date
- Mar 2012
- Posts
- 50
Thanked: 2
I'm no pro honer by any means but I'll chime in.
Some things I look for in the lower grits (1k-4k) is when no noticable improvement in sharpness is being gained, being indicated by TPT, TNT, and arm hair tests. Do tests frequently on the low grits so you know when to move up a grit. Another good thing about the TNT is that it smoothes and levels the edge out very mildly and removes some micro chipping. Always follow up after doing a TNT with a few light strokes on the hone . Don't do TNT test past 4k..
I've heard of people wetting the arm hair and razor and using that as a type of sharpness/smoothness test.
Alot of people use 30x magnification loupes to see the edge and the scratch pattern on the bevel. When the scratch pattern is removed from the previous stone your getting close.
Another thing, especially for me in the finishing stages is the suction/noise/feel on the hone. When your close you'll feel the razor being sucked on the hone, you'll see the water being pushed or undercut by the razor, and you'll hear and feel the edge progressively get "smoother" on the hone.
Hope I could help somewhat!Last edited by eastoahu; 11-25-2014 at 07:56 PM.
Geezer likes this.
-
The Following User Says Thank You to eastoahu For This Useful Post:
rlmnshvstr8 (11-25-2014)
-
11-25-2014, 10:25 PM #3Senior Member
- Join Date
- Oct 2014
- Location
- Jefferson City, TN
- Posts
- 402
Thanked: 43
Thanks eastoahu,
I will have to gain definitely more experience so that I can learn the subtle differences and grades of sharpness over time. But that is one of the fun things of the art.
Is there anything that I can look for that I will see in one grit progression that I will not in another? For example is there something that I will feel or see in the 4k that I will not see in the 1k?A fool flaunts what wisdom he thinks he has, while a wise man will show that he is wise silently.
-
11-26-2014, 01:13 AM #4Know thyself


- Join Date
- Feb 2008
- Location
- New York
- Posts
- 11,930
Thanked: 2559
Here is a recent post of mine in a thread that asked the same thing (http://straightrazorpalace.com/honin...en-do-you.html):
My advice to newer guys who are trying to learn to hone but cannot sit down with someone experienced is the following:
Take a blade that you think is totally finished on (insert hone here), and test shave a tiny patch of hair (wherever you want, but one or two hairs on the upper arm is my preference). Then do 10 more X strokes on (insert hone here) and repeat. Stop when you are no longer noticing any improvement. Do whatever you need to remember what that edge is like (look under magnification, do a TPT, remember the feedback on the hone, whatever). Go up to the next hone and repeat.
Every so often, repeat your checks; you will probably find that you can get more out of each hone as you develop more honing experience.wyobarbershop and Steel like this.
-
11-26-2014, 01:15 AM #5There is no charge for Awesomeness


- Join Date
- Aug 2006
- Location
- Maleny, Australia
- Posts
- 7,977
- Blog Entries
- 3
Thanked: 1587
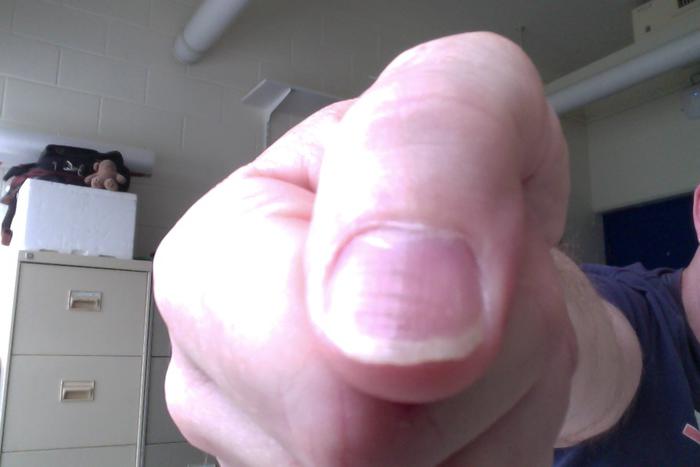
Sharpness tests are one of those things - everyone develops their own personal favourite. For me, I use the wet thumbnail test at the 1 and 4K stages (looking for an initial "digging in" and then a consistent, reasonably heavy drag from heel to toe. If you use this one you have to do a few more strokes after the test to fix the damage the test has done before moving on to the next grit). Here's a picture of my honing thumb - you can kind of make out the cuts in the nail:
After these grits, so from 8K up, I use the arm hair waft: fluff up your arm hair, waft the razor edge slowly through them a few mm above the skin. For me, I know the edge is there and ready for the next grit if the hairs "plink" along the edge in a certain way. I use this test all the way to the final finisher and off the strop too. When the edge is really good it will plink the little fine hairs I have around the elbow crease.
But remember, no one can tell you how any test should feel for you. The only way to develop these tests is with repetition:
1. Hone;
2. Test;
3. Shave;
4. Relate result of 2. to the result of 3.
5. Repeat steps 1-4 many many times on many different types of razor (and for some, on many different types of hones).
Step 5 is one of the main reasons why the honemeisters appear to "know" what is happening with the edge as they hone. No amount of raw talent will replace or substitute for experience when it comes to these tests I'm afraid.
Good luck.
James.<This signature intentionally left blank>
-
11-26-2014, 01:16 AM #6Member
- Join Date
- Mar 2012
- Posts
- 50
Thanked: 2
No problem, I'm still learning as well. I'd say don't over think trying to feel the blade on the hone too much.. Its a very subtle change and at first i was stressing out about it, thinking I would feel some huge difference as the sharpness progressed. Once you get the bevel set really try and limit yourself on the stones and don't go overboard. That's one of the biggest problems.
As far as seeing or feeling something different throughout the progression, I would say the higher grit finisher stones are harder to "feel" when honing, so Ive been doing a set amount of strokes for those. Say 15 maybe a few more on the 8k and stop instead of trying to feel it out. Again, you want to limit yourself and not go overboard and overhone the razor.
-
The Following User Says Thank You to eastoahu For This Useful Post:
rlmnshvstr8 (11-26-2014)
-
11-26-2014, 01:19 AM #7Senior Member


- Join Date
- Apr 2012
- Location
- Diamond Bar, CA
- Posts
- 6,553
Thanked: 3215
At 1k, you should see the bevels are flat from heel to toe and meeting at the edge, no shinny spots reflecting back at you when looking straight down at the edge with the naked eye and a strong light behind you. Under magnification the edge should look grey and fuzzy, shiny spots mean the bevel is not set yet.
On the bevel the stria pattern should be even, no deep stria, if you see deep stria, continue honing on the 1k with little or no pressure until the stria are all even, easier to do if you hone in the same direction, I do 90 degree final laps. Circles and half laps will cause random stria.
You can ink the bevels and do one lap with very light pressure. Any deep stria will still have ink in it, the rest of the bevel will be shinny steel. Remove the inked deep stria by honing on the 1K until gone.
The bevel is now set, but if you look at the edge from the side, under magnification, it will not be straight. It will look serrated because of the 1K stria.
The 4k’s job is to refine the edge and straighten it, by reducing the stria height on the bevel. Here I find it very helpful to strop on linen or canvas before you hone on the 4K, to straighten the edge and polish the bevels. Stropping will straighten the edge, knocking off burrs on the edge while keeping it sharp and not chipping it. Stropping is not necessary, it is just how I do it.
The stria on the bevels should look even and all the 1k stria should be removed. I do a heel forward about 30 degree, finish laps ensuring all the 1k, 90 degree stria has been replaced with finer 4K stria. Also ensure the bevels are still meeting at the edge, you will notice the edge is now much straighter. Strop again on linen.
The 8K will polish the bevel further and make the edge much straighter and more comfortable on the skin. Do the final laps at 90 degrees and ensure all the 4K 30 degree stria has been replaced by 8K stria. The final laps are done with as little pressure as possible to further polish the tops of the 8K stria, straightening the edge as much as possible.
Check the edge looking straight down with magnification to endure the edge is still straight, looking for any shinny spots, if you see shinny spots continue honing until they are gone.
As you progress you want to ensure the previous stria has been removed and the edge is still straight and not chipped. What you will see is the new stria and not see the previous stria and that you did not damage the edge.
At the 1K the best test is the visual test, it is non-destructive test, TNT is a destructive test. TPT is a good non-destructive test, but takes time to calibrate/learn. Visual test is fool proof, quick and non-destructive. Hair test are not conclusive and cannot test the entire edge, and may or may not work for you.
If you short cut any of the process and move up too soon, you will pay for it later, with chipping or uncomfortable edge.
Do not worry about trying to feel when the edge is done, that will come later. Focus on even to lite pressure to make a uniform scratch pattern on the bevel and a straight edge.
The finer the grit, the smaller the stria, straighter the edge and more comfortable the edge will shave.
Strop on linen and leather to polish the stria, bevel and edge further, paste will speed up the stropping.eastoahu and rlmnshvstr8 like this.
-
The Following User Says Thank You to Euclid440 For This Useful Post:
rlmnshvstr8 (11-26-2014)
-
11-26-2014, 02:17 AM #8Senior Member
- Join Date
- Oct 2014
- Location
- Jefferson City, TN
- Posts
- 402
Thanked: 43
Wow everyone,
All this information is more than I could have hoped. Thanks, a lot!eastoahu likes this.A fool flaunts what wisdom he thinks he has, while a wise man will show that he is wise silently.
-
11-26-2014, 09:26 AM #9aka shooter74743


- Join Date
- Sep 2009
- Location
- SE Oklahoma/NE Texas
- Posts
- 7,285
- Blog Entries
- 4
Thanked: 1936
What stones are you using? I will assume that the 16K is Shapton GS. No matter what, drop the Chinese stone from your progression as you aren't doing any good with it in a synthetic progression like you have. If your stones are Shaptons, you have something in your favor that we call: sticksion It's kind of like suction, the blade literally starts to stick to the blade once you have removed the previous scratch marks from the blade. Key to all honing is setting the bevel, its 80% of the journey. These guys have mentioned a lot of good information, just know that Shaptons are the quickest stones I am aware of, meaning it takes less strokes to get you to where you need to be. If you are using a complete Shapton set, feel free to contact me anytime...they have been my primary synthetic for years now.
Southeastern Oklahoma/Northeastern Texas helper. Please don't hesitate to contact me.
Thank you and God Bless, Scott
-
11-26-2014, 11:20 AM #10Senior Member
- Join Date
- Oct 2014
- Location
- Jefferson City, TN
- Posts
- 402
Thanked: 43
I have a: Originally Posted by shooter74743

chosera 1k(now called " Naniwa professional series")
Norton 4k/8k combo
And yes a shapton 16k glassA fool flaunts what wisdom he thinks he has, while a wise man will show that he is wise silently.


 Reply With Quote