
Results 1 to 10 of 38
 15Likes
Thread: First time honing - questions...
 LinkBack URL
 About LinkBacks
Hybrid View
-
06-28-2015, 07:27 PM #1Senior Member


- Join Date
- Dec 2014
- Location
- Southern NH
- Posts
- 562
Thanked: 41 First time honing - questions...
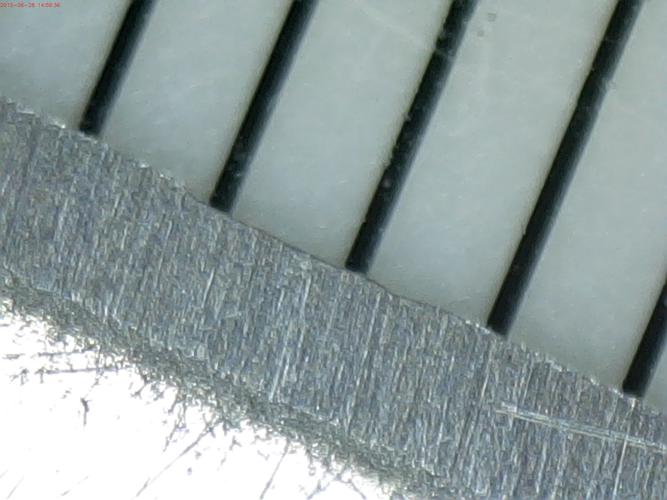
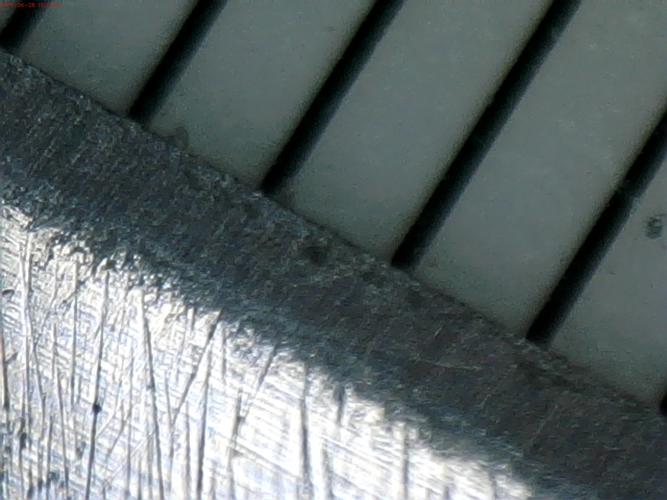
Hi! I have a Union Cutlery Spike 9/16 1/4 hollow that was my second straight and had some contact wear. Two about 1mm wide and a large one about 6-7mm long. Here's the large one very close up, farther away, and two of the others:
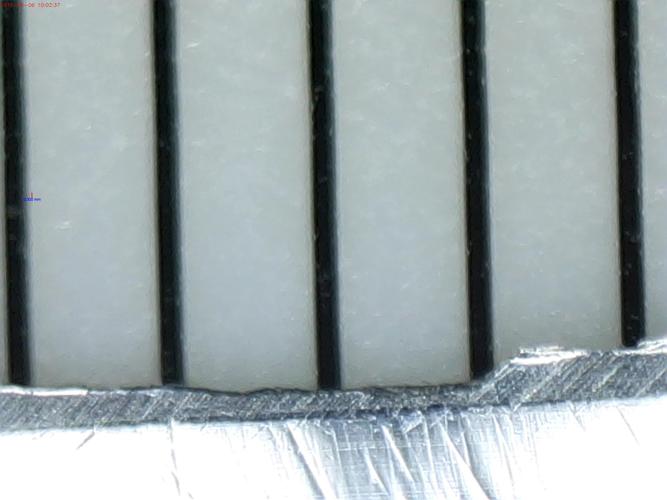
Today, I decided to try the first steps at honing. I took my Norton 1K and did sets of 40 circles with edge toward and edge away. I could see the deepest point of the larger ding, and kept doing this many times, alternating between towards and away (probably 30 mins or so). I then did 30 X strokes. I could still see the ding, so I did (many) more of the circles. Finally followed up with 30 more X strokes.
Note: I had the heel forward on all circles so that the stabilizer wouldn't hit. I went clockwise with the edge away, and counter-clockwise with the edge towards me.
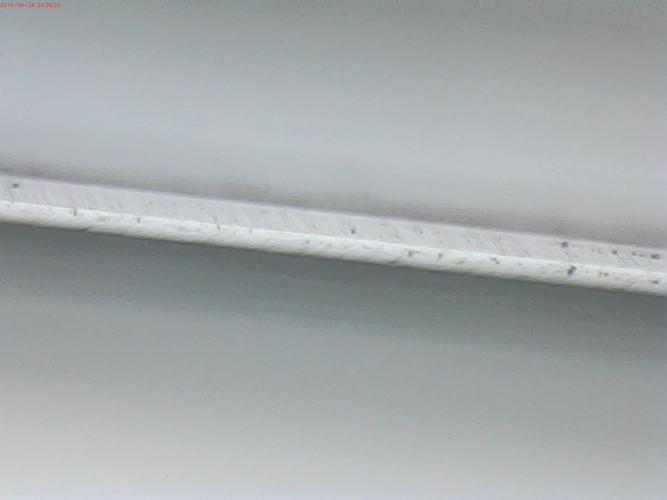
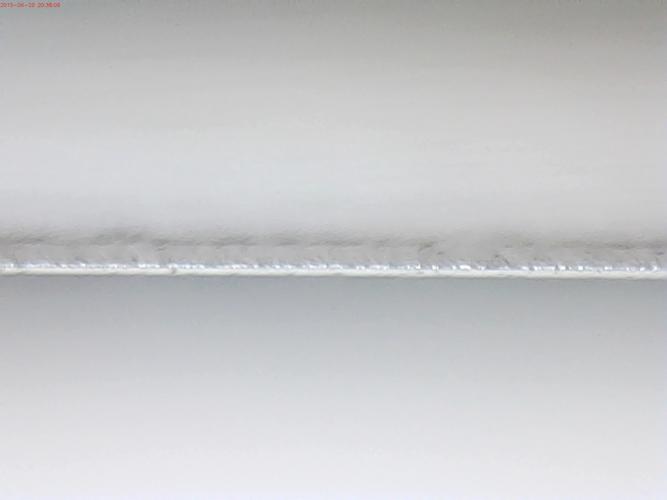
Here are shots at this point:
These show the 6-7mm ding from each side. Note that it is only 2-3mm wide now. The other dings are totally gone.
Questions...
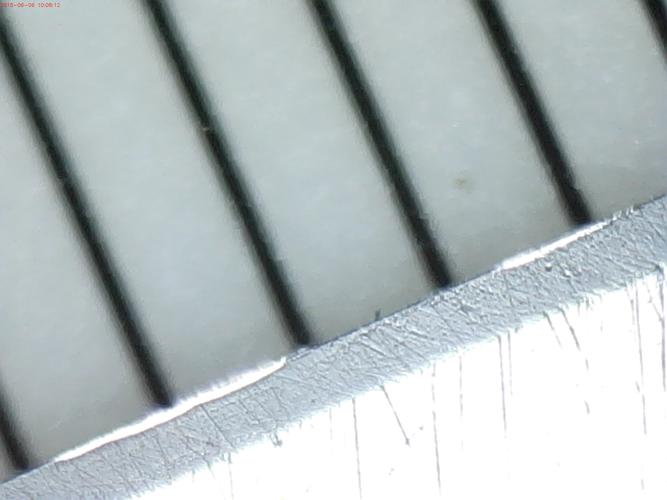
On the edge, when it is toward me, the bevel seems very consistent. However, on the edge that is away from me, it seems to be tapered, with a larger bevel at the heel than at the toe.
  Unfortunately, I'm not sure what it was like before I started (I only took shots of the bad areas). Next time I do this, I'll take shots of both sides with less magnification.
If I did cause the uneven wear, and only on one side, what could I be doing wrong with my technique (moving towards me with circles) that would cause this wear pattern?
What can I do, to try to even up the wear, or should I not worry about it?
I'm not sure if the blade was previously honed with tape or not, but I'm not using tape here.
I've been doing fewer circles, with much lighter pressure, when going away from me, as that side looks so much better, and for the last set of circles, I tried placing my finger on top, a third of the way from the toe of the blade, hoping that would even out the wear. I'm not sure that it is helping (seems a little better).
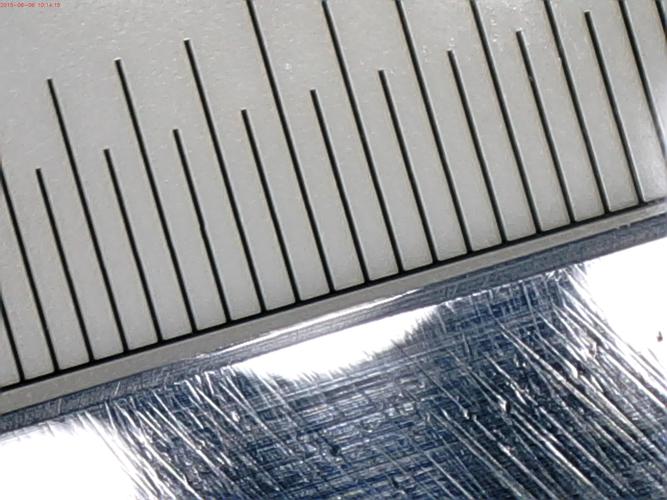
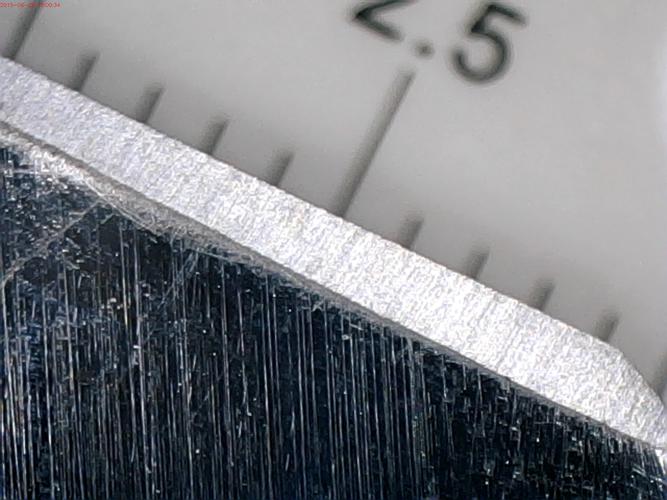
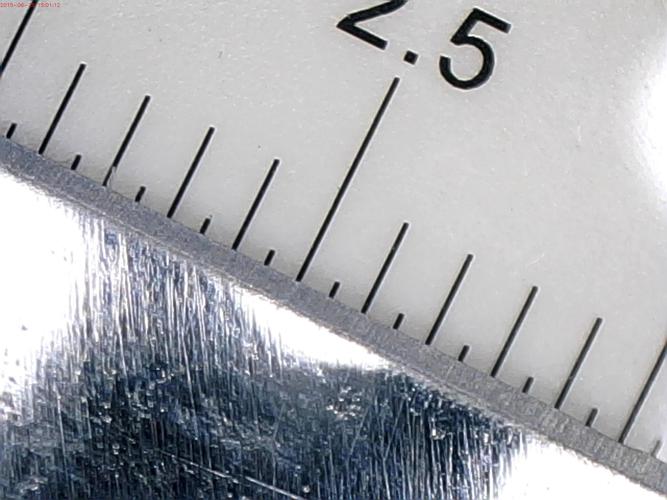
Here is a picture of the heel bevel (almost 2mm), and then a picture of the middle (around 1mm). The toe is the same as the middle now.
I clearly need to do more with the 1K, to totally get rid of the wear, but I wanted to bounce this off the group, before going farther (and getting too far off course).
I did try to shave arm hairs, and it only does a few, nothing like my Boker (4/8 extra hollow), which has 20-30 shaves on it and cuts them easily. I lightly tried the TPT (on the Spike) and it seems to grab some (I've never done this before, so I can't judge, and don't want to do it on "good" blades).
Once I get the nicks gone, do I need to do X strokes with no pressure, or should I move up to the 4K/8K Norton, which I was going to try the progressions that Lynn mentioned on his video?
Maybe it's blind optimism, but other than being uneven on one side, the bevel seems to look OK. Here is the Boker and then Spike, at the same magnification:
I'd appreciate any tips/comments/suggestions/critiques you may have!Regards,
PCM
-
06-28-2015, 07:38 PM #2Senior Member
- Join Date
- Dec 2014
- Location
- Southern NH
- Posts
- 562
Thanked: 41
On closer looking, the one side has about a 1mm bevel, and the other side goes from about .75mm to 1.5mm on the one side. It is almost 1mm on the other side. I set the plastic ruler on top of the blade to see the width.
Regards,
PCM
-
06-28-2015, 08:44 PM #3Senior Member


- Join Date
- Apr 2012
- Location
- Diamond Bar, CA
- Posts
- 6,553
Thanked: 3215
Set the razor on a flat surface and see if it is warped. If so, that is why the bevel is uneven. An un-even bevel means nothing in terms of shaving.
But tape the spine. You have caused needless wear on the spine and if you wear the spine too much, you will have to use tape, to get a usable chip free edge.
Use tape to learn to hone, typically new honers use too much pressure and do too many laps and just wear the spine. Once you master honing… then decide if you want to use tape or not. You will learn to use less pressure and laps to get an edge by then.
You have to completely remove the chip, so just remove the chip by doing 45 degree laps with the spine off the hone or breadknife, until the chip is completely removed. Colored ink will easily tell you when that is. No matter how you do it, the steel has to be removed even with the bottom of the chip.
Then do circles until the bevels are meeting. Do not move up in grits until the chip is completely removed and the bevel is completely set.
-
The Following User Says Thank You to Euclid440 For This Useful Post:
pcm (06-29-2015)
-
06-29-2015, 10:55 PM #4Senior Member
- Join Date
- Dec 2014
- Location
- Southern NH
- Posts
- 562
Thanked: 41
Thanks for the tips! I checked the blade and it does seem flat, although the height of the blade (edge to spine) is about 0.5mm less at the tail. Originally Posted by Euclid440

I'll try the breadknifing and bevel set using the procedures here: Honing a damaged blade - Straight Razor Place Library
Will use tape, as I do see some wear at the spine.
Attempt #2 tonight...Regards,
PCM
-
06-29-2015, 11:47 PM #5Senior Member
- Join Date
- Apr 2012
- Location
- Diamond Bar, CA
- Posts
- 6,553
Thanked: 3215
I have had better luck with the razor resting on the spine, edge up and with a diamond hone or Diamond file, “file the edge” with the plate long heel to toe strokes.
Or with the plate on the counter, hold the blade with both hands and hold the razor just a bit off 90 degree a bit, tilted towards the direction of travel, pull or push the razor with the blade edge flat on the plate or stone.
Do 3-4 laps in one direction then change direction changing the tilt. Go until you have almost removed the chip, leave a bit of the bottom of the chip,
then angle the blade 45 degrees in the direction of travel and pull and push to and away, in smooth even strokes to knock off the corners of the blunt edge, This will save you a ton of time and honing strokes.
Do not bring the edges to meeting, just get close to meeting. Now tape the spine with 2-3 layers of tape and do circles on a 1k, to bring the bevels to meeting, finish with long X strokes with 1 or 2 layers of tape, lighten up on pressure on the final strokes. If you get a lot of chipping, lightly drag the edge on a corner or end of the stone to remove the ragged edge, and reset the edge with a few strokes, then move up to a 3 or 4k.
-
The Following User Says Thank You to Euclid440 For This Useful Post:
pcm (06-30-2015)
-
06-30-2015, 12:53 AM #6Senior Member
- Join Date
- Dec 2014
- Location
- Southern NH
- Posts
- 562
Thanked: 41
I did the bread-knifing and the edge was flat using a 220 Norton. Did about 3 long strokes (lightly) on the edge of the blade. I then did 10 angled strokes in each direction, and then 3 straight strokes, followed by 2 X strokes, I repeated with 2 more long strokes as there seemed to be a bit of a nick, and then the 3 straight and 2 X strokes. All with 3 layers of tape.
Next I moved to 1K with 1 layer of tape. I've done circles 20+20 six times, and then 15 X strokes twice. I checked edge. I did another 20 + 20 circles and then 10 X strokes and checked. Did this process three more times. Checking in between.
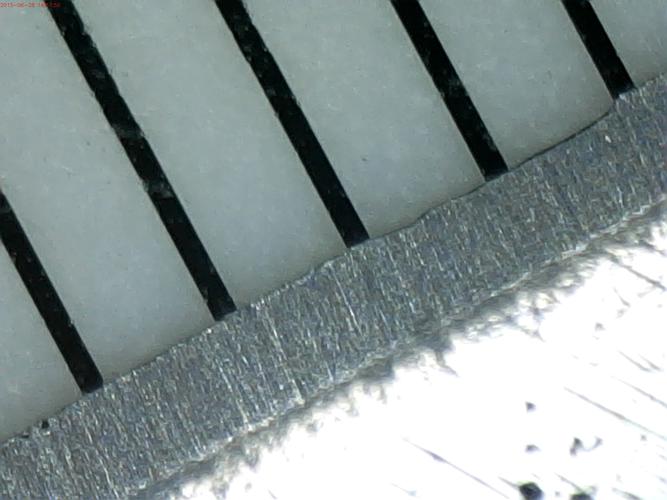
It "seems" like the edge meets well for 2/3 of the length, to the heel. The toe doesn't seem to meet quite yet. It's really hard to tell.
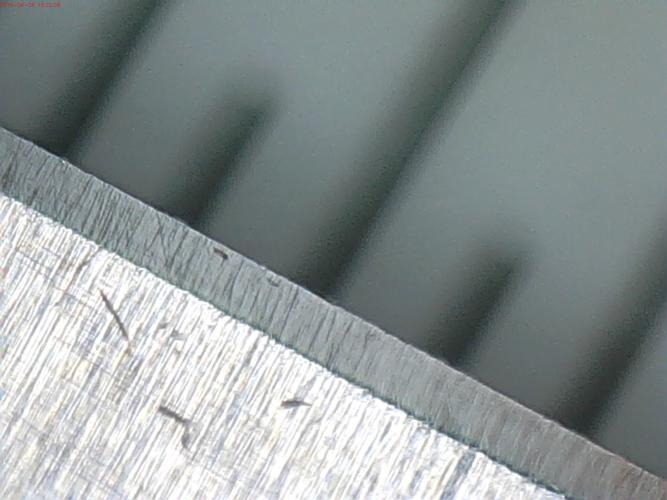
Here is a shot of the 1/3 towards heel and then 1/3 towards toe:
It's really hard for me to get focused well on the edge.
I'll stop for tonight, but any suggestions on how to proceed? Continue with circles only? Alternate with circles and X strokes? More or less counts of each?
I'm liking how 2/3 of the edge look (to a very untrained eye, of course )
Regards,
)
Regards,
PCM


 Reply With Quote