
Results 11 to 20 of 22
 2Likes
Thread: Jnat Progression
 LinkBack URL
 About LinkBacks
-
07-21-2015, 09:30 PM #11www.edge-dynamics.com


- Join Date
- Feb 2013
- Location
- London
- Posts
- 3,066
Thanked: 512 I have soaked the hell out of the Botan and Mejiro with no joy.. The Mejiro was just a joke, ive swapped it now so its ok but the Botan is now winding me up
 Originally Posted by FranfC


-
07-21-2015, 09:34 PM #12www.edge-dynamics.com
- Join Date
- Feb 2013
- Location
- London
- Posts
- 3,066
Thanked: 512
Tonight I did the 1/4k Shapton then the Tenjou/Mejiro/Koma/Tomo it didn't work out so well . I seem to have better results when I do very little with each nagura.
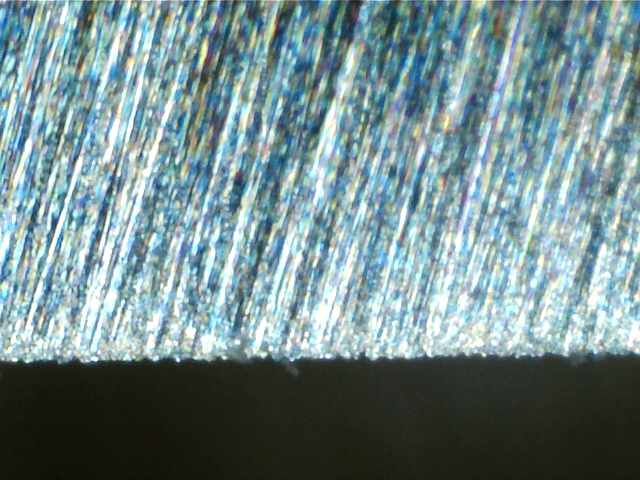
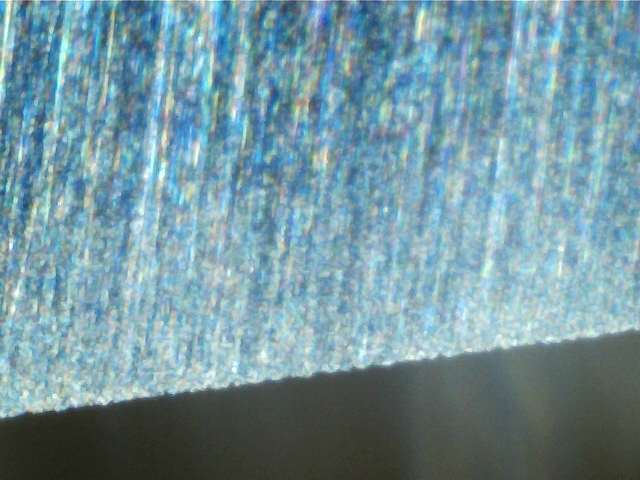
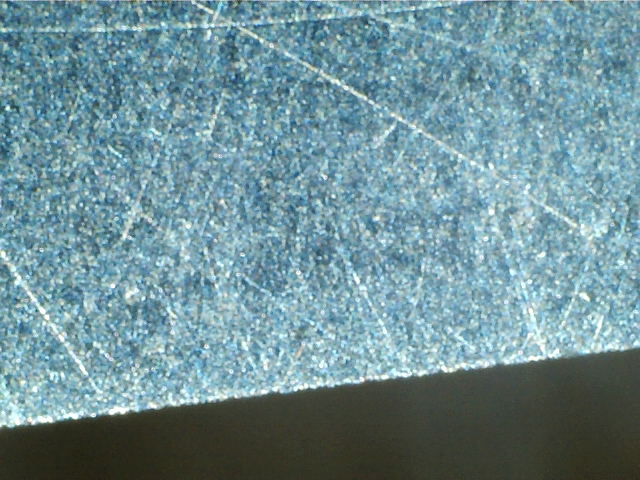
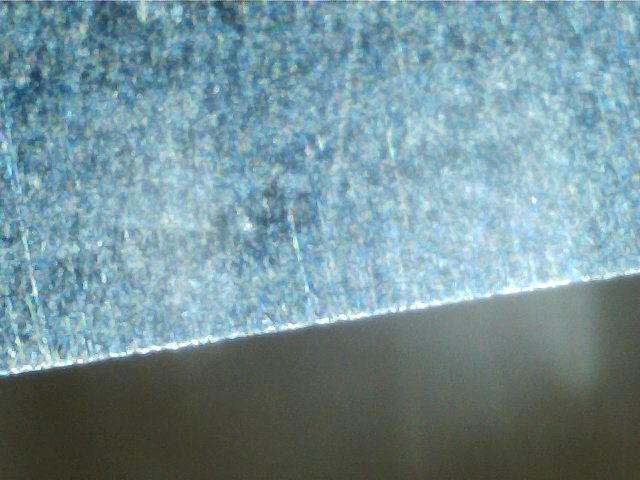
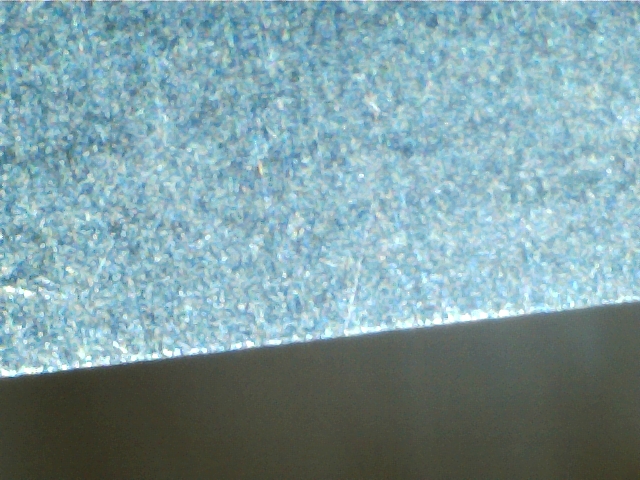
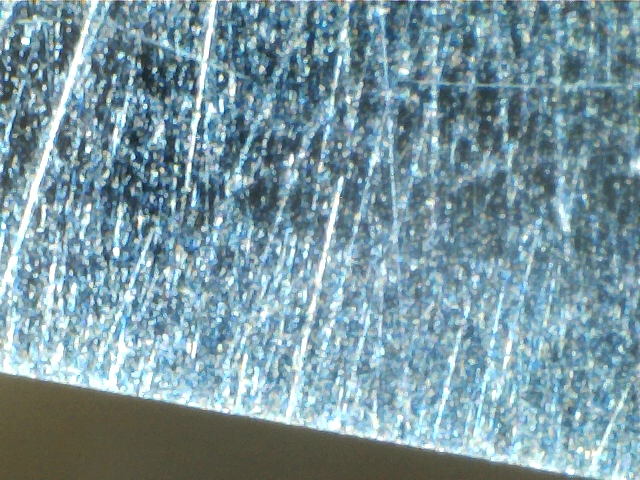
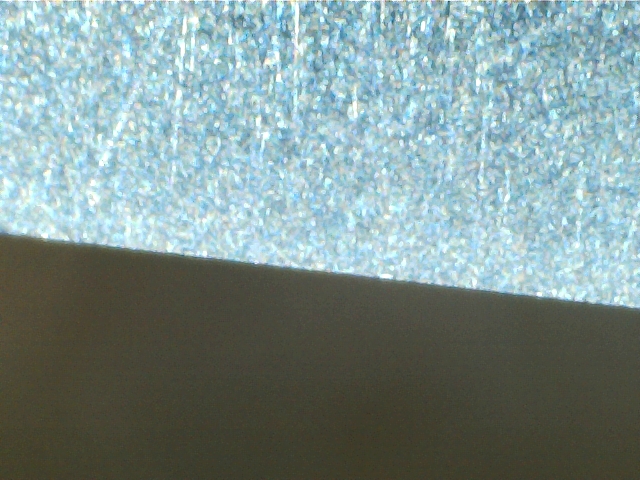
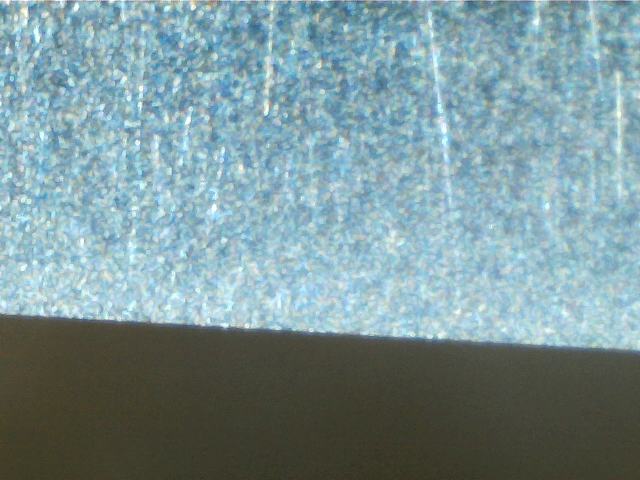
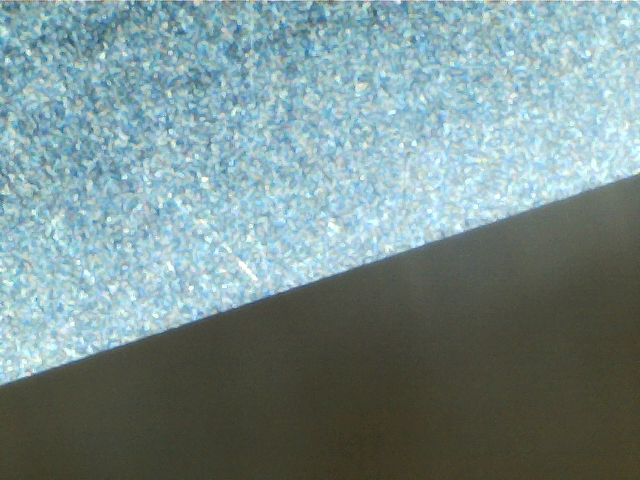
Here are the pictures, maybe you can see some thing?

-
07-22-2015, 12:26 AM #13Senior Member

- Join Date
- Oct 2014
- Location
- Jefferson City, TN
- Posts
- 402
Thanked: 43
Now someone tell me if they see the same as I do. The bevel at the bevel set looks good. Stria all the way to the apex. But the higher you go in your progression the fine apex begins to stand out more from the rest of the bevel. Like a fine non uniform line separate from the bevel.
Does both sides of the same spot look exactly the same, or does the other side have a bright line?
If I am seeing correctly it looks as if the very apex is "bending" out of the way, thus not allowing the higher progression to meet the apex very well.
Or what I might be seeing is some slight slurry dulling.
What does someone else think? For this one I am definitely willing to be wrong.A fool flaunts what wisdom he thinks he has, while a wise man will show that he is wise silently.
-
07-22-2015, 01:42 AM #14The Great & Powerful Oz


- Join Date
- May 2008
- Location
- Bodalla, NSW
- Posts
- 15,636
Thanked: 3751
Have you read this PDF ? Originally Posted by JOB15
http://straightrazorpalace.com/gener...tml#post840723
Pressure is discussed but you may need to extrapolate some as he is talikng about hard J/razors.Steel likes this.The white gleam of swords, not the black ink of books, clears doubts and uncertainties and bleak outlooks.
-
The Following User Says Thank You to onimaru55 For This Useful Post:
JOB15 (07-22-2015)
-
07-22-2015, 07:44 AM #15www.edge-dynamics.com
- Join Date
- Feb 2013
- Location
- London
- Posts
- 3,066
Thanked: 512
Thanks for that Originally Posted by onimaru55
-
07-22-2015, 07:51 AM #16www.edge-dynamics.com
- Join Date
- Feb 2013
- Location
- London
- Posts
- 3,066
Thanked: 512
That could well be caused by using 3 layers of tape and as it wears through the the tape the hone slightly leaves the very edge. Originally Posted by rlmnshvstr8
The strangest one I had was a full hollow for my brother, I really went to town on it, 2 slurries per nagura by the end it popped tree top arm hair like I'd never seen before but when he shaved with it , it wouldn't really cut hair.
Anyway my new botan arrived today so I can see what it does and compare it to the hard one, ill post pics.
P.S the 1k chosera then full nagura hone worked better than the 1/4k Shapton Tenjou and onward progression .
-
07-22-2015, 11:56 AM #17I used Nakayamas for my house


- Join Date
- Aug 2009
- Location
- Des Moines
- Posts
- 8,664
- Blog Entries
- 1
Thanked: 2591
The bright line right where the edge is indicates that the bevel is not set all the way.
As for naguras, just Mejiro followed by tomonagura will work the same as a set of 3 and a tomonagura. I long reduced my Nagura progression to just that and the results have not changed.Steel likes this.Stefan
-
-
07-22-2015, 02:51 PM #18www.edge-dynamics.com
- Join Date
- Feb 2013
- Location
- London
- Posts
- 3,066
Thanked: 512 I knew it.
Today I tried my new Botan.
It has a white stamped side and a red/white striped underside. It took 10 mins plus to create a slurry just like the old Botan , rock hard.
After honing with the slurry I could see under the scope that it was not doing a lot just like the previous Botan.
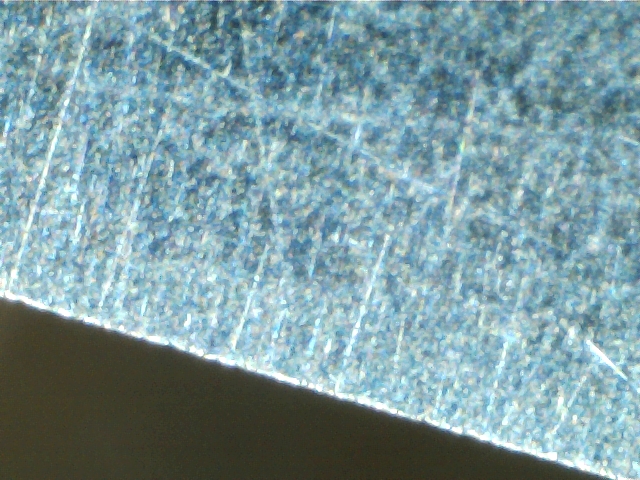
So I made an executive decision to Atoma away the stamp and try the white side.
It made a lovely easy slurry very fast and under the scope you can see it works well. (pics below)
After the full Nagura progression the blade is popping tree top hairs like you wouldn't believe , it looks good and seems good, I have to wait to for hair growth to have a shave.
Conclusion : the hard red striped Naguras are crap (Thanks Mainman you really know your stuff) ( Also thanks everyone for your help)
Concerning the edge with a streak of light down it. This is the blade I did most of my early learning on, its an Hart Steel "Not a Replica" blade 6/8ths / 1/4 hollow and at one point I bread knifed the bevel completely away so it's not the most symmetrical of blades but still a best quality shaver.
One side is perfect , the other side not so much, that is the side with light on the edge.
All the pictures are from the good side apart from the second Botan picture.
Pictures are :
Chosera 1k
Botan Red Striped Honed
Botan White Side Honed
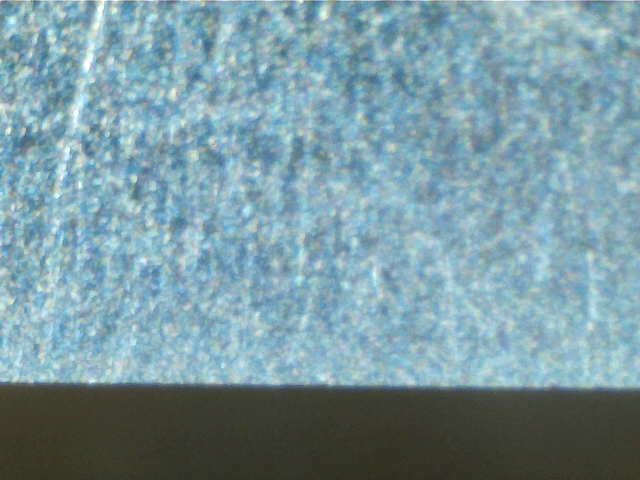
Tenjou
Mejiro
Koma
Tomo.

Last edited by JOB15; 07-22-2015 at 02:54 PM.
-
07-22-2015, 03:33 PM #19Str8Faced Gent.


- Join Date
- Aug 2013
- Location
- Orangeville, Ontario
- Posts
- 8,456
- Blog Entries
- 1
Thanked: 4207
I offer the below quote from
"Honing Razors and Nihonkamisori"
by Kousuke Iwasaki
"We are taught in schools that, as opposed to Kamisori, when honing razors we should avoid using any pressure from the very first step. However, if there is a large chip or a seriously rounded bevel to fix, without pressure it will take a really long time. In the instructions included with an American man-made hone, it says "At first, use a little pressure, but once the bevel is set then remove the pressure." This is exactly right.
Since people are taught to hone without pressure, often they prefer softer razors. This is because they will take an edge easily, even when honing with no pressure. On the other hand, harder razors won't take an edge as easily, so they are often returned because "they won't shave." Unfortunately, softer razors won't hold an edge as long as a harder razor, though.
So in order to put a good edge on a durable, hard razor, use pressure when honing as follows:
(1) Coarse honing - Botan Nagura - Use strong pressure
(2) Middle honing - Tenjou Nagura - Use moderate pressure
(3) Finishing - Tomonagura - Use very light pressure
(4) False Edge removal - Raxa hone - Use very light pressure
(5) Edge Finishing - Honyama Hone - Use only the weight of the razor
Notice that only in the final step, "Edge Finishing", do we use only the weight of the razor; we mustn't leave out pressure from the beginning.
2-Distance traveled by the Kamisori
"Gradually lighten pressure" or "Lighten pressure step-by-step" are easy to say, but in practice they are difficult to do. Those with little professional experience will find this impossible at first.
Those people should, when honing, gradually reduce the total distance traveled by the razor on the hone. In the process, the pressure will mysteriously decrease on it's own. And so, you should reduce the distance traveled by the Kamisori or razor as follows:
(1) Coarse honing - Botan Nagura - 6 Sūn 6 fūn [Again, archaic Japanese measurements.--JDR] (200mm)
(2) Middle honing - Tenjou Nagura - 3 Sūn 3 Fūn (100mm)
(3) Finishing - Tomonagura - 5 Fūn (18mm)
(4) False Edge removal - Raxa hone - 3 Sūn 3 Fūn (100mm)
(5) Edge Finishing - Honyama Hone - 0 (Standing honing-0mm)
Even for razors honed in a figure 8, gradually reducing the distance travelled will also reduce the pressure on the blade, and this will lead to the "false edge" growing finer and finer, until there is none left in the final stage of honing.
3-Honing Time
Many people think that when they hone on coarse abrasives, they should spend a lot of time, then gradually reduce their honing time as they move to finer honing. However, in reality, the opposite is true: they should be gradually increasing the time. When you hone with pressure on coarse particles, you not only remove chips in the edge, but also wear away the steel of the spine and blade. Honing time for both Kamisori and razors should be divided as follows:
(1) Coarse honing - Botan Nagura - 3-4 minutes
(2) Middle honing - Tenjou Nagura - 4-5 minutes
(3) Finishing - Tomonagura - 5-6 minutes
(4) False Edge removal - Raxa hone - 10 seconds
(5) Edge Finishing - Honyama Hone - Japanese made folding razor 10 min; Kamisori/Imported Razor/Iwasaki Razor 15 minutes."
I hope this helps. I am just experimenting with a jnat myself, and using the above guide in my education.
Good luck."Depression is just anger,, without the enthusiasm."
Steven Wright
https://mobro.co/michaelbolton65?mc=5
-
07-22-2015, 04:26 PM #20Senior Member
- Join Date
- Oct 2014
- Location
- Jefferson City, TN
- Posts
- 402
Thanked: 43
Have you tried this? I have a tenjyou that seemed very hard and would not want to give up its slurry and want to stick to the Honzan, so I rounded the bottom just very slightly. And now it releases its slurry like a dream. But I say that if it is taking you 10 min to raise a botan slurry you might be working the slurry down too much during the process of building a slurry that when you finally put a razor to it, it does not cut like it should.
Try rounding the bottom of your botan with your diamond hone and see if that helps with the slurry.A fool flaunts what wisdom he thinks he has, while a wise man will show that he is wise silently.


 Reply With Quote