
Results 51 to 60 of 126
 117Likes
 LinkBack URL
 About LinkBacks
Threaded View
-
03-06-2016, 04:58 PM #1Senior Member


- Join Date
- Dec 2014
- Location
- Southern NH
- Posts
- 562
Thanked: 41 Should I try to tackle this (very difficult, IMHO) challenge?
OK, I'm a relatively new honer. Having done about four times, from easier touch ups to simple restoration in the case with a Ja Henckels I got at a local antique shop. Some challenges along the way, but with help from folks here (there are a bunch of threads), I've been able to successfully sharpen and bring back to life several razors.
Confidence is up, but I have a razor that is staring at me, with a smirk, taunting me to try to hone it. I'm willing to give it a go, but would like to hear from those experienced, whether this is cannon fodder, and I'm better to toss this blade. And frankly, I know, I'll be over my head, but I'm kinda hoping the challenge will be a good (great?) learning experience.
History...
Early on, in my straight razor shaving, I wanted to try different grinds and sizes. I had a Dovo 5/8 1/2 hollow, and a Union Cutlery Spike 9/16 1/4 hollow. I ended up getting a Saunders NY vintage 6/8 near wedge, with French point from gssixgun. I used it about 11 times, after which it was starting to pull quite a bit, so I set it aside. I suspected, that my stropping may have not been well with the razor (although I had no problems with other blades).
In any case, it sat for months, and finally, when I needed to get the Dovo honed, I sent it to SRD and asked if Lynn could sharpen it. Well, Lynn called and said that the blade need much more than a simple sharpening. He played with it for a while, but in the end sent it back (at no charge).
So, here it sits, like a puppy at the pound, having me wondering if I could "restore" this blade, along the way learn more about honing, and maybe learn how to maintain a (near?) wedge. Or, will this end up being a frustrating, hair pulling experiment? I'm willing to give it a go, if folks think I have a shot at it.
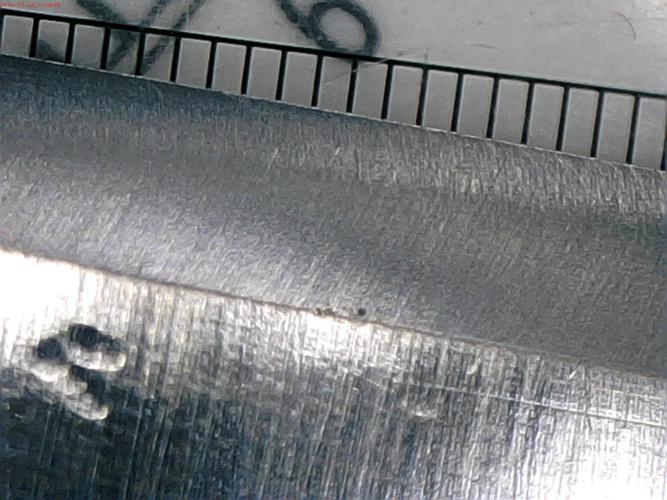
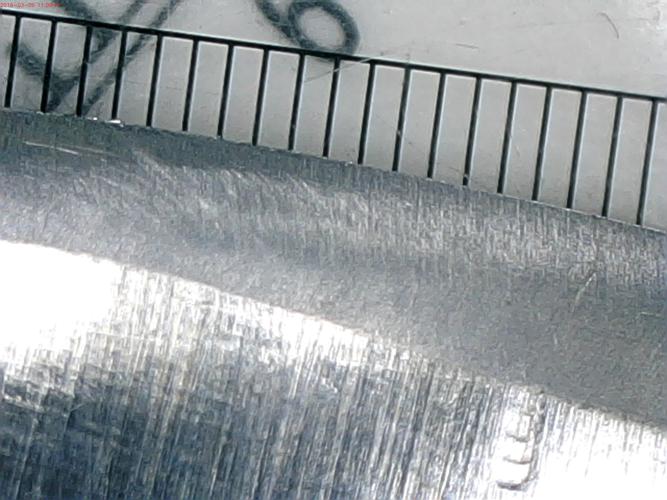
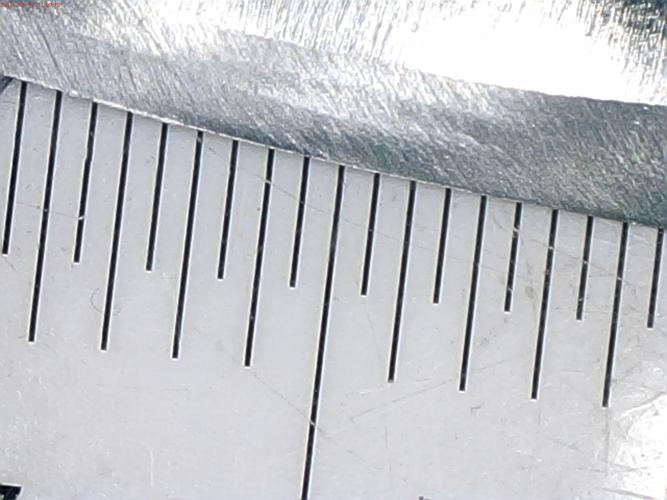
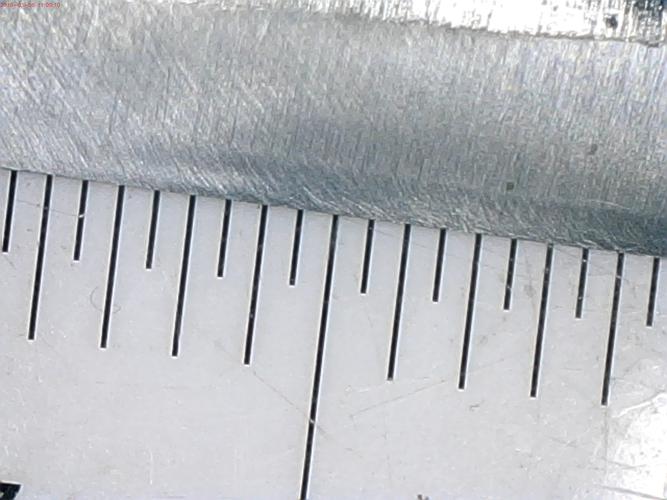
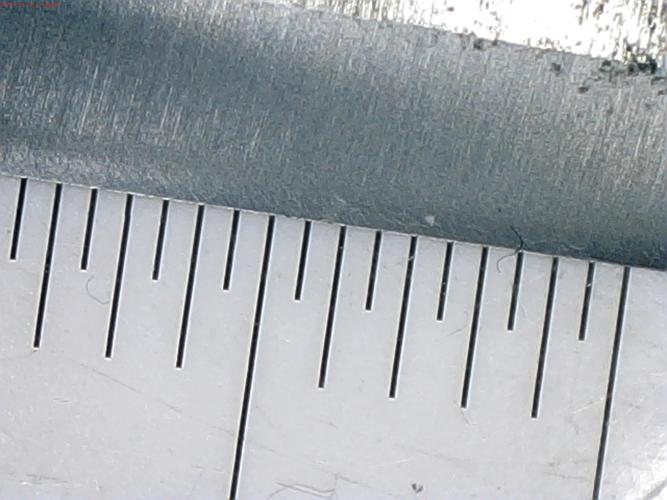
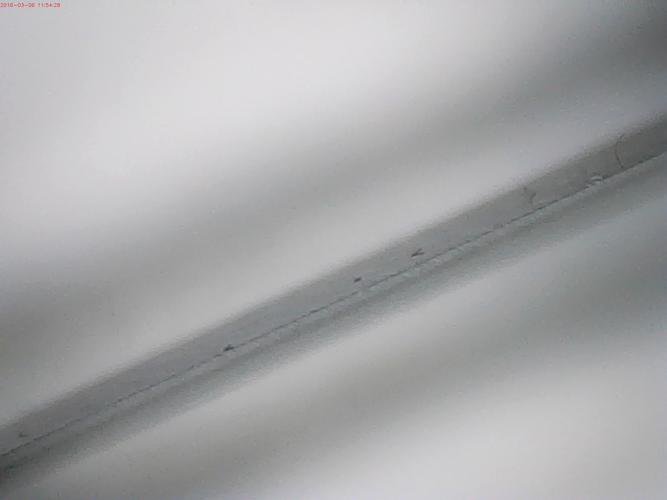
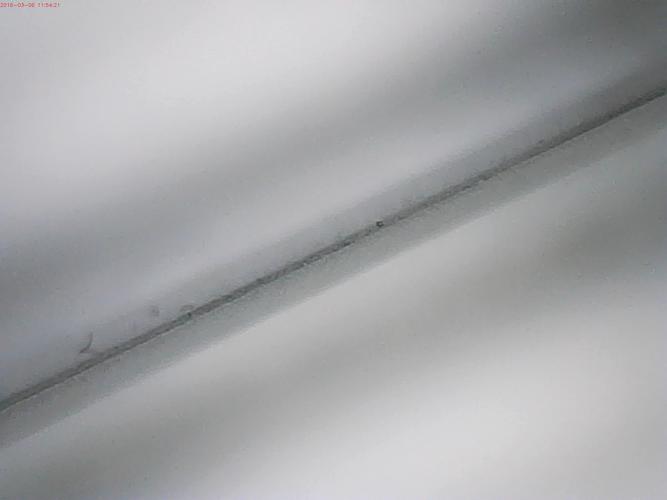
Here's some pictures of the razor, along with lower magnification of the edge, which is huge - 3-4mm:
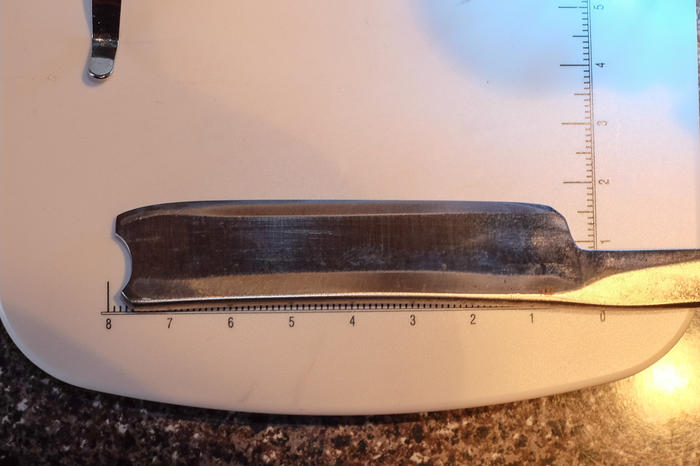
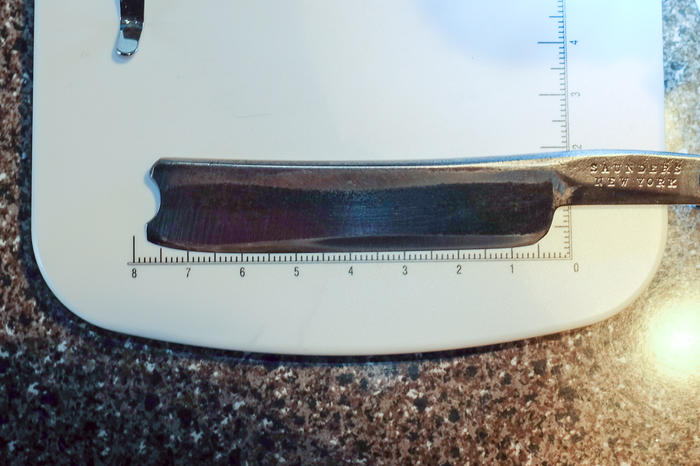
There are multiple bevels, uneven variation in width, and spine wear. Here's the edge:
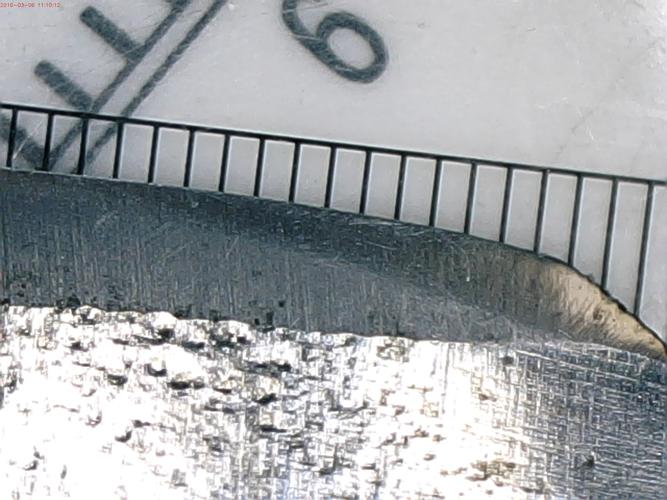
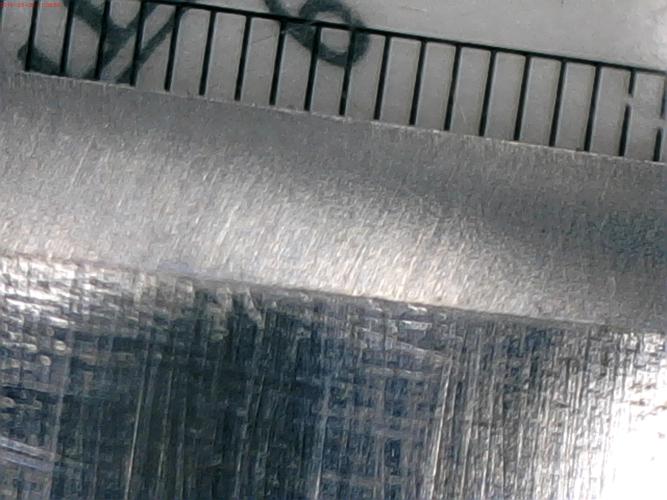
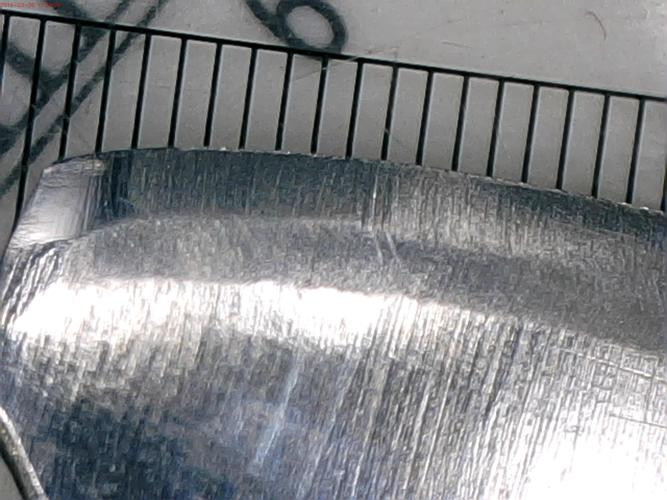
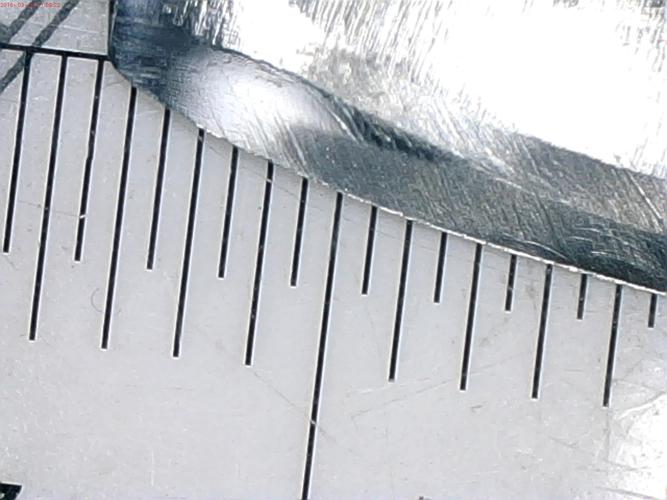
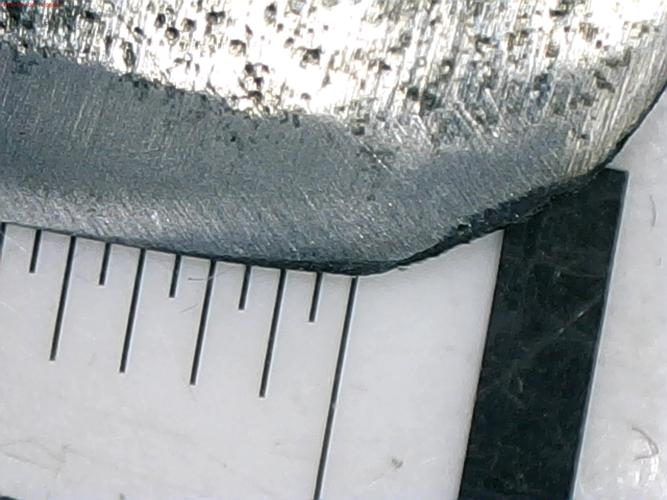
It doesn't cut arm hair, and seems like TPT is not sharp as well. Here's straight onto edge (sorry a bit OOF on some). It doesn't seem to meet:

Comments? Suggestions? Am I crazy (about trying to tackle this)?Regards,
PCM


 Reply With Quote