
Results 21 to 30 of 32
 21Likes
 LinkBack URL
 About LinkBacks
-
06-28-2016, 01:08 PM #21Member


- Join Date
- May 2016
- Location
- HONOLULU
- Posts
- 34
Thanked: 3
I have a norton 4k/8k combo hone.
By jointing the edge, do you mean flattening it on the stone? The only video I could find on it a guy shows totally removing the bevel to get the blade flat before resetting the bevel.
It did have rust when I got it. I sanded it by hand as much as I could, starting with 220 grit, and progressing up to 2000 grit. Wasn't able to remove all the pitting or staining tho.
-
06-28-2016, 01:32 PM #22Senior Member


- Join Date
- Apr 2012
- Location
- Diamond Bar, CA
- Posts
- 6,553
Thanked: 3215
Probably what you are describing is Bread Knifing, Jointing is a lite, single stroke on the corner of a stone, it will lightly remove just the edge and straighten it. You will also feel any chips on the corner of the stone.
Do a couple lite, Jointing strokes, then do some circles, if it continues to chip, joint again and do more circles. You will have to get slowly to good solid steel.
Keep jointing and doing circles until the bevels come together and the steel holds, then hone with straight or X strokes.
This is restore work, not honing, and really a job for a 1k or lower grit. It can be done on a 4k, it will just take some time. Once you get to solid steel, then it can be honed. A Norton 4k is an aggressive 4k, more than capable.
Use ink and tape. Just drag the sharpie across the edge from heel to toe, (so it cuts lightly into the fiber tip) and both sides of the bevel will be inked at the edge, which is all you care about.
-
06-28-2016, 01:52 PM #23illegitimum non carborundum

- Join Date
- Jan 2008
- Location
- Rochester, MN
- Posts
- 11,552
- Blog Entries
- 1
Thanked: 3795
What is the brand and model of the microscope? Originally Posted by WWRSD

I analyze chromosomes at 1000x and the working distance is so close I cannot imagine how you would have been able to illuminate the bevel from above.
-
06-28-2016, 10:41 PM #24Member
- Join Date
- May 2016
- Location
- HONOLULU
- Posts
- 34
Thanked: 3
A cheap Chinese made USB telescope. I'm doubtful about their claims, but they claim 1000x
I got it so Ali express for around $15
1PCS Adjustable Stand 8 LED 1000X USB Digital Microscope For Vista/Win7/Mac System-in Microscopes from Industry & Business on Aliexpress.com | Alibaba Group
-
06-29-2016, 05:55 AM #25Member
- Join Date
- May 2016
- Location
- HONOLULU
- Posts
- 34
Thanked: 3
Spent some more time on it today, jointing the edge, setting the bevel, and repeating until there were no more chips.
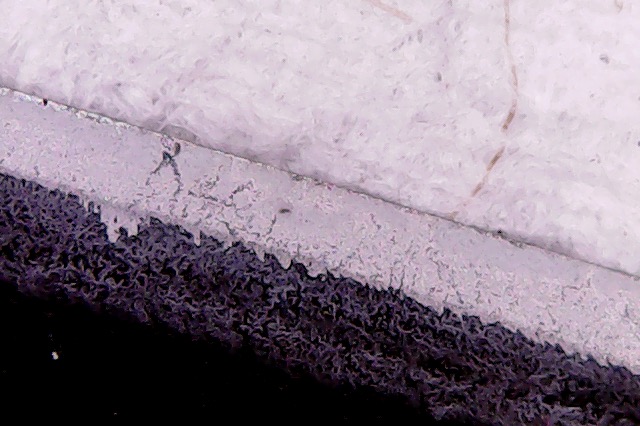
At the end, this is what I ended up with
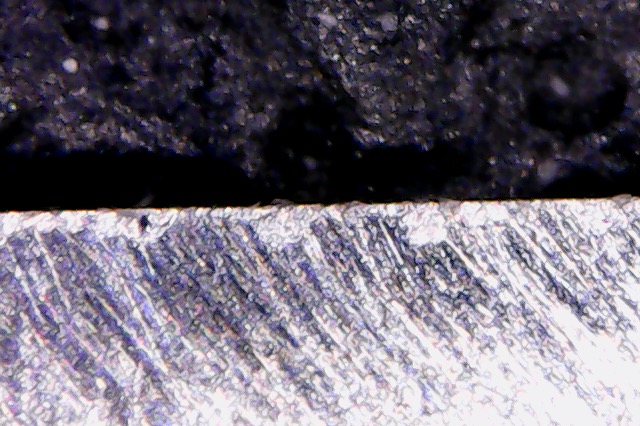
Still not a sharp edge. I'm beginning to wonder if this is just crappy steel. I've read that chinese and pakistani blades won't take an edge.
Maybe I have something just as bad.
This was probably a terrible blade for me to try to hone at my current level of experience.
-
06-29-2016, 01:29 PM #26Senior Member
- Join Date
- Apr 2012
- Location
- Diamond Bar, CA
- Posts
- 6,553
Thanked: 3215
How much tape are you using?
It still looks like you are not honing to the edge, completely, and you need to do more X strokes to lay down an even stria pattern, circles will leave a chippy edge. A 4k should leave a much more uniform stria pattern and straighter edge.
The steel on the video does appear to be heavily rusted.
You can add a layer of tape to increase the angle, hone to the edge and see if it will hold it.
Some times with weak steel, you just have to remove more of the edge to get to solid steel.
-
06-29-2016, 02:40 PM #27Senior Member

- Join Date
- Feb 2013
- Location
- Haida Gwaii, British Columbia, Canada
- Posts
- 14,443
Thanked: 4828
You are doing a restoration bevel set with a 4K hone, it is going to take some time and effort. The 4K will get the job done eventually, you will need some extra patience for this one.
Euclid440 likes this.It's not what you know, it's who you take fishing!
-
06-30-2016, 12:09 AM #28Member
- Join Date
- May 2016
- Location
- HONOLULU
- Posts
- 34
Thanked: 3
I was using 2 layers of tape.
After the video, I removed the scales and sanded as much of the rust away as I could. I went all the way down to 220 grit sandpaper and moved all the way up to 2000 grit. It still has pitting and some discoloration.
Using a very bright light to look at the edge, I can't see any bright spots reflecting light that I think would indicate flat spots.
This pic is a reduced magnification of the edge - the black part is sharpie ink.
I actually went and bought a norton 1k stone, did circles, then jointed the edge, then more circles, change tape, repeat . . .
After doing that process several times, I went to rolling x's.
Was only able to get it to cut arm hair at the toe.
The steel is stamped with 1050 at the tang, which I think means it's relatively soft steel with a low carbon content.
-
06-30-2016, 01:10 AM #29Senior Member
- Join Date
- Feb 2013
- Location
- Haida Gwaii, British Columbia, Canada
- Posts
- 14,443
Thanked: 4828
On the bright side, if the toe can cut hair, there is hope for the rest of the blade. An important part of honing for me is pressure. It is both friend and foe. With the right pressure at the right time, it removes steel quickly. On the other hand too much pressure too late make the edge not fully sharpen and leads to chipping later.As one part of the blade gets sharp, it is a sign that you are getting close and need to ease up on the pressure. Also, seeing as how you took a break from honing and did some sanding it is likely that during that process your edge went backwards. Either a) you hone on and get the bevel set or b) set it aside for a while, like a day or longer. I rarely find that I am making good progress and learning well, after a long period of questioning what I am doing. If I keep my sessions short then I do not second guess what I am doing and I am more open to reading the situation and thus learning more.
It's not what you know, it's who you take fishing!
-
07-01-2016, 02:46 AM #30Member
- Join Date
- May 2016
- Location
- HONOLULU
- Posts
- 34
Thanked: 3
After looking at it closely, and wondering why it wobbles on one side much more than the other, I noticed that the stabilizer is thicker on one side than the other (something that I think Mainaman noticed on the first page of this thread). Since I wasn't getting anywhere, and being the impatient sort that I am, I took a dremel too to the stabilizer and thinned it out a little on the high side. After going through the progression again, I have a blade that will cut hair the full length of the blade. Probably not the best it can be, but it's getting there. Thanks again for all the help.
RezDog likes this.


 Reply With Quote